Archive: October 18, 2025

briggs and stratton 17.5 hp engine manual

Briggs & Stratton 17.5 HP Engine Manual: A Comprehensive Guide

This comprehensive guide details operation, maintenance, and troubleshooting for the Briggs & Stratton 17.5 HP engine, covering models like 31S977-0005-G1;

It’s essential to read all operating instructions before use, and this manual assists technicians with repair procedures, referencing model 311707, type 0125-E1.

The Briggs & Stratton 17.5 HP engine is a widely utilized power source, known for its reliability in various outdoor power equipment applications. This engine, often found with model numbers like 31S977-0005-G1, delivers 17.5 horsepower from its 500cc displacement.

Understanding its operation is crucial for optimal performance and longevity. This manual provides detailed instructions for technicians and owners alike, covering everything from initial setup to routine maintenance. Proper use, as outlined within, ensures safe and efficient operation. Always consult the complete owner’s manual before operating equipment powered by this engine.

Engine Specifications & Model Numbers

Briggs & Stratton 17.5 HP engines, such as the popular 31S977-0005-G1, boast a 500cc (30.5 cubic inch) displacement. Key specifications include a 3.56-inch bore and a 3.06-inch stroke. The oil capacity is 48 fluid ounces (1.4 liters).

Model numbers, like 311707 with type number 0125-E1, are critical for identifying specific engine configurations and sourcing the correct parts. These numbers dictate component compatibility and warranty coverage. Referencing the engine’s model and type numbers ensures accurate maintenance and repair procedures, as detailed within this manual.

Safety Precautions & Warnings

Prior to operating your Briggs & Stratton 17.5 HP engine, thoroughly review this manual and the equipment’s operating instructions. Always disconnect the spark plug wire before performing any maintenance to prevent accidental starting.

Exercise extreme caution when handling fuel; it is highly flammable. Never operate the engine in a poorly ventilated area, as exhaust fumes contain carbon monoxide – a deadly gas. Wear appropriate safety glasses and gloves during maintenance. Do not modify the engine or operate it beyond its specified limits.

Understanding the Engine Components

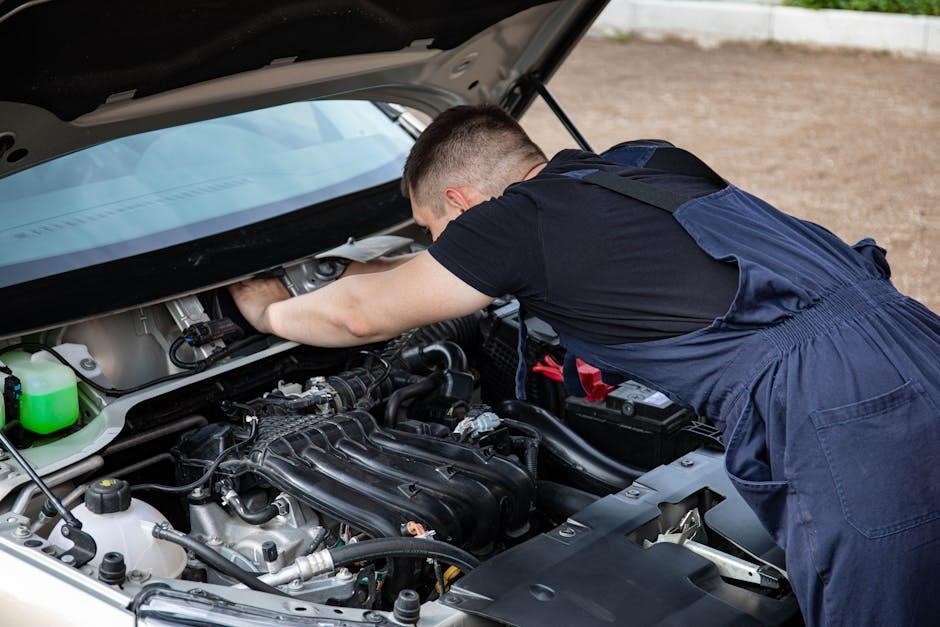
The Briggs & Stratton 17.5 HP engine comprises several key systems working in unison. These include the fuel system, ignition system, cooling system, and governor. Familiarizing yourself with these components is crucial for effective maintenance and troubleshooting.

The engine features a vertical shaft design and a premium dual clean air filtration system. Understanding the layout, as depicted in illustrated parts lists available on the Briggs & Stratton website, aids in identifying parts and performing repairs. Proper component function ensures optimal engine performance and longevity.

Key Parts Identification

Essential components of the Briggs & Stratton 17.5 HP engine include the carburetor, spark plug, air filter, and fuel filter. The engine also features a governor system and a robust cooling system. Identifying these parts is the first step towards successful maintenance.

Referencing illustrated parts lists, readily available through Briggs & Stratton’s website support, is highly recommended. Knowing the location and function of each part – from the bore and stroke dimensions to the oil capacity – streamlines repairs and ensures correct component replacement.

Engine Diagram & Layout

A detailed engine diagram visually represents the arrangement of the Briggs & Stratton 17.5 HP engine’s components. This layout clarifies the positioning of the carburetor, spark plug, fuel filter, and governor system.

Accessing illustrated parts lists, found on the Briggs & Stratton website, provides a comprehensive visual guide. These diagrams are crucial for understanding how parts interconnect and facilitate efficient maintenance and repair. The 500cc engine, with its 3.56-inch bore and 3.06-inch stroke, benefits from clear visual representation for technicians and DIY enthusiasts alike.

Operation & Starting Procedures

Proper operation of the Briggs & Stratton 17.5 HP engine requires adherence to specific starting procedures. Before initiating, a pre-start checklist ensures optimal performance and longevity.

Starting can be achieved via electric start or recoil start, depending on the engine configuration. Always consult the owner’s manual for detailed instructions specific to your model. Safe stopping procedures are equally vital; familiarize yourself with the engine shutdown process to prevent damage and ensure user safety. Reading the manual is essential before operation.

Pre-Start Checklist

Before each start, a thorough pre-start checklist is crucial for the Briggs & Stratton 17.5 HP engine. Verify the oil level, ensuring it’s within the recommended range – approximately 48 fl. oz (1.4 L) for this engine.

Inspect the air filter for cleanliness, and clean or replace as needed. Check the fuel level and ensure fresh fuel is used. Confirm all safety guards and shields are securely in place. Finally, review the owner’s manual for any model-specific instructions before attempting to start the engine.

Starting the Engine (Electric & Recoil)

For electric start models, ensure the battery is fully charged and connected. Turn the ignition switch to the ‘start’ position, releasing it immediately upon engine ignition. If using recoil start, prime the engine by pressing the primer bulb several times.

Slowly pull the recoil starter rope until resistance is felt, then give a firm, steady pull. Avoid rapid or jerky pulls. Always follow the complete operating instructions detailed in the owner’s manual for safe and effective starting procedures.

Stopping the Engine

To stop the engine, disengage any attached equipment. For models with a throttle control, move it to the ‘idle’ position. Then, turn the ignition switch to the ‘off’ position. If the engine lacks an ignition switch, simply disconnect the spark plug wire, ensuring it’s safely away from the spark plug.

Always refer to the complete owner’s manual for specific instructions related to your engine model. Proper shutdown procedures are crucial for engine longevity and operator safety, preventing potential damage or hazards.

Maintenance Schedule & Procedures

Regular maintenance is vital for optimal performance and longevity of your Briggs & Stratton 17.5 HP engine. Key procedures include routine oil changes, air filter cleaning or replacement, and spark plug inspections. Following the schedule outlined in the owner’s manual ensures reliable operation.

Consistent upkeep prevents common issues and extends the engine’s lifespan. This manual assists technicians and owners in performing these tasks correctly, referencing specific model details for accurate service intervals and component specifications.

Oil Change Procedures

Regular oil changes are crucial for maintaining your Briggs & Stratton 17.5 HP engine. Begin by warming the engine, then remove the drain plug, allowing the old oil to fully drain. Replace the oil filter with a new one, ensuring a proper seal.

Refill with the recommended oil type, noting the 48 fl. oz. (1.4 L) capacity for this engine. Always check the oil level with the dipstick before operation. Proper oil maintenance, as detailed in the manual, prevents wear and extends engine life.

Air Filter Maintenance

Maintaining a clean air filter is vital for optimal engine performance. The Briggs & Stratton 17.5 HP engine benefits from a premium dual-clean air filtration system. Regularly inspect the air filter for dirt and debris.

Clean foam filters with soap and water, ensuring they are fully dry before re-installation. Paper filters should be replaced when visibly dirty. A clean air filter ensures proper airflow, preventing engine damage and maintaining power output, as outlined in the engine manual.

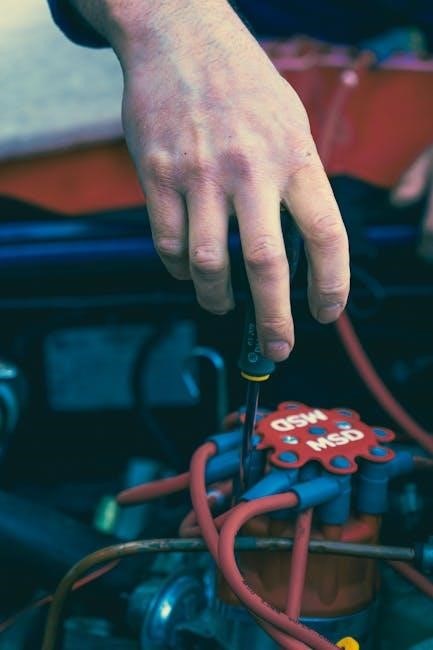
Spark Plug Replacement

Regular spark plug replacement is crucial for reliable engine starting and efficient combustion in the Briggs & Stratton 17.5 HP engine. Consult the manual for the correct spark plug type.

Disconnect the spark plug wire before removal. Use a spark plug socket to avoid damaging the plug. Gap the new spark plug to the manufacturer’s specifications before installation. Proper spark plug maintenance ensures optimal engine performance and prevents issues like rough running or starting difficulties, as detailed in the service instructions.

Troubleshooting Common Issues

Addressing common problems ensures your Briggs & Stratton 17.5 HP engine operates smoothly. If the engine won’t start, check fuel levels, spark plug connection, and the safety interlock switch.

Rough running often indicates a dirty carburetor or air filter, requiring cleaning or replacement. A low oil shutdown signifies insufficient oil; immediately add oil to the correct level. Refer to the manual for detailed diagnostic steps and safety precautions when resolving these issues, maintaining optimal engine functionality.

Engine Won’t Start

If your Briggs & Stratton 17.5 HP engine fails to start, begin by verifying adequate fuel supply and a clean fuel filter. Inspect the spark plug for fouling or damage, ensuring a proper connection. Confirm the safety interlock switch is functioning correctly, as it prevents starting under certain conditions.

Check the recoil starter or electric starter for proper operation. A flooded engine may require allowing excess fuel to evaporate before attempting restart. Consult the manual for specific troubleshooting steps related to your engine model.

Engine Runs Rough

A rough-running Briggs & Stratton 17.5 HP engine often indicates issues with the fuel system or combustion process. Begin by inspecting the air filter for obstructions, as a restricted airflow can cause poor performance. Examine the spark plug for signs of fouling or wear, replacing it if necessary.

Carburetor problems, such as a clogged jet or incorrect fuel mixture, are common causes. A fuel stabilizer can help prevent fuel degradation. Refer to the manual for detailed carburetor cleaning and adjustment procedures to restore smooth engine operation.

Low Oil Shutdown

The Briggs & Stratton 17.5 HP engine is equipped with a low oil shutdown system to prevent damage. If the oil level drops too low, the engine will automatically stop running. Do not attempt to bypass this safety feature.

Before restarting, identify and rectify the cause of the low oil level – check for leaks and ensure proper oil capacity (48 fl. oz / 1.4 L). Always use the recommended oil type. Refer to the manual’s maintenance section for oil change procedures and preventative measures to avoid future shutdowns.

Fuel System Maintenance

Maintaining the fuel system of your Briggs & Stratton 17.5 HP engine is crucial for optimal performance. Always use the fuel type recommended in the owner’s manual. Periodically inspect the fuel lines for cracks or leaks, replacing them as needed.

Regularly clean or replace the fuel filter to prevent debris from entering the carburetor. Carburetor cleaning and adjustment may be necessary to address issues like rough idling or difficulty starting. Consult the manual for detailed instructions on these procedures, ensuring proper engine operation.

Fuel Type & Recommendations

For your Briggs & Stratton 17.5 HP engine, using the correct fuel is paramount for longevity and performance. The manufacturer recommends fresh, unleaded gasoline with a minimum octane rating of 87. Avoid fuels containing ethanol exceeding 10%, as higher concentrations can cause engine damage.

Fuel stabilizers are highly recommended, especially during storage, to prevent fuel degradation and carburetor issues. Always adhere to local regulations regarding fuel storage and handling. Refer to your engine’s specific manual for detailed fuel recommendations and any model-specific requirements.

Carburetor Cleaning & Adjustment

Maintaining a clean carburetor is crucial for optimal engine performance. If experiencing starting difficulties or rough running, the carburetor may require cleaning. Disassemble carefully, noting component positions, and use carburetor cleaner to remove deposits.

Adjustment is typically not required unless modifications have been made. However, if necessary, consult the engine manual for specific adjustment procedures. Improper adjustment can lead to poor fuel economy and increased emissions. Always prioritize safety and disconnect the spark plug wire before working on the carburetor.

Fuel Filter Replacement

Regular fuel filter replacement ensures a clean fuel supply, preventing carburetor issues and maintaining engine performance; Locate the fuel filter, typically inline between the fuel tank and carburetor. Before removal, relieve fuel system pressure to avoid spills.

Disconnect the fuel lines and install a new filter, ensuring correct flow direction as indicated by the arrow on the filter housing. Reconnect the fuel lines securely. A clogged fuel filter can cause starting problems and reduced power, so periodic inspection and replacement are vital for reliable operation.

Governor System Overview

The governor system automatically regulates engine speed, maintaining consistent performance under varying loads. It achieves this by controlling the throttle valve, adjusting fuel flow to counteract speed fluctuations. This system ensures the engine doesn’t overspeed or stall.

Proper governor function is crucial for safe and efficient operation. The system typically consists of a mechanical linkage, weights, and a spring. Inspect the linkage for free movement and proper adjustment. A malfunctioning governor can lead to unstable engine speed and potential damage.

Ignition System Details

The ignition system provides the spark needed to ignite the air-fuel mixture within the cylinder. It comprises the flywheel, magneto, ignition coil, and spark plug. The flywheel, rotating with the engine, generates electricity, which is then amplified by the ignition coil.

This high-voltage electricity travels to the spark plug, creating a spark at the precise moment for optimal combustion. Regular spark plug inspection and replacement are vital for reliable starting and engine performance. A weak or fouled spark plug can cause starting difficulties and reduced power.

Cooling System Information

The Briggs & Stratton 17.5 HP engine utilizes an air-cooled system to maintain optimal operating temperatures. This system relies on airflow around the cylinder fins to dissipate heat generated during combustion. Ensuring these fins are clean and unobstructed is crucial for effective cooling.

Debris accumulation can restrict airflow, leading to overheating and potential engine damage. Regular cleaning of the cooling fins, particularly after use in dusty environments, is recommended. Proper engine operation also depends on adequate ventilation around the engine itself.

Warranty Information & Registration

Briggs & Stratton offers a limited consumer engine warranty, typically covering defects in materials and workmanship. The INTEK 17.5 HP engine, with its 500 CC displacement, often includes a specific warranty period, detailed in the accompanying documentation.

Registering your engine is vital to validate warranty coverage and receive important product updates. Registration can often be completed online through the Briggs & Stratton website. Retain proof of purchase, as it’s required for any warranty claims. Carefully review the warranty terms for exclusions and limitations.

Finding Additional Resources & Manuals

Briggs & Stratton provides extensive online support through their official website, offering a comprehensive database of operator’s manuals and illustrated parts lists. Locating resources is simplified by following the instructions provided on their support pages.

Users can search by model number to quickly find the specific manual for their 17.5 HP engine. These resources detail everything from basic operation to in-depth repair procedures. Illustrated parts lists are invaluable for identifying components and ordering replacements, ensuring proper maintenance and longevity of your engine.

Briggs & Stratton Website Support

The Briggs & Stratton website serves as a central hub for accessing a wealth of information regarding your 17.5 HP engine. It offers a dedicated support section where users can easily locate operator’s manuals and illustrated parts lists.

Searching is streamlined by inputting the engine’s model number, ensuring you receive the correct documentation. Beyond manuals, the website provides FAQs, troubleshooting guides, and contact information for customer service assistance. This online platform empowers owners with the resources needed for effective engine maintenance and repair.

Illustrated Parts Lists

Detailed illustrated parts lists are crucial for identifying and ordering replacement components for your Briggs & Stratton 17.5 HP engine. These lists visually depict each part, accompanied by corresponding part numbers, simplifying the repair process.

Accessing these lists, often available through the Briggs & Stratton website, allows for accurate component identification, ensuring compatibility and preventing incorrect purchases. They are invaluable for both DIY mechanics and professional technicians, facilitating efficient engine servicing and extending the lifespan of your equipment.

Customer Responsibilities & Engine Care

Proper engine care is vital for maintaining the performance and longevity of your Briggs & Stratton 17.5 HP engine. Owners are responsible for adhering to the recommended maintenance schedule, including regular oil changes and air filter cleaning.

Following the guidelines outlined in this manual, particularly within the “Customer Responsibilities” section, ensures optimal operation and prevents potential issues. This includes using the correct fuel type and performing routine inspections. Neglecting these duties may void the warranty and lead to costly repairs.

Engine Model Number Decoding

Understanding your Briggs & Stratton engine’s model number is crucial for accurate parts identification and service. The model number, such as 31S977-0005-G1 or 311707, provides specific information about the engine’s configuration and manufacturing details.

Decoding this number allows you to locate the correct replacement parts and access the appropriate service documentation. Refer to Briggs & Stratton’s resources, including their website and illustrated parts lists, to decipher the code. Accurate identification ensures compatibility and proper functionality, preventing incorrect installations and potential damage.

Technical Specifications (Bore, Stroke, Displacement)

The Briggs & Stratton 17.5 HP engine, specifically the INTEK series, boasts precise technical specifications vital for understanding its performance. It features a bore of 3.56 inches (90.5 mm) and a stroke of 3.06 inches (77.8 mm).

These dimensions contribute to a displacement of 500 CC, defining the engine’s capacity to process air and fuel. Knowing these specifications is essential for maintenance, repair, and performance tuning. Accurate data ensures correct component selection and optimal engine operation, maximizing efficiency and longevity.

Appendix: Torque Specifications

Proper torque application is crucial for the longevity and reliable operation of your Briggs & Stratton 17.5 HP engine. This appendix provides essential torque values for various engine components, ensuring secure fastening without damage.

Referencing this data during assembly or repair prevents over-tightening, which can lead to stripped threads or component failure, and under-tightening, which can cause loosening and malfunction. Always use a calibrated torque wrench and consult the specific model’s illustrated parts list for accurate specifications.

zoom post op instructions

Zoom Post-Op Instructions: A Comprehensive Guide (Updated 12/13/2025)

Today’s date is 12/13/2025 08:57:12․ This guide details post-procedure care‚ addressing security‚ recordings‚ mobile data‚ and AI summaries‚ ensuring a smooth Zoom experience for all users․

Understanding Your Recent Zoom Procedure

Following your recent Zoom-facilitated procedure‚ it’s crucial to understand the various aspects of the platform that may impact your experience․ Many users‚ particularly those utilizing Zoom for fitness classes via the Zoom Meeting API‚ express concerns regarding meeting security․ Sharing links with unauthorized individuals can compromise the integrity of the session․

Furthermore‚ the platform’s recording functionality‚ while beneficial‚ can occasionally present challenges․ Instances have been reported where recordings fail to save despite the app indicating a successful recording status‚ necessitating searches for temporary files like ․zoom and __zoom__ to attempt recovery․

Connectivity issues‚ specifically with mobile data‚ are also common․ While Zoom often functions flawlessly on Wi-Fi‚ users encounter problems when relying on cellular networks‚ even when other data-intensive applications operate normally․ Troubleshooting steps include restarting the device‚ verifying mobile data activation‚ and ensuring the app is updated․ Finally‚ be aware of potential disruptions during meeting termination‚ especially if simultaneous join attempts occur․

Immediate Post-Procedure Care (First 24 Hours)

In the initial 24 hours following your Zoom-related procedure – whether a virtual fitness class accessed through the Zoom Meeting API‚ a recorded session‚ or a phone consultation utilizing AI call summaries – prioritize stability and security․ If your procedure involved a shared link‚ immediately change access settings to prevent unauthorized entry‚ addressing potential security concerns․

Should you have experienced a recording issue‚ diligently search for temporary files (․zoom‚ __zoom__) on your device․ If accessing Zoom via mobile data‚ anticipate potential connectivity hiccups and switch to Wi-Fi whenever possible․ Be mindful of potential disruptions if a meeting was abruptly terminated with simultaneous join attempts․

If utilizing Zoom Phone‚ review the AI-generated call summaries for accuracy․ Report any discrepancies promptly․ Finally‚ ensure your Zoom application remains updated to benefit from the latest security patches and bug fixes‚ safeguarding your virtual experience․

Pain Management Strategies

While “pain” in the context of Zoom typically refers to frustration with technical issues‚ let’s address common discomforts․ If a lost Zoom recording causes anxiety‚ employ relaxation techniques – deep breathing‚ mindfulness – to manage stress․ For security breaches stemming from shared links‚ the “pain” of potential compromise can be mitigated by immediately revoking access and notifying affected parties․

If mobile data connectivity issues interrupt a crucial Zoom session‚ consider it a minor inconvenience․ Restarting your device or switching to Wi-Fi are quick remedies․ For disruptions caused by simultaneous join attempts during meeting termination‚ acknowledge the frustration and attempt to rejoin promptly․

Regarding Zoom Phone AI call summaries‚ inaccurate transcriptions can be “painful” for record-keeping․ Utilize editing features or report errors to improve future summaries․ Remember‚ proactive troubleshooting and preventative measures are key to minimizing Zoom-related “pain” and maximizing a seamless experience․

Dietary Recommendations – What to Eat & Avoid

While seemingly unrelated‚ maintaining focus during Zoom sessions benefits from mindful “fueling․” Avoid sugary snacks and excessive caffeine‚ which can lead to energy crashes and diminished concentration – hindering your ability to troubleshoot recording issues or address security concerns․ Instead‚ opt for brain-boosting foods like blueberries‚ nuts‚ and whole grains․

If a frustrating Zoom experience (like mobile data connectivity problems) induces stress-eating‚ consciously choose healthier alternatives․ A balanced diet supports overall well-being‚ enhancing your patience when dealing with technical glitches or attempting to access AI call summaries․

Hydration is crucial․ Keep water readily available to combat mental fatigue during lengthy meetings․ Avoid heavy meals immediately before important Zoom calls‚ as they can cause drowsiness․ Prioritize foods that promote alertness and sustained energy‚ ensuring you’re at your best when navigating Zoom’s features and resolving potential complications․

Oral Hygiene Protocol – Gentle Cleaning

Maintaining a clean digital “environment” is vital for a seamless Zoom experience․ Regularly clear your Zoom cache and temporary files (like ․zoom and __zoom__) to prevent recording issues and ensure optimal performance․ This is akin to removing the “acquired pellicle” – the layer that can obscure clarity․

Periodically update the Zoom application to benefit from the latest security patches and bug fixes․ This proactive step minimizes the risk of unauthorized access and protects your meetings from disruptions․ Think of it as a preventative measure against “stain reattachment” – safeguarding your digital space․

Review your Zoom settings to confirm appropriate privacy controls are enabled․ Regularly check your recording storage location and ensure sufficient space is available․ A well-maintained Zoom setup‚ like diligent oral hygiene‚ promotes a healthy and reliable communication platform‚ reducing frustration when accessing features like AI call summaries․

Managing Swelling and Discomfort

Addressing technical “swelling” – unexpected issues – is crucial for a positive Zoom experience․ If you encounter mobile data connectivity problems‚ despite a stable connection (as seen with apps like YouTube working fine)‚ restart your phone and verify Zoom app updates․ This mirrors addressing initial post-procedure discomfort․

Troubleshoot Zoom recording failures by searching for temporary files and confirming sufficient storage space․ If a meeting terminates unexpectedly while another attempts to join‚ it can cause disruption․ Ensure a stable internet connection for all participants to minimize these occurrences․

For security concerns regarding shared meeting links‚ utilize Zoom’s security features like waiting rooms and password protection․ Proactive management‚ similar to post-op care‚ prevents complications․ Regularly review Zoom’s documentation and support resources to address emerging issues and maintain a smooth‚ comfortable Zoom environment․

Recognizing and Addressing Potential Complications

Potential “complications” in a Zoom context range from lost recordings to security breaches․ If a Zoom recording mysteriously disappears‚ immediately search for temporary files (․zoom‚ __zoom__) on your system․ This parallels diligent post-procedure monitoring for adverse reactions․

Addressing unauthorized access requires proactive security measures․ Shared meeting links pose a significant risk; implement waiting rooms‚ unique passwords‚ and restrict screen sharing to authorized participants․ Regularly review participant lists during sessions․

Furthermore‚ issues accessing AI-generated call summaries via the API‚ despite the presence of the ai_call_summary_id‚ indicate a potential API limitation or bug․ Contact Zoom’s developer support for clarification and potential workarounds․ Consistent vigilance and prompt action are key to resolving these technical “complications” effectively․

Zoom Recording Issues & Troubleshooting

Experiencing lost Zoom recordings is frustrating‚ but often recoverable․ A common scenario involves the recording status (red dot) appearing during the session‚ yet no file being saved afterward․ Initial troubleshooting steps include a thorough search for temporary files – specifically‚ those beginning with “․zoom” or “__zoom__” – on your computer․

If these searches yield no results‚ consider the possibility of a software glitch․ Restarting your computer and ensuring you’re running the latest version of the Zoom application are crucial first steps․ Check your Zoom account settings to confirm cloud recording is enabled and sufficient storage space is available․

For persistent issues‚ contacting Zoom support directly is recommended․ Provide detailed information about the session‚ including date‚ time‚ and any error messages encountered․ Documenting these steps ensures a more efficient resolution process‚ minimizing disruption to future recordings․

Zoom Meeting Security Concerns & Link Sharing

A significant concern with Zoom meetings‚ particularly those created via the Zoom Meeting API‚ is unauthorized access through shared links․ Fitness businesses utilizing Zoom for virtual classes frequently encounter situations where students distribute meeting links to non-registered individuals‚ compromising session security․

To mitigate this risk‚ implement robust security measures․ Utilize Zoom’s waiting room feature to control participant entry‚ verifying identities before granting access․ Password-protect meetings and regularly rotate these passwords to prevent unauthorized entry․ Consider employing unique meeting IDs for each session‚ further reducing the potential for link sharing abuse․

Educate participants about the importance of keeping meeting links confidential․ Clearly communicate the consequences of sharing links and emphasize the need to protect the integrity of the virtual class environment․ Regularly monitor meeting attendance for unfamiliar faces and address any security breaches promptly․

Zoom Phone AI Call Summaries – API Access

Accessing AI-generated call summaries from Zoom Phone programmatically presents a current challenge for developers․ While the ai_call_summary_id is visible within the call log details‚ a dedicated‚ documented API endpoint to retrieve the actual summary content remains unavailable as of recent inquiries․

Currently‚ there is no officially supported method to access these summaries via an account-level OAuth application with admin-level scope․ Developers seeking this functionality are encouraged to monitor Zoom’s API documentation for updates and potential future releases that may address this limitation․ Workarounds involving screen scraping or unofficial API access are strongly discouraged due to their instability and potential violation of Zoom’s terms of service․

The lack of direct API access hinders integration with other business systems and limits the ability to automate analysis of call content․ Zoom is actively exploring options to provide developers with a reliable and secure method for accessing AI call summaries in the future․

Mobile Data Connectivity Issues with Zoom

Users are reporting inconsistent Zoom performance when utilizing mobile data networks‚ despite a stable data connection confirmed through other applications like YouTube and Instagram․ This issue appears to be specific to Zoom‚ as other data-intensive apps function normally on the same mobile network․

Troubleshooting steps attempted by affected users include multiple phone restarts‚ verifying mobile data is enabled‚ and ensuring the Zoom application is updated to the latest version․ Despite these efforts‚ the connectivity problems persist when disconnected from Wi-Fi․ The core issue seems to reside within the Zoom application’s interaction with certain mobile carrier networks․

It’s crucial to note that Zoom functions flawlessly when connected to a Wi-Fi network‚ indicating the problem isn’t a general app malfunction but rather a compatibility issue with mobile data connections․ Further investigation is needed to identify the root cause and implement a solution․

Zoom Meeting Termination & Simultaneous Join Attempts

A specific scenario has been identified where issues arise when a Zoom meeting host terminates a session (using client․leave(true)) while a participant simultaneously attempts to join the same meeting room․ This timing conflict can lead to unpredictable behavior‚ potentially preventing the joining participant from accessing the meeting;

The problem isn’t a complete failure to join‚ but rather an interruption of the joining process triggered by the host’s termination command․ Zoom’s system appears to struggle with handling the concurrent actions of a meeting ending and a new user attempting entry at precisely the same moment․

Developers utilizing the Zoom Meeting API should be aware of this potential issue and implement safeguards within their applications․ These safeguards could include delaying join attempts slightly after a meeting termination signal or providing clear feedback to the user if a join attempt fails due to this timing conflict․ Further testing and API refinements may be necessary to fully resolve this edge case․

Whitening Post-Care Instructions (48 Hour Protocol)

Following your revolutionary tooth whitening procedure‚ diligent adherence to these instructions for the subsequent 48 hours is crucial for maximizing and enhancing your results; Immediately post-treatment‚ your teeth are undergoing a rehydration process and are particularly susceptible to stain reattachment․

A protective layer‚ known as the acquired pellicle‚ naturally forms on tooth surfaces․ During whitening‚ this layer‚ containing surface stains‚ is temporarily disrupted․ It’s vital to minimize exposure to staining agents during the pellicle’s reformation․

For the first 48 hours‚ avoid all staining foods and beverages‚ including coffee‚ tea‚ red wine‚ berries‚ and soy sauce․ Refrain from smoking or using tobacco products․ Maintain excellent oral hygiene with gentle brushing and flossing‚ using a non-abrasive toothpaste․ Hydrate frequently with water to aid rehydration․ Following these guidelines will help maintain your brighter‚ whiter smile!

Acquired Pellicle & Stain Reattachment

The acquired pellicle is a naturally occurring‚ protein-rich film that constantly forms on tooth surfaces after procedures like whitening․ It’s a crucial aspect of post-whitening care‚ as it directly impacts the longevity of your brighter smile․ During the whitening process‚ this pellicle is disrupted‚ temporarily leaving teeth more porous and vulnerable to re-staining․

Think of the pellicle as a protective barrier․ Once disrupted‚ it takes time to rebuild․ During this rebuilding phase – typically the first 48 hours – teeth readily absorb pigments from food‚ drinks‚ and other sources․ This leads to stain reattachment‚ diminishing the whitening effects․

Understanding this process is key to maintaining results․ Strict adherence to post-care instructions‚ specifically avoiding staining agents‚ allows the newly formed pellicle to establish itself without immediately capturing unwanted discoloration․ Proper hydration also aids in pellicle reformation and overall tooth health․

Locating Lost Zoom Recordings – File Recovery

Experiencing a missing Zoom recording can be frustrating‚ but several troubleshooting steps can aid in recovery․ First‚ confirm the recording was initiated correctly; the red recording indicator must be visible throughout the entire session․ If absent‚ the recording wasn’t started․ If the indicator was present‚ begin a thorough search of your local machine․

Zoom typically saves recordings as temporary files‚ often with prefixes like “․zoom” or “__zoom__”․ Search your entire hard drive‚ including hidden folders‚ for these files․ Check your Zoom settings to verify the default recording location․ Ensure you’re searching within the correct timeframe corresponding to the meeting date․

If local searches fail‚ explore Zoom’s cloud recording options (if enabled)․ Log into your Zoom account online and navigate to the recordings section․ Recordings are often automatically uploaded․ If still unsuccessful‚ contact Zoom support‚ providing meeting details and a description of the issue․ They may have server-side backups․

michigan temporary instruction permit expires

Michigan Temporary Instruction Permit: Expiration and Renewal

Navigating Michigan’s permit system can be tricky‚ especially regarding expiration and renewal processes. System policy restrictions and update permissions often require administrator intervention‚ mirroring challenges faced by users.

Understanding the Permit Validity Period

The Michigan temporary instruction permit’s validity hinges on several factors‚ but generally‚ it’s issued for a maximum of 180 days. This period begins from the date of issuance‚ providing learners ample time to practice supervised driving. However‚ mirroring issues seen with software updates requiring administrator permissions‚ the permit’s functionality is contingent on adherence to state regulations.

Similar to encountering “This installation is forbidden by system policy” errors‚ failing to meet specific requirements can shorten the permit’s lifespan. Like users facing blocked programs‚ permit holders must diligently follow restrictions. The initial permit may be extended once‚ but only under specific circumstances‚ and always within the overall 180-day window. It’s crucial to remember that‚ like a malfunctioning Store application‚ a permit’s usefulness is lost if not actively utilized and renewed appropriately. Understanding this timeframe is the first step towards a successful licensing journey.

Standard Expiration Timeline

Typically‚ a Michigan temporary instruction permit is initially valid for six months – 180 days – from the date it’s granted. This aligns with the need for consistent practice‚ much like regularly updating software to maintain functionality. However‚ similar to encountering errors like “Theres a problem with Store‚” unexpected issues can arise.

If a learner reaches their 16th birthday during the permit period‚ the permit automatically expires on their birthday‚ regardless of remaining days. This is a firm deadline‚ akin to a system administrator blocking a program. Renewal isn’t possible after this date. Furthermore‚ if the permit lapses due to inactivity or non-compliance with restrictions‚ it won’t be automatically reinstated‚ mirroring a disabled account needing administrator intervention. Consistent adherence to driving rules and timely renewal attempts are vital to avoid expiration‚ just as maintaining system health prevents software malfunctions.

Factors Affecting Permit Expiration (Age & Driving Record)

Several factors can influence a Michigan temporary instruction permit’s lifespan‚ beyond the standard six-month period. Age is a primary determinant; as noted‚ the permit expires on a learner’s 16th birthday‚ even with remaining validity. This is a fixed rule‚ similar to system policies restricting software access.

A less predictable factor is your driving record. While a clean record doesn’t extend the permit‚ violations or convictions can lead to suspension or revocation‚ effectively ending the permit period prematurely. This mirrors software updates being blocked due to permission issues. Furthermore‚ if a learner fails to meet the required supervised driving hours‚ or violates permit restrictions‚ the permit could be invalidated. Like encountering a “This installation is forbidden” error‚ non-compliance halts progress. Maintaining a responsible driving history and adhering to all regulations are crucial for uninterrupted permit validity.

Expiration Dates and Renewal Process

Determining your permit’s expiration and navigating the renewal process requires attention to detail‚ much like troubleshooting system errors and permission blocks.

Checking Your Permit Expiration Date Online

Michigan offers a convenient online tool to verify your temporary instruction permit’s expiration date. This digital resource mirrors the functionality of software updates‚ requiring access and potentially administrator permissions‚ similar to QuickBooks updates. Accessing this information is crucial for avoiding issues‚ much like resolving “Store” errors or system policy restrictions.

To check‚ you’ll typically need your driver’s license or permit number and potentially other identifying information. The Michigan Secretary of State (SOS) website provides a dedicated section for online services‚ where you can input this data. This process is akin to running a system diagnostic‚ revealing the current status of your permit. Regularly checking online prevents unexpected expirations and ensures you remain legally compliant while practicing driving; Remember‚ proactive monitoring is key‚ just as it is with software security and system maintenance.

Online Renewal Eligibility Requirements

Not all Michigan temporary instruction permits are eligible for online renewal. Similar to software updates blocked by system administrators‚ certain conditions must be met; Generally‚ a clean driving record is essential; any violations or restrictions may disqualify you. The SOS website mirrors the troubleshooting steps needed for app errors – verifying eligibility before proceeding.

You must also meet age requirements and not have previously exceeded the maximum number of renewals allowed. The system‚ like a restricted program‚ will prevent renewal if these criteria aren’t satisfied. Furthermore‚ your permit must not be currently suspended or revoked. Online renewal offers convenience‚ but it’s contingent on adherence to these rules‚ much like accessing features requiring administrator privileges. Checking eligibility beforehand avoids wasted time and potential complications‚ mirroring the need to resolve “forbidden installation” errors.

Renewing at a Secretary of State Branch Office

If online renewal isn’t an option‚ visiting a Michigan Secretary of State (SOS) branch office is necessary. This process‚ like seeking assistance from a system administrator for blocked programs‚ requires direct interaction. Be prepared to present your expiring permit and a valid form of identification‚ mirroring the documentation needed for software authorization.

You’ll likely need to complete an application form and pay the applicable renewal fee. Expect potential wait times‚ similar to troubleshooting complex system errors. Branch offices offer personalized assistance‚ addressing specific circumstances that might prevent online renewal – much like resolving installation issues. It’s crucial to verify the required documents and fees beforehand on the SOS website to streamline the process. This in-person approach ensures compliance and provides a direct solution‚ akin to a system administrator’s intervention for permission-related problems.

What Happens When Your Permit Expires?

An expired permit mirrors blocked software access; driving becomes illegal‚ potentially leading to penalties. System policy restrictions and unauthorized access parallels this situation.

Driving with an Expired Permit – Legal Consequences

Operating a vehicle with an expired Michigan temporary instruction permit carries significant legal ramifications. Much like encountering system policy restrictions preventing software updates‚ driving without a valid permit is a violation of state law. This can result in a traffic ticket‚ potentially leading to fines and court appearances.

The penalties aren’t limited to monetary costs. An expired permit can also lead to points being added to your driving record‚ which could impact future insurance rates. More seriously‚ it could delay your progress through the Graduated Driver Licensing (GDL) stages‚ effectively resetting your learning period.

Furthermore‚ law enforcement officers have the authority to impound the vehicle if the driver is found to be operating it with an expired permit. This adds substantial inconvenience and expense. Just as troubleshooting software issues requires administrator intervention‚ resolving an expired permit situation demands immediate attention to avoid escalating legal consequences.

Impact on Graduated Driver Licensing (GDL) Stages

An expired Michigan temporary instruction permit significantly disrupts the Graduated Driver Licensing (GDL) process‚ mirroring the setbacks experienced when system updates are blocked by administrator settings. The GDL system is designed to gradually introduce new drivers to the responsibilities of operating a vehicle‚ and permit expiration throws off this carefully structured progression.

Allowing a permit to lapse often means restarting the learning period. You may be required to reapply for a new permit and fulfill the initial requirements‚ including vision screenings and knowledge tests. This effectively resets your accumulated supervised driving hours.

The delay can be particularly frustrating for young drivers eager to obtain their full license. Just as troubleshooting software issues requires patience and methodical steps‚ navigating the GDL stages after a permit expiration demands diligence and adherence to Michigan SOS guidelines. It’s crucial to maintain a valid permit throughout each stage to avoid unnecessary setbacks.

Restrictions After Permit Expiration

Once a Michigan temporary instruction permit expires‚ significant restrictions immediately take effect‚ akin to the limitations imposed when a program is blocked by system administration. Driving with an expired permit is illegal and carries substantial penalties. You are no longer authorized to operate a vehicle‚ even with a licensed supervising driver present.

This means any driving activity becomes a violation of Michigan traffic laws‚ potentially leading to fines‚ court appearances‚ and a negative impact on your driving record. The restrictions aren’t merely inconvenient; they represent a serious legal issue.

Furthermore‚ an expired permit halts your progress towards obtaining a full driver’s license. You cannot schedule a road test without a valid permit. Similar to encountering a “forbidden installation” error‚ attempting to proceed without addressing the expired permit will prevent you from completing the licensing process. Reinstatement or renewal is essential before resuming driving practice.

Reinstatement Options After Expiration

Like resolving software access issues requiring administrator intervention‚ reinstating an expired permit involves specific steps and documentation to regain driving privileges legally.

Applying for a Duplicate Permit

If your Michigan temporary instruction permit is lost‚ stolen‚ or damaged‚ obtaining a duplicate is crucial to continue your path towards a full driver’s license. The process mirrors troubleshooting software problems – a systematic approach is required. You cannot simply proceed as if nothing happened; official channels must be followed.

To apply for a duplicate‚ you’ll generally need to visit a Michigan Secretary of State (SOS) branch office. While online options exist for some SOS services‚ duplicate permits typically require an in-person visit for identity verification. Be prepared to present acceptable identification documents‚ such as a driver’s license from another state‚ a birth certificate‚ or a passport.

A fee is associated with obtaining a duplicate permit‚ similar to software license costs. The current fee amount can be found on the Michigan SOS website. Completing the necessary application form‚ available at the SOS office or potentially downloadable online‚ is also essential. Remember‚ just like a system administrator resolving access issues‚ you are responsible for ensuring all requirements are met.

Required Documents for Reinstatement

Reinstating a Michigan temporary instruction permit after it has expired demands careful preparation of documentation‚ akin to troubleshooting a complex software installation issue. Just as specific files are needed for a successful install‚ specific documents are required by the SOS.

You will need to present proof of identity‚ such as a certified birth certificate‚ a U.S. passport‚ or a state-issued identification card. Social Security card documentation is also typically required; Furthermore‚ proof of Michigan residency – two documents are usually needed – like utility bills or bank statements‚ are essential.

If the expiration was due to a lapse in insurance‚ proof of current insurance coverage is mandatory. Any documentation related to driving record issues‚ such as court orders or completion certificates for traffic school‚ must also be provided. Similar to needing administrator permissions for software updates‚ you must demonstrate compliance with all requirements to regain permit validity.

Fees Associated with Reinstatement

Reinstating an expired Michigan temporary instruction permit isn’t free; several fees may apply‚ much like software licenses or repair costs for system errors. Understanding these costs is crucial for a smooth reinstatement process‚ avoiding unexpected financial hurdles.

The standard reinstatement fee for a permit typically ranges‚ but expect a charge for a duplicate permit if the original is unavailable. Additional fees may be levied if the expiration is linked to unpaid tickets or court fines – these must be settled before reinstatement. If a driving record review is required‚ a separate fee will be assessed.

Just as troubleshooting a system issue can incur repair costs‚ reinstatement can involve fees for record retrieval or administrative processing. It’s advisable to check the official Michigan Secretary of State website for the most current fee schedule‚ as amounts are subject to change. Prepare for these expenses to ensure a hassle-free renewal.

Avoiding Permit Expiration Issues

Proactive management is key to preventing permit lapses‚ similar to maintaining system security. Setting reminders and utilizing SOS resources can avert issues and ensure compliance.

Setting Reminders for Renewal Dates

Establishing timely reminders is crucial for avoiding the complications of an expired Michigan temporary instruction permit. Much like system administrators proactively manage software updates and security protocols‚ permit holders should adopt a similar approach to their driving privileges. Consider utilizing calendar applications on your smartphone or computer to schedule multiple reminders leading up to the expiration date.

These reminders shouldn’t be a single notification; instead‚ set alerts for one month‚ two weeks‚ and one week before the permit expires. This layered approach ensures you have ample time to address the renewal process‚ even if you initially miss an alert. Furthermore‚ many email providers allow for recurring reminders‚ offering another convenient method.

Don’t rely solely on memory‚ as life’s demands can easily cause important dates to slip your mind. Treat your permit renewal with the same diligence you would apply to critical system maintenance‚ preventing potential disruptions and ensuring continued legal driving status. A little foresight can save significant hassle later on.

Understanding the Michigan SOS Website Resources

The Michigan Secretary of State (SOS) website is a comprehensive hub for all permit-related information‚ mirroring the centralized system administration tools used to manage software and user permissions. Navigating this resource effectively is key to avoiding issues with permit expiration. The SOS website provides a dedicated section for driver licensing‚ including detailed explanations of permit requirements‚ expiration dates‚ and renewal procedures.

Specifically‚ look for the online permit status check tool‚ allowing you to verify your current permit’s expiration date. The site also offers downloadable forms and FAQs addressing common concerns. Similar to troubleshooting software errors‚ the SOS website provides solutions to frequently encountered problems.

Familiarize yourself with the online services portal for potential renewal options. The SOS website is regularly updated‚ so check back frequently for the latest information and any changes to policies. Utilizing these resources proactively will empower you to manage your permit effectively and avoid the consequences of driving with an expired document.

Contacting the Michigan Secretary of State for Assistance

When online resources prove insufficient‚ direct contact with the Michigan Secretary of State (SOS) is crucial‚ much like seeking help from a system administrator when facing software access issues. The SOS offers multiple avenues for assistance‚ including a dedicated phone number and email support. Be prepared to provide your permit details for efficient service.

For complex situations‚ such as issues with online renewal or discrepancies in permit status‚ a phone call often yields the quickest resolution. The SOS website lists contact information for specific departments‚ ensuring your inquiry reaches the appropriate personnel.

Consider visiting a local SOS branch office for in-person assistance‚ particularly if you require document verification or have unique circumstances. Remember that wait times may vary. Just as troubleshooting software problems requires clear communication‚ clearly articulate your concerns to the SOS representative to expedite the process and ensure a satisfactory outcome regarding your permit’s expiration.

singer heavy duty instruction manual

Singer Heavy Duty Sewing Machine: A Comprehensive Guide

This guide details operation and maintenance‚ offering dependable instructions for your new Singer Heavy Duty machine‚ ensuring confident and successful sewing projects.

The Singer Heavy Duty series‚ including popular models like the 4452 and 4423‚ represents a significant leap in home sewing machine capability. These machines are engineered for durability and power‚ tackling a wider range of fabrics and projects than standard machines.

Designed for sewists of all levels‚ from beginners to experienced crafters‚ the Heavy Duty series excels at handling denim‚ canvas‚ and multiple layers of fabric. SINGER’s legacy of innovation shines through‚ offering features like faster sewing speeds and robust metal frames.

This series provides a reliable companion for quilting‚ home décor‚ and garment construction. Access to comprehensive manuals and updates‚ available online‚ ensures long-term performance and user satisfaction.

Understanding the Model 4452 & 4423

Both the Singer Heavy Duty 4452 and 4423 are renowned for their robust construction and powerful motors‚ making them ideal for various sewing tasks. The 4452‚ often found in Rosewater‚ boasts 32 built-in stitches‚ while the 4423 offers a similar stitch selection.

Key differences lie in aesthetic details and bundled accessories‚ but their core functionality remains consistent. Both models feature an extra-high sewing speed‚ enhancing project completion time. They share a heavy-duty metal frame‚ ensuring stability and longevity.

Accessing the official SINGER website provides downloadable user manuals‚ stitch guides‚ and machine updates specific to each model‚ ensuring optimal performance and troubleshooting assistance. These resources are invaluable for maximizing your sewing experience.

Key Features and Benefits

The Singer Heavy Duty series excels with its powerful motor‚ effortlessly handling denim‚ canvas‚ and multiple fabric layers. A standout feature is the 32 built-in stitches‚ offering versatility for diverse projects. The machines boast an extra-high sewing speed‚ significantly reducing project completion times.

Durability is paramount‚ thanks to the heavy-duty metal frame‚ ensuring long-lasting performance. User-friendly design makes it suitable for beginners‚ while advanced features cater to experienced sewists. SINGER’s commitment to innovation is evident in their sewing assistant app.

Benefits include reliable operation‚ reduced sewing time‚ and the ability to tackle challenging fabrics. Free shipping on machines and readily available manuals enhance the overall user experience.

Setting Up Your Machine

Proper setup is crucial for optimal performance. This involves carefully unboxing‚ inspecting components‚ and correctly connecting the power cord and foot pedal for immediate use.

Unboxing and Initial Inspection

Carefully unpack your new Singer Heavy Duty sewing machine‚ ensuring all components are present. Begin by removing the machine from the box and protective packaging. Inspect the machine for any visible damage that may have occurred during shipping – look for dents‚ scratches‚ or broken parts;

Verify the contents against the included parts list; this typically includes the machine itself‚ a foot pedal‚ power cord‚ various presser feet‚ bobbins‚ needle set‚ screwdriver‚ seam ripper‚ and the instruction manual. Retain the packaging for potential future transport or warranty claims. Familiarize yourself with the machine’s basic parts – the handwheel‚ stitch selector dial‚ bobbin winder‚ and presser foot lever. A thorough initial inspection ensures a smooth start to your sewing journey.

Attaching the Power Cord and Foot Pedal

Begin by locating the power jack on the back of your Singer Heavy Duty machine. Insert the power cord firmly into this jack‚ ensuring a secure connection. Plug the other end of the power cord into a grounded electrical outlet. Next‚ connect the foot pedal to the designated port‚ typically located on the front or side of the machine.

Ensure the foot pedal cable is securely plugged in; this controls the sewing speed. Avoid using extension cords if possible‚ but if necessary‚ use a heavy-duty extension cord rated for the machine’s power requirements. Always verify the voltage compatibility before plugging in the machine. Proper connection of the power cord and foot pedal is crucial for safe and efficient operation.

Winding the Bobbin

Start by placing the thread spool on the spool pin. Guide the thread through the thread guide‚ then onto the bobbin winding tension disc. Next‚ insert the empty bobbin onto the bobbin winder spindle‚ ensuring it clicks into place. Push the bobbin winder to the right to engage it.

Hold the thread tail firmly while starting the machine slowly‚ allowing several turns to wind onto the bobbin. Once a sufficient amount is wound‚ gently disengage the bobbin winder and trim the thread. Properly wound bobbins are essential for consistent stitch quality. Regularly check the bobbin for even winding to prevent issues during sewing.

Threading the Machine

Correct threading – upper and lower – is crucial for proper stitch formation and machine operation‚ ensuring smooth and reliable sewing performance.

Upper Threading Guide

Begin by raising the presser foot; this disengages the tension discs‚ allowing the thread to seat correctly. Place the spool of thread on the spool pin‚ securing it with a spool cap. Guide the thread through the first thread guide‚ then down and around the tension disc assembly.

Next‚ bring the thread up and over the tension disc‚ ensuring it snaps firmly into place. Continue threading through the take-up lever‚ moving it to its highest position. Then‚ thread through the remaining thread guides‚ leading towards the needle clamp. Finally‚ thread the needle from front to back – a crucial step for proper stitch formation.

Always refer to your machine’s specific threading diagram for visual guidance‚ as slight variations may exist between models.

Lower Threading (Bobbin Insertion)

Begin by locating the bobbin compartment‚ typically accessed via a sliding cover on the front of the machine. Insert a pre-wound bobbin‚ ensuring it rotates in the correct direction – usually clockwise‚ as indicated by an arrow on the machine.

Guide the thread through the tension slot or spring‚ ensuring it’s securely held. Then‚ draw up a few inches of thread through the opening. Close the bobbin compartment cover until it clicks securely.

Finally‚ hold the upper thread loosely and turn the handwheel towards you‚ causing the needle to descend and pick up the bobbin thread. Gently pull on the upper thread to bring the bobbin thread up‚ forming a loop.

Needle Threading Techniques

Start by raising the needle to its highest position using the handwheel. Locate the needle clamp screw and loosen it slightly to allow the needle insertion. Insert a new needle‚ with the flat side facing the back of the machine‚ and tighten the clamp screw securely.

Next‚ guide the thread through the upper thread guides‚ following the numbered sequence indicated on the machine. Pass the thread through the take-up lever and then down through the needle clamp.

Finally‚ thread the needle from front to back. Pull several inches of thread through the needle eye‚ ensuring it’s properly seated; This ensures smooth and consistent stitching.

Basic Sewing Operations

Mastering fundamental techniques unlocks your machine’s potential; select stitches‚ adjust length/width‚ and choose appropriate fabrics and needles for optimal results.

Selecting Stitches

The Singer Heavy Duty machines‚ like the 4452 and 4423‚ boast a variety of built-in stitches‚ offering versatility for diverse projects. Typically‚ 32 stitches are included‚ encompassing essential straight and zigzag stitches‚ alongside decorative and functional options.

To select a stitch‚ locate the stitch selection dial – usually positioned prominently on the machine’s front. Rotate the dial to align your desired stitch number with the indicator mark. Refer to the stitch guide‚ often printed on the machine itself or within the instruction manual‚ to understand each stitch’s purpose and recommended settings.

Experimenting with different stitches expands your creative possibilities. Straight stitches are ideal for constructing seams‚ while zigzag stitches provide stretch and are suitable for finishing raw edges. Decorative stitches add embellishment to projects‚ enhancing their aesthetic appeal. Always test the selected stitch on a scrap fabric before beginning your actual sewing.

Adjusting Stitch Length and Width

Precise stitch control is crucial for achieving professional-looking results. Singer Heavy Duty machines feature dials to adjust both stitch length and width‚ allowing customization for various fabrics and techniques. The stitch length dial determines the distance between each stitch‚ impacting seam strength and appearance.

Shorter stitch lengths (around 2.0-2.5mm) are ideal for delicate fabrics or areas requiring extra reinforcement. Longer stitch lengths (3.0-4.0mm) are suitable for basting or heavier materials. The stitch width dial controls the zigzag stitch’s breadth‚ influencing its stretch and coverage.

Always test your settings on scrap fabric before sewing your project. Incorrect settings can lead to puckering‚ skipped stitches‚ or weakened seams. Refer to your machine’s manual for recommended settings based on fabric type and stitch selection.

Fabric Selection and Needle Types

Choosing the right combination of fabric and needle is vital for optimal sewing performance. Singer Heavy Duty machines can handle a wide range of materials‚ but proper needle selection prevents damage and ensures clean stitches. Universal needles (size 80/12‚ 90/14) work well for woven fabrics like cotton and linen.

For knits‚ use ballpoint or stretch needles (sizes 75/11‚ 90/14) to avoid snagging or running the fabric. Denim or heavy-duty needles (sizes 90/14‚ 100/16) are essential for thicker materials like denim‚ canvas‚ or upholstery fabrics.

Always match the needle size to the fabric weight; a finer fabric requires a smaller needle‚ while heavier fabrics need a larger one. Regularly replace needles to maintain stitch quality and prevent skipped stitches.

Advanced Features & Techniques

Explore beyond basics with reverse stitching‚ adjustable presser foot pressure‚ and free motion sewing – unlocking creative potential with your Singer Heavy Duty machine.

Using the Reverse Stitch

The reverse stitch‚ crucial for securing seams at the beginning and end‚ prevents unraveling and adds durability to your projects. On your Singer Heavy Duty machine‚ engaging the reverse function is straightforward. Locate the reverse lever‚ typically positioned behind the needle plate or above the handwheel.

Push the lever down to activate reverse; the machine will now stitch backward. Release the lever to return to forward stitching. Many models feature a reverse stitch button‚ offering a convenient alternative. Utilize this function sparingly – a few stitches are usually sufficient to secure the seam.

Experiment with different reverse stitch lengths to find what works best for your fabric and project. Remember to always test on a scrap piece of fabric before applying to your final creation. Mastering the reverse stitch is a fundamental skill for any sewist!

Adjusting Presser Foot Pressure

Proper presser foot pressure is vital for achieving even stitches and preventing fabric issues like puckering or slipping. The Singer Heavy Duty series allows you to customize this pressure to suit various fabric weights and types. Locate the pressure adjustment dial‚ usually found on the back of the machine.

Turning the dial to a higher number increases the pressure‚ ideal for thicker fabrics like denim or multiple layers. Lower settings are best for delicate materials like silk or chiffon. Always test the pressure on a scrap of your chosen fabric before starting your project.

Insufficient pressure can cause skipped stitches‚ while excessive pressure may distort the fabric. Finding the optimal setting ensures smooth‚ professional-looking results.

Free Motion Sewing

Free motion sewing‚ also known as darning‚ unlocks creative quilting and embellishment possibilities with your Singer Heavy Duty machine. To engage this mode‚ detach the presser foot and set the stitch length to zero. Then‚ lower the feed dogs – a lever usually located at the back of the machine disables them.

Hold the fabric gently and move it freely under the needle‚ guiding your stitches. The machine’s speed is controlled by your foot pedal‚ allowing for intricate designs. Practice on scrap fabric to develop a consistent rhythm.

Use a darning foot for optimal visibility and control. Remember to re-engage the feed dogs when returning to standard sewing!

Maintenance and Troubleshooting

Regular cleaning and lubrication are vital for peak performance. Address common issues like thread bunching or skipped stitches with our helpful guide.

Cleaning Your Singer Heavy Duty Machine

Maintaining a clean machine is crucial for smooth operation and longevity. Always disconnect the power cord before beginning any cleaning procedures. Use a soft brush‚ or the brush accessory included with your machine‚ to remove lint and dust from the bobbin area‚ feed dogs‚ and around the needle plate.

A small vacuum cleaner with a brush attachment can also be helpful for removing stubborn lint. For tougher grime‚ a slightly dampened cloth can be used‚ but avoid harsh chemicals or solvents. Pay particular attention to the areas around the tension discs and the needle bar‚ as these can accumulate thread fragments. Regularly cleaning these areas will prevent issues like thread breakage and uneven stitching. Remember to oil the machine after cleaning‚ following the lubrication guidelines in the manual.

Oil Points and Lubrication

Proper lubrication ensures your Singer Heavy Duty machine runs smoothly and quietly. Refer to your machine’s manual for specific oil point locations‚ as these can vary slightly between models. Generally‚ key areas include the bobbin case‚ hook assembly‚ presser bar‚ and any moving parts identified in the diagram.

Use only sewing machine oil – never use oil with detergents or additives. Apply a small drop of oil to each point‚ and then operate the machine briefly to distribute the oil evenly. Wipe away any excess oil with a clean cloth. Over-oiling can attract dust and lint‚ so less is more. Regular lubrication‚ combined with cleaning‚ will significantly extend the life of your machine and maintain optimal performance.

Common Problems and Solutions

Thread bunching often indicates incorrect threading or improper bobbin insertion; re-thread both upper and lower threads carefully. Needle breakage can stem from using the wrong needle type for the fabric‚ forcing the fabric‚ or a bent needle – replace it! Skipped stitches might mean a dull or damaged needle‚ incorrect threading‚ or improper tension adjustments.

If the machine is noisy‚ check for lint buildup or insufficient lubrication. Always unplug the machine before cleaning or troubleshooting. Consult your manual’s troubleshooting section for detailed guidance and diagrams. If problems persist‚ consider contacting a qualified sewing machine technician for assistance.

Safety Precautions

Always disconnect the power before maintenance. Avoid needle breakage by using correct needles and fabrics. Prioritize safe operation for enjoyable sewing!

Electrical Safety Guidelines

Before operating your Singer Heavy Duty machine‚ ensure the power cord is in good condition‚ free from damage or fraying. Always connect the machine to a properly grounded electrical outlet matching the voltage specified on the machine’s nameplate.

Never operate the sewing machine with a damaged cord or plug‚ and avoid using extension cords if possible. If an extension cord is necessary‚ select one rated to handle the machine’s amperage.

To prevent electrical shock‚ always disconnect the machine from the power source before performing any maintenance‚ changing the needle‚ or cleaning. Avoid operating the machine in damp or wet conditions. Do not attempt to repair the machine yourself; contact a qualified service technician for any electrical issues.

Avoiding Needle Breakage

Needle breakage can be prevented by selecting the correct needle type and size for your fabric. Heavy-duty fabrics require heavier needles‚ while delicate fabrics need finer ones. Always insert the needle correctly‚ with the flat side facing the back.

Ensure the needle is fully inserted and tightened before starting to sew. Avoid forcing the fabric through the machine; let the feed dogs do the work. Regularly check the needle for bends‚ dullness‚ or damage‚ replacing it as needed.

Never sew over pins‚ as this can cause the needle to break or become damaged. Reduce sewing speed when starting or stopping‚ and avoid abrupt changes in direction. Proper threading is also crucial; incorrect threading can strain the needle.

General Machine Safety

Always disconnect the power cord before changing the needle‚ threading‚ cleaning‚ or performing any maintenance. Keep fingers away from moving parts‚ like the needle and presser foot‚ while the machine is running. Never operate the machine if it’s damaged or malfunctioning.

Ensure the machine is placed on a stable‚ level surface during operation. Do not use the machine outdoors or in damp environments; Supervise children closely when they are near the sewing machine. Avoid using excessive force when sewing‚ and never pull or push the fabric.

Regularly inspect the power cord for damage and replace it if necessary. Store the machine in a safe‚ dry place when not in use. Follow all safety guidelines outlined in the instruction manual to prevent accidents and ensure safe operation.

PDF

minyan pdf david bezmogis

Minyan PDF by David Bezmogis: A Comprehensive Overview (as of 12/13/2025)

Today, December 13th, 2025, finding a readily accessible “Minyan” PDF by David Bezmogis requires careful navigation of digital resources and copyright awareness.

What is “Minyan”? Defining the Core Concept

The term “minyan” itself originates from Jewish religious practice, specifically denoting the minimum number of ten adult Jewish individuals required to constitute a quorum for certain communal religious observances. These observances include public readings of the Torah and the recitation of specific prayers. However, within the context of David Bezmogis’s novel, “Minyan,” the concept transcends this purely religious definition.

Bezmogis utilizes “minyan” as a multifaceted symbol representing not only religious obligation but also the fragile bonds of community, the search for meaning, and the complexities of adolescent identity. The novel centers around a group of boys who, lacking a sufficient number of adult men, attempt to form their own minyan to conduct religious services. This act becomes a catalyst for exploring themes of faith, loss, and the challenges of maintaining tradition in a rapidly changing world.

The narrative delves into the boys’ motivations, their struggles with religious observance, and the impact of their actions on themselves and their community. The “minyan” they create is, in essence, a microcosm of a larger societal shift, reflecting the anxieties and uncertainties of post-Soviet Jewish life. Understanding this dual nature – the literal religious requirement and the symbolic representation – is crucial to appreciating the depth and nuance of Bezmogis’s work.

David Bezmogis and His Literary Work

David Bezmogis is a Russian-born Israeli-Canadian author celebrated for his evocative and insightful explorations of Jewish identity, particularly within the context of post-Soviet diaspora. Born in Moscow in 1989, Bezmogis immigrated to Canada with his family at a young age, a formative experience that deeply informs his writing. He is a graduate of McGill University and holds an MFA from the University of Michigan.

While “Minyan” remains his most acclaimed work, establishing him as a significant voice in contemporary Jewish literature, Bezmogis has also contributed to various publications and literary journals. His writing style is characterized by its lyrical prose, keen observational skills, and a nuanced understanding of the complexities of human relationships. He often focuses on the intersection of tradition and modernity, faith and doubt, and the challenges of belonging.

Bezmogis’s work frequently features characters grappling with questions of identity and purpose, navigating the tensions between their heritage and their adopted cultures. “Minyan,” in particular, showcases his ability to capture the voices and experiences of a specific community with authenticity and sensitivity, solidifying his reputation as a compelling storyteller.

The “Minyan” Story: A Synopsis

“Minyan,” published in 2014, unfolds in 1990s Vilnius, Lithuania, a city experiencing a revival of Jewish life after decades of Soviet suppression. The narrative centers around a group of teenagers, primarily boys, who diligently gather daily to form a minyan – the quorum of ten Jewish men required for communal prayer. This isn’t driven by fervent religious zeal, but rather by a pragmatic need: to provide a grieving widower, Mr. Dundek, with the opportunity to recite the Kaddish, the Jewish prayer for the dead, for his recently deceased wife.

The story is told through the collective voice of these boys, offering a fragmented and often humorous perspective on their experiences. They navigate the awkwardness of adolescence, the complexities of faith, and the challenges of rebuilding a community. Their commitment to the daily minyan becomes a defining aspect of their lives, shaping their understanding of responsibility, tradition, and the power of collective action.

As the narrative progresses, the boys’ motivations and the circumstances surrounding the minyan become increasingly nuanced, revealing a deeper exploration of loss, memory, and the enduring strength of Jewish heritage.

Key Characters in “Minyan”

Mr. Dundek is central, the grieving widower whose need for the Kaddish initiates the boys’ daily commitment. He represents the weight of the past and the importance of honoring tradition. The unnamed narrator, speaking for the collective group of boys, provides a unique, fragmented perspective, often laced with adolescent humor and observation.

Yasha emerges as a prominent figure, often taking on leadership roles within the minyan. He embodies a blend of youthful energy and a growing sense of responsibility. Boris, another key member, contributes to the group dynamic with his distinct personality and evolving understanding of faith.

Several other boys populate the narrative, each contributing to the collective voice and representing different facets of the burgeoning Jewish community. These characters, though less individually developed, collectively illustrate the challenges and triumphs of rebuilding a religious life in post-Soviet Vilnius. Their interactions and shared experiences form the heart of the novel.

Themes Explored in “Minyan”: Loss, Faith, and Community

Loss permeates “Minyan,” stemming from the recent deaths that necessitate the daily prayers. This isn’t merely individual grief, but a collective mourning for a vanished Jewish world. The novel explores how ritual, specifically the recitation of the Kaddish, attempts to grapple with and transcend this profound sense of absence.

Faith is presented not as a given, but as something actively constructed and questioned. The boys’ initial motivations are often pragmatic – avoiding parental pressure or seeking camaraderie – yet their repeated participation fosters a genuine, if unconventional, spiritual connection. Bezmogis examines the complexities of belief, particularly within a community rebuilding after decades of suppression.

Community emerges as a vital force. The minyan itself becomes a microcosm of a fractured society, bringing together individuals from diverse backgrounds. Through shared ritual and collective responsibility, the boys forge bonds that offer solace and a sense of belonging, highlighting the power of communal support in the face of loss and uncertainty.

Historical Context: Jewish Life in Post-Soviet Russia

“Minyan” is deeply rooted in the specific historical circumstances of Jewish life in Vilnius, Lithuania, in the aftermath of the Soviet Union’s collapse. Decades of state-sponsored atheism and suppression of religious practice left a void, yet also a yearning for reconnection with Jewish heritage. The novel captures the tentative re-emergence of Jewish communal life during this period.

The fall of the Soviet regime allowed for a revival of religious institutions and practices, but also exposed the demographic devastation wrought by the Holocaust and subsequent assimilation. Many Jewish communities were aging and struggling to maintain continuity. Bezmogis portrays a community grappling with its past and uncertain about its future.

Vilnius, historically a center of Jewish learning and culture, became a focal point for this revival. The novel’s setting reflects the city’s complex history and its role as a space where Jewish identity was both suppressed and preserved. Understanding this context is crucial to appreciating the significance of the boys’ minyan.

The PDF Format and Accessibility of “Minyan”

The proliferation of “Minyan” in PDF format stems from its popularity among readers seeking convenient digital access to David Bezmogis’s work. PDFs offer portability and compatibility across various devices – computers, tablets, and smartphones – making the novel readily available. However, the quality and source of these PDFs vary significantly.

Many PDFs circulating online are scans of physical copies, potentially resulting in lower resolution and readability. Others are digitally formatted, offering clearer text and searchable capabilities. Accessibility features, such as text-to-speech compatibility and adjustable font sizes, are not always present in these PDFs.

Finding a legally obtained, high-quality PDF can be challenging. While some online bookstores offer digital versions, unauthorized distribution remains prevalent. Readers should prioritize legitimate sources to support the author and ensure a positive reading experience. The PDF format, while convenient, doesn’t always guarantee optimal accessibility.

Sources for Obtaining the “Minyan” PDF

Locating a “Minyan” PDF by David Bezmogis requires navigating a landscape of both legitimate and unauthorized sources. Major online booksellers like Amazon Kindle Store and Google Play Books frequently offer digital versions, often including PDF formats, ensuring a legal and high-quality reading experience.

Digital libraries and academic databases may also provide access to the PDF, particularly for research purposes, though availability can vary based on institutional subscriptions. However, numerous websites host freely downloadable PDFs, which often raise copyright concerns and may contain lower-quality scans or even malware.

Caution is advised when utilizing these unofficial sources. Prioritize established platforms and verify the file’s integrity before downloading. Checking online forums and literary communities can sometimes reveal links to legitimate promotional PDFs or author-approved digital copies. Remember to respect copyright laws and support David Bezmogis’s work through authorized channels whenever possible.

Legality and Copyright Considerations Regarding the PDF

Downloading and distributing a PDF of David Bezmogis’s “Minyan” without proper authorization raises significant legal and ethical concerns regarding copyright infringement. Copyright law protects the author’s intellectual property, granting exclusive rights to reproduce, distribute, and display the work.

Obtaining a PDF from unauthorized sources – websites offering free downloads without explicit permission – constitutes a violation of these rights. Such actions can lead to legal repercussions for both the downloader and the distributor, including fines and potential lawsuits. Supporting the author by purchasing the PDF through legitimate channels, like authorized online bookstores, ensures fair compensation for their creative work.

Fair use exceptions may apply in limited circumstances, such as academic research or critical analysis, but these are subject to specific guidelines and require proper attribution. Always prioritize respecting copyright laws and contributing to a sustainable ecosystem for authors and the literary community.

Critical Reception of “Minyan”: Reviews and Analysis

“Minyan” by David Bezmogis garnered substantial critical acclaim upon its release, praised for its nuanced portrayal of Orthodox Jewish life and its exploration of universal themes like loss, faith, and community. Reviews frequently highlighted Bezmogis’s masterful storytelling and his ability to create deeply compelling characters.

Critics lauded the novel’s authentic depiction of Vilnius’s Jewish history and the complexities of post-Soviet Jewish identity. Many analyses focused on the narrative structure, noting its fragmented, multi-voiced approach which mirrors the fractured memories and experiences of the characters. The work’s emotional resonance and intellectual depth were consistently emphasized.

Some reviewers noted the challenging nature of the narrative, requiring attentive reading to fully grasp the interwoven storylines. However, this complexity was largely viewed as a strength, contributing to the novel’s lasting impact and prompting ongoing scholarly discussion. The PDF format facilitates wider access to these critical interpretations.

Literary Style and Narrative Techniques Employed by Bezmogis

David Bezmogis’s literary style in “Minyan” is characterized by a fragmented, polyphonic narrative structure. He employs multiple narrators, shifting perspectives to create a mosaic-like portrayal of the community and events. This technique mirrors the unreliable nature of memory and the subjective experience of trauma.

Bezmogis utilizes a distinctive blend of realism and subtle symbolism, grounding the story in the specific details of Vilnius’s Jewish life while simultaneously layering in deeper thematic resonances. His prose is often described as lyrical and evocative, capturing the atmosphere and emotional landscape of the setting.

The author’s deliberate use of dialogue and interior monologue reveals the inner lives of his characters, exposing their vulnerabilities and complexities. Accessing the “Minyan” PDF allows readers to closely examine these stylistic choices and appreciate Bezmogis’s artistry. The narrative’s non-linear timeline further enhances the sense of disorientation and fragmented recollection.

The Significance of the Setting: Vilnius and its Jewish History

Vilnius, historically known as Yerushalayim d’Lita (Jerusalem of Lithuania), holds immense significance as a central hub of Jewish life and learning for centuries. Before World War II, it boasted a vibrant Jewish community, tragically decimated by the Holocaust. Bezmogis masterfully utilizes this historical weight in “Minyan,” making Vilnius almost a character itself.

The city’s architecture, streets, and even its atmosphere become imbued with the memories of a lost world. The narrative subtly explores the layers of history embedded within Vilnius, contrasting the pre-war flourishing with the post-war silence and absence. Accessing the “Minyan” PDF allows a deeper appreciation of how Bezmogis interweaves the city’s past into the present narrative.

The setting isn’t merely a backdrop; it actively shapes the characters’ identities and experiences. The echoes of a once-thriving Jewish community haunt the story, influencing the characters’ search for meaning and connection. Bezmogis’s depiction of Vilnius is both poignant and historically informed.

“Minyan” and its Representation of Orthodox Jewish Practice

David Bezmogis’s “Minyan” offers a nuanced and often unconventional portrayal of Orthodox Jewish practice, specifically within a post-Soviet Lithuanian context. The novel centers around the challenges of assembling a minyan – a quorum of ten Jewish men required for communal prayer – highlighting the dwindling Jewish population and the struggle to maintain religious traditions.

The narrative doesn’t shy away from depicting the complexities and internal debates within the Orthodox community. Characters grapple with questions of faith, observance, and the meaning of ritual in a rapidly changing world. Obtaining a “Minyan” PDF allows readers to closely examine Bezmogis’s detailed descriptions of prayer services and religious customs.

While respectful, the novel also presents a realistic and sometimes critical perspective on Orthodox life, exploring the tensions between tradition and modernity. Bezmogis avoids romanticizing religious practice, instead offering a complex and multifaceted representation.

Comparisons to Other Works of Jewish Literature

“Minyan” by David Bezmogis resonates with themes explored in other significant works of Jewish literature, particularly those dealing with identity, community, and the aftermath of historical trauma. Similar to Chaim Potok’s novels, “Minyan” delves into the internal conflicts within Orthodox Jewish life, though with a distinctly post-Soviet perspective.

The novel’s focus on a shrinking Jewish community echoes concerns found in Isaac Bashevis Singer’s stories, which often depict the struggles of Jewish life in Eastern Europe. However, Bezmogis’s narrative style is more fragmented and contemporary, reflecting a modern sensibility. Accessing a “Minyan” PDF facilitates comparative textual analysis.

Furthermore, the exploration of faith and doubt in “Minyan” aligns with themes present in Philip Roth’s work, albeit with a different cultural and religious context. Bezmogis offers a unique voice within the broader canon of Jewish literature, blending personal experience with historical observation.

The Impact of “Minyan” on Contemporary Readers

David Bezmogis’s “Minyan” continues to resonate with contemporary readers, particularly those interested in diasporic Jewish experiences and the complexities of religious observance. The novel’s exploration of a dwindling community in Vilnius strikes a chord in an era marked by increasing globalization and cultural shifts.

The accessibility of a “Minyan” PDF has broadened its readership, allowing for wider discussion and analysis of its themes. Readers often comment on the novel’s realistic portrayal of adolescent struggles within a strict religious framework, and its nuanced depiction of faith and doubt.

“Minyan” prompts reflection on the challenges of maintaining tradition in a rapidly changing world, and the importance of community in preserving cultural identity. Its impact lies in its ability to evoke empathy and understanding for a specific time and place, while simultaneously addressing universal human concerns.

Analyzing the Symbolism within “Minyan”

“Minyan” is rich with symbolism, deeply interwoven with its narrative of a shrinking Jewish community in Vilnius. The minyan itself, the quorum of ten men required for public prayer, functions as a potent symbol of continuity and the struggle to maintain tradition against dwindling numbers.

The setting of Vilnius, a city steeped in Jewish history, acts as a symbolic representation of a lost world, haunted by the memories of a vibrant past. The characters’ internal conflicts often mirror the external pressures facing the community, with their individual struggles symbolizing the broader challenges of faith and identity.

Access to the “Minyan” PDF facilitates deeper engagement with these symbolic layers, allowing readers to dissect the novel’s intricate details. Recurring motifs, like the weather and the changing seasons, contribute to the overall symbolic weight, reflecting the precariousness of the community’s existence.

Further Research Resources on David Bezmogis and “Minyan”

While a dedicated, official website for David Bezmogis remains elusive, several resources offer valuable insights into his work and “Minyan.” Literary databases like JSTOR and Project MUSE contain critical essays and scholarly articles analyzing the novel’s themes and stylistic elements. Searching these platforms, often accessible through university libraries, can yield in-depth analysis.

Online literary magazines, such as The Paris Review and Granta, may feature interviews or reviews related to Bezmogis’s writing. Exploring online booksellers and digital libraries can also uncover supplementary materials, including author interviews and contextual information about Jewish life in post-Soviet Russia.

Regarding the “Minyan” PDF itself, caution is advised due to copyright concerns. Reputable academic databases are the safest source for accessing critical materials. Remember to verify the legitimacy of any online PDF source before downloading to avoid potential legal issues or malware.

The Enduring Relevance of “Minyan” in the 21st Century

Despite being set in a specific time and place – Vilnius, Lithuania, in the 1990s – David Bezmogis’s “Minyan” continues to resonate with contemporary readers. Its exploration of faith, loss, and the search for community transcends geographical and temporal boundaries, speaking to universal human experiences.

In an era marked by increasing secularization and fragmented communities, the novel’s depiction of a tightly-knit Orthodox Jewish group grappling with change feels particularly poignant. The questions it raises about tradition, identity, and belonging remain highly relevant in a globalized world.

Even the accessibility of the “Minyan” PDF, while presenting copyright challenges, underscores the novel’s enduring appeal and desire for wider readership. The story’s nuanced portrayal of complex characters and its unflinching examination of difficult themes ensure its continued significance for generations to come, prompting ongoing discussion and analysis.

PDF

bible games for youth pdf

Bible games for youth, often available as PDF downloads, creatively engage young people with scripture.

These resources, like eBible, blend faith and fun, fostering a deeper understanding of biblical stories and principles.

They offer a dynamic alternative to traditional study methods, making learning interactive and memorable for all age groups.

What are Bible Games?

Bible games are interactive activities designed to teach biblical principles and stories in an engaging way. Often found as readily available PDF downloads, these games transform scripture into fun challenges, fostering a deeper connection with faith.

They range from simple trivia and charades to elaborate scavenger hunts and obstacle courses, mirroring activities like “Escape from Egypt”. Utilizing resources like eBible, these games can be digitally integrated for quizzes and interactive learning.

The core aim is to move beyond rote memorization, encouraging youth to actively participate and internalize biblical teachings, making faith exploration enjoyable and impactful.

Why Use Games in Youth Ministry?

Bible games, frequently accessible as PDF resources, are invaluable in youth ministry because they cater to diverse learning styles. They move beyond traditional lectures, offering a dynamic and memorable way to engage with scripture.

Games like “Parable Pictionary” and trivia challenges foster teamwork and critical thinking, while digital integration via apps like eBible provides interactive learning experiences.

By making faith exploration fun, games increase participation and retention, helping youth internalize biblical truths and apply them to their lives, ultimately glorifying God through joyful engagement.

Old Testament Bible Games

Old Testament Bible games for youth, often found as PDFs, bring stories of Abraham, Moses, and Psalms to life through interactive fun!

These resources enhance learning and engagement.

Genesis-Based Games

Genesis-based games, frequently available as downloadable PDFs, offer exciting ways for youth to explore the creation narrative and early biblical history.

Creation Story Sequencing challenges players to arrange events from Genesis 1 in the correct order, reinforcing their understanding of God’s creative acts.

Abraham’s Journey Map Game utilizes maps to trace Abraham’s travels, highlighting his faith and obedience.

These PDF resources often include printable game boards, question cards, and answer keys, making preparation simple for youth leaders.

They connect ancient stories with modern learning, fostering a deeper appreciation for the foundations of faith.

Creation Story Sequencing

Creation Story Sequencing is a popular PDF-based game, ideal for youth to grasp the order of events in Genesis 1.

This activity typically involves printable cards, each depicting a stage of creation – light, land, sea, plants, sun, moon, stars, creatures, and humanity.

Players must arrange these cards in the correct sequence, referencing the biblical text to confirm their order.

Variations include timed challenges or team competitions, adding an element of excitement.

The PDF often includes an answer key for easy verification, reinforcing accurate comprehension of God’s creative process.

Abraham’s Journey Map Game

Abraham’s Journey Map Game, frequently found as a PDF download, visually traces the pivotal travels of Abraham as described in Genesis.

The game utilizes a map of the ancient Near East, with key locations like Ur, Haran, Canaan, and Egypt marked or needing to be identified.

Youth are tasked with plotting Abraham’s route, often using cards with events or prompts related to his journey.

This reinforces understanding of his obedience to God and the establishment of the Hebrew lineage.

PDF versions often include historical context and discussion questions, enriching the learning experience.

Psalms-Based Games

Psalms-Based Games, readily available as PDF resources, leverage the poetic and emotional depth of the Book of Psalms for youth engagement.

These games often center around themes of praise, trust, repentance, and God’s protection, as exemplified in Psalm 91.

Activities range from scripture memorization challenges to creative expression, like writing their own psalm verses or illustrating key imagery.

PDF downloads frequently include pre-made game boards, question sets, and devotional prompts.

The goal is to help youth connect with the personal and spiritual relevance of the Psalms in their own lives.

Psalm 91 Challenge: “My Refuge” Scavenger Hunt

This “My Refuge” Scavenger Hunt, often found in Bible games for youth PDFs, centers around Psalm 91’s themes of safety and trust in God.

Clues are hidden, each referencing a verse from Psalm 91, leading participants to discover “refuges” – designated safe zones.

Each refuge requires a challenge, like reciting a verse or answering a question about God’s protection.

PDF resources provide pre-written clues and refuge locations, simplifying setup.

The hunt reinforces the idea that God is a constant source of comfort and security, mirroring the psalm’s message of dwelling in His shelter.

Memorization Games with Psalm Verses

Bible games for youth PDFs frequently include memorization activities centered on Psalms, particularly Psalm 91.

These games range from simple flashcards to more complex challenges like “Verse Relay Races” or “Memory Match.”

Variations involve filling in missing words, sequencing verses, or reciting from memory after a distraction.

PDF resources often provide printable verse cards and game instructions.

The goal is to internalize God’s promises, fostering a deeper connection with scripture and strengthening faith through repeated exposure and recall.

Story of Moses Games

Bible games for youth PDFs often feature engaging activities based on the epic story of Moses.

These resources creatively retell the Exodus narrative, focusing on key events like the burning bush, the plagues, and the parting of the Red Sea.

Games might include sequencing the story, character role-playing, or trivia questions about Moses’ life and leadership.

PDF downloads frequently offer printable props and game boards to enhance the immersive experience.

These games aim to help young people understand God’s power, faithfulness, and deliverance throughout the story of Moses.

Escape from Egypt Obstacle Course

A thrilling Bible games for youth PDF activity, the “Escape from Egypt” obstacle course, vividly recreates the Israelites’ flight from Pharaoh.

Participants navigate challenges symbolizing the plagues – a “river” to cross (blue tarp), “walls of water” to part (cones), and “Pharaoh’s army” to evade (tagging game).

PDF instructions detail setup, safety guidelines, and biblical references to enhance learning.

This active game emphasizes teamwork, problem-solving, and the miraculous nature of God’s deliverance.

It’s a memorable way for youth to experience the story of Exodus and appreciate the Israelites’ journey to freedom.

Ten Commandments Trivia

Engage youth with a dynamic Bible games for youth PDF – “Ten Commandments Trivia!” This game tests knowledge of God’s laws as given to Moses.

PDF materials include multiple-choice and true/false questions covering each commandment, fostering understanding of their meaning and relevance.

Teams or individuals compete, earning points for correct answers, promoting friendly competition and biblical literacy.

Questions can range in difficulty, catering to various age groups and knowledge levels.

This trivia game reinforces the importance of moral principles and God’s expectations for His people, making learning fun and impactful.

New Testament Bible Games

New Testament Bible games for youth PDF resources bring Jesus’ life and Paul’s journeys to life!

Interactive activities, like Pictionary and map challenges, enhance learning and engagement with scripture.

Life of Jesus Games

Life of Jesus games for youth, often found as readily available PDF downloads, offer engaging ways to explore His ministry. Parable Pictionary encourages creative interpretation of Jesus’ teachings, fostering discussion and understanding.

The Miracle Matching Game reinforces knowledge of the incredible acts performed by Jesus, solidifying biblical literacy. These games, alongside resources like eBible, transform learning into an interactive experience.

They help young people connect with the stories and messages of the New Testament in a fun and memorable way, deepening their faith and understanding of Jesus’ impact.

Parable Pictionary

Parable Pictionary is a fantastic Bible game for youth, easily implemented with a printable PDF guide. Players draw scenes from Jesus’ parables – the Good Samaritan, the Prodigal Son, or the Sower – while others guess.

This game encourages creative interpretation of scripture and promotes discussion about the parable’s meaning. It’s a dynamic way to move beyond simply reading the text and actively engage with Jesus’ teachings.

Resources like eBible can supplement the game with background information, enhancing understanding and making learning fun for all age groups involved.

Miracle Matching Game

The Miracle Matching Game is a captivating Bible game for youth, often found as a downloadable PDF. Players match descriptions of Jesus’ miracles – healing the sick, calming the storm, feeding the 5,000 – with the corresponding Bible story.

This game reinforces knowledge of Jesus’ power and compassion, prompting discussion about faith and God’s intervention in our lives. Utilizing resources like eBible alongside the game provides deeper scriptural context.

It’s an engaging activity that encourages memorization and understanding of key New Testament events for various age groups.

Paul’s Missionary Journeys

Exploring Paul’s Missionary Journeys through Bible games for youth, often available as PDFs, brings the New Testament to life. These games typically involve tracing Paul’s routes on a map, identifying cities he visited, and understanding the challenges he faced spreading the Gospel.

Interactive activities, like “Letter Writing Challenge (as Paul),” encourage empathy and historical understanding. Resources like eBible can supplement the game, providing detailed scriptural accounts of each journey.

This fosters a deeper appreciation for Paul’s dedication and the early church’s expansion.

Map the Journeys Game

The “Map the Journeys Game,” frequently found within Bible games for youth PDFs, is a visually engaging activity. Players trace Paul’s missionary routes on a provided map, identifying key cities like Antioch, Philippi, and Ephesus.

This game reinforces geographical knowledge and highlights the vast distances Paul traveled to share his faith. PDF versions often include challenge questions about the people Paul encountered and the obstacles he overcame.

Utilizing resources like eBible alongside the game enhances understanding of the biblical context of each location.

Letter Writing Challenge (as Paul)

The “Letter Writing Challenge,” often included in Bible games for youth PDFs, encourages creative engagement with Paul’s epistles. Participants assume the role of Paul, composing letters to various churches or individuals he addressed.

This activity fosters a deeper understanding of Paul’s writing style, theological themes, and the challenges faced by early Christians. PDF resources may provide prompts or scenarios to guide letter content.

Integrating eBible for reference ensures scriptural accuracy and contextual relevance, enriching the learning experience.

Game Types & Formats

Bible games for youth PDFs offer diverse formats – trivia, active play, and digital options – enhancing engagement.

eBible integration supports interactive quizzes, adapting to various learning styles and age groups.

Bible Trivia Games

Bible trivia games, frequently found as PDF downloads, are a cornerstone of youth ministry resources. These games test knowledge of scripture in engaging ways, often utilizing multiple choice questions or true or false challenges.

Many PDFs are designed for varying difficulty levels, catering to different age groups and biblical understanding. Digital integration, like with eBible, allows for interactive quizzes and instant scoring, adding a modern twist to classic trivia.

These games reinforce learning, encourage teamwork, and provide a fun way to explore biblical narratives and characters, solidifying understanding of key concepts.

Multiple Choice Questions

Multiple choice questions are a staple within Bible games for youth PDF resources, offering a structured way to assess biblical knowledge. These questions typically present a verse or story element with several answer options, encouraging careful consideration of scripture.

PDF formats allow for easy printing and distribution, making them ideal for group settings. Digital versions, integrated with platforms like eBible, can provide instant feedback and scoring.

The format is adaptable for all ages, with question complexity adjusted accordingly, reinforcing learning and promoting a deeper engagement with biblical narratives.

True or False Challenges

True or False challenges are a simple yet effective component found within many Bible games for youth PDF packages. This format tests comprehension of biblical facts and stories, requiring participants to discern accuracy based on their understanding of scripture.

PDF versions facilitate easy gameplay in various settings, from Sunday school to youth group meetings. Utilizing resources like eBible can enhance the experience with immediate answer verification.

These challenges are easily adaptable for different age groups, fostering critical thinking and reinforcing key biblical concepts in an engaging manner.

Active & Outdoor Games

Active & Outdoor Games, often detailed in Bible games for youth PDF resources, transform learning into a physically engaging experience. These games encourage teamwork, energy expenditure, and a deeper connection with biblical narratives.

Bible Charades and Relay Races, for example, can illustrate stories from Genesis or the life of Jesus in a memorable way. Many PDF guides provide instructions and variations for different age groups and group sizes.

Integrating technology, like referencing stories within eBible, can add another layer of learning to these dynamic activities, promoting both faith and fitness.

Bible Charades

Bible Charades, a classic game frequently found in Bible games for youth PDF collections, brings scripture to life through non-verbal communication. Players act out biblical characters, events, or parables, challenging others to guess correctly.

This activity fosters creativity, teamwork, and a deeper understanding of biblical stories. PDF resources often include pre-made lists of charade ideas, categorized by Old or New Testament themes, simplifying preparation.

Consider incorporating elements from resources like eBible to ensure accurate portrayals and enhance the educational value of this engaging and interactive game.

Bible Relay Races

Bible Relay Races, commonly featured in Bible games for youth PDF downloads, inject energy and friendly competition into learning. Teams race to complete Bible-themed tasks, like assembling verses or answering trivia questions.

These races promote teamwork, quick thinking, and recall of biblical knowledge. PDF resources often provide detailed instructions, task cards, and scoring guidelines for easy implementation. Adapt challenges based on age groups, ensuring inclusivity.

Utilize resources like eBible for accurate verse references and to verify answers, enhancing the educational aspect of this dynamic and physically active game.

Digital Bible Games

Digital Bible Games, increasingly found alongside traditional Bible games for youth PDF resources, offer interactive learning experiences. These leverage technology – apps and online platforms – to engage young people with scripture in new ways.

eBible integration allows for interactive quizzes and challenges, testing knowledge in a dynamic format. Many PDF guides suggest utilizing Bible apps for collaborative games and personalized study. This approach caters to tech-savvy youth, making biblical learning accessible and appealing.

Digital games often incorporate multimedia elements, enhancing comprehension and retention of key biblical concepts.

eBible Integration for Quizzes

eBible’s features seamlessly integrate with Bible games for youth PDF materials, particularly for creating engaging quizzes. The platform allows youth leaders to import questions directly from PDF game guides, transforming static content into interactive assessments.

This functionality supports various quiz formats – multiple choice, true/false, and fill-in-the-blank – enhancing learning through active recall. eBible’s user-friendly interface simplifies quiz creation and administration, saving valuable time for ministry leaders.

Furthermore, instant scoring and feedback motivate participants, fostering a competitive yet supportive learning environment.

Using Bible Apps for Interactive Learning

Leveraging Bible apps alongside Bible games for youth PDF resources amplifies interactive learning. Many apps, like eBible, offer features that complement game-based activities, such as quick verse lookups and contextual information.

Youth can use apps to verify answers during trivia, explore passages referenced in scavenger hunts, or delve deeper into stories introduced through games. This blended approach caters to diverse learning styles and encourages independent study.

Apps also facilitate digital note-taking and sharing, fostering collaboration and discussion beyond the game session.

Resources for Bible Game PDFs

Bible games for youth PDF options are plentiful online! Websites offer free downloads, while others provide premium content.

eBible and similar platforms can also be sources for adaptable game materials.

Free Printable Bible Game PDFs

Finding free, printable Bible game PDFs for youth is surprisingly accessible! Numerous websites cater specifically to children’s ministry and Sunday school teachers, offering a wealth of resources. These often include trivia questions, crossword puzzles, word searches, and coloring pages centered around popular Bible stories like Creation (Genesis 1) and Abraham’s journey.

Many of these PDFs are designed for various age groups, ensuring age-appropriateness. You can discover engaging activities based on Psalms, like scavenger hunts referencing Psalm 91, or games focused on the life of Moses. Utilizing these free resources allows for cost-effective and creative youth engagement, supplementing lessons and reinforcing biblical teachings in a fun, interactive manner. Remember to always preview content for suitability.

Websites Offering Bible Game Downloads

Several websites specialize in providing downloadable Bible games for youth, often in PDF format. Ministry-to-children.com is a popular resource, offering a diverse range of free and premium games. Another excellent option is SundaySchoolCenter.com, boasting a large collection categorized by Bible story and age group.

For more interactive options, explore sites that integrate with digital Bibles like eBible, allowing for online quizzes and learning. These platforms frequently feature games centered around Genesis, Psalms, and the life of Jesus. Many sites also offer customizable templates, enabling you to create your own unique Bible-based challenges and activities.

Creating Your Own Bible Game PDFs

Designing your own Bible game PDFs allows for tailored engagement with youth. Start by selecting a biblical narrative – perhaps from Genesis or the Psalms – and determine learning objectives. Utilize readily available design software or online tools to create visually appealing game boards, trivia questions, or scavenger hunt clues.

Remember to align games with age appropriateness, ensuring content is both challenging and understandable. Consider incorporating elements from digital resources like eBible for interactive components. Finally, save your creation as a PDF for easy distribution and printing, fostering a personalized and impactful learning experience.

Adapting Games for Different Age Groups

Bible game PDFs require modification based on age; simpler rules for younger children, complex challenges for teens.

eBible’s features can be adjusted to suit varying comprehension levels and engagement styles.

Games for Younger Children (Ages 6-9)

Bible game PDFs for this age group should prioritize simplicity and visual appeal. Think coloring pages depicting scenes from Genesis, like creation, or simple matching games featuring animals from Noah’s Ark.

Focus on foundational stories – Adam and Eve, David and Goliath – using picture-based quizzes.

Obstacle courses mirroring the Israelites’ escape from Egypt, adapted for safety, are excellent. Keep rules minimal and emphasize participation over competition. Utilize readily available PDF printables focusing on Psalm 91’s comforting message.

eBible’s customizable features can aid in creating age-appropriate interactive quizzes, reinforcing key biblical concepts in a fun, engaging manner.

Games for Middle School Students (Ages 10-13)

Bible game PDFs for this age group can incorporate more complex challenges. Trivia games focusing on Abraham’s journey or the Ten Commandments, utilizing multiple-choice and true/false formats, are effective.

Map-based activities, charting Paul’s missionary journeys, encourage geographical and biblical understanding.

“Parable Pictionary” fosters creative interpretation of Jesus’ teachings. Encourage letter-writing exercises, mimicking Paul’s epistles, to explore biblical communication. Downloadable PDFs can provide structured activities.

Integrating eBible for interactive quizzes and scripture memorization adds a digital dimension, appealing to their tech-savviness.

Games for High School Students (Ages 14-18)

Bible game PDFs for high schoolers should encourage critical thinking and deeper engagement. Debates centered around biblical ethics, using scripture as evidence, are stimulating.

Complex trivia, demanding nuanced understanding of Old and New Testament narratives, proves challenging.

Analyzing Psalms for themes of refuge and trust, like Psalm 91, fosters personal reflection. Utilize PDF resources for in-depth character studies of figures like Abraham.

Integrating eBible for research and interactive learning, alongside digital quizzes, enhances their experience. Encourage adapting secular music to glorify God, mirroring David’s Psalms.

PDF

patiowell 10×10 shed instructions pdf

Patiowell 10×10 Shed Instructions PDF: A Comprehensive Guide

Navigating the assembly can be tricky; finding the Patiowell 10×10 shed instructions PDF online is crucial for a smooth‚ successful build experience.

Understanding the Patiowell 10×10 Shed Kit

The Patiowell 10×10 shed kit typically arrives as a collection of pre-cut wooden components‚ hardware‚ and detailed (hopefully!) instructions. Familiarizing yourself with the kit’s contents before starting assembly is paramount. Expect wall panels‚ roof rafters‚ sheathing‚ siding‚ a door kit‚ and potentially window components.

Understanding the labeling system used for parts – often alphanumeric – will save considerable frustration. The included PDF instructions‚ though sometimes challenging to decipher‚ are your primary guide. Knowing what to expect within the box minimizes delays and ensures a more efficient building process‚ ultimately leading to a sturdy and functional shed.

Locating the Patiowell 10×10 Shed Instructions PDF

Finding the official Patiowell 10×10 shed instructions PDF can sometimes prove unexpectedly difficult. Start by checking the box the kit arrived in – a printed QR code often links directly to the digital manual. If absent‚ a thorough search on Patiowell’s official website is essential.

Alternatively‚ utilize search engines with specific keywords like “Patiowell 10×10 shed assembly instructions PDF.” Be cautious of unofficial sources; prioritize downloads from Patiowell directly to ensure accuracy and avoid potentially outdated or incorrect guides. Having the correct PDF is vital for proper assembly.

Pre-Assembly Preparation

Before commencing construction‚ meticulous pre-assembly preparation is paramount for a stress-free Patiowell 10×10 shed build. This begins with a comprehensive inventory of all parts‚ cross-referencing against the parts list in the instructions PDF. Simultaneously‚ gather the necessary tools – drills‚ screwdrivers‚ levels‚ and safety gear.

Crucially‚ prepare the build site‚ ensuring a level foundation. Proper preparation minimizes errors and ensures structural integrity‚ ultimately saving time and frustration during the assembly process.

Inventory of Parts

A thorough inventory is the first step; carefully unpack and compare all components against the detailed parts list within the Patiowell 10×10 shed instructions PDF. Verify quantities of wall panels‚ roof rafters‚ siding‚ hardware (screws‚ nails‚ brackets)‚ and the door kit.

Note any discrepancies immediately – missing or damaged parts should be reported to Patiowell customer support before proceeding. Accurate inventory prevents mid-build delays and ensures a complete‚ structurally sound shed.

Tools Required for Assembly

Preparation is key for efficient construction; the Patiowell 10×10 shed instructions PDF outlines essential tools. You’ll need a drill/driver with various bits‚ a level (spirit or laser)‚ a measuring tape‚ a hammer‚ and a circular saw or hand saw for minor adjustments.

Safety glasses and work gloves are crucial. A square ensures accurate angles‚ while a wrench set assists with hardware tightening. Having these tools ready streamlines the assembly process significantly.

Site Preparation & Foundation

A solid base ensures shed longevity; the Patiowell 10×10 shed instructions PDF emphasizes proper site preparation. Choose a level location‚ clear of debris and vegetation. Accurate measurements are vital for a square foundation.

Consider drainage to prevent water damage. The foundation must support the shed’s weight. Options include gravel‚ concrete‚ or wooden skids – each detailed within the PDF. Proper preparation prevents future structural issues and ensures stability;

Foundation Options for the 10×10 Shed

The Patiowell 10×10 shed instructions PDF details several foundation choices. A gravel foundation offers good drainage and is cost-effective‚ requiring a compacted base. Concrete slab foundations provide maximum stability but are more labor-intensive.

Wooden skid foundations are suitable for temporary structures or uneven ground. The PDF outlines material lists and step-by-step guides for each option‚ emphasizing the importance of a level and stable base for long-term shed integrity.

Gravel Foundation

The Patiowell 10×10 shed instructions PDF recommends a minimum of four inches of compacted gravel for a stable base. Begin by excavating the area‚ then lay down landscape fabric to prevent weed growth. Add gravel in layers‚ compacting each layer thoroughly with a plate compactor.

Ensure the gravel bed is level before proceeding with frame assembly. This foundation type offers excellent drainage and is relatively inexpensive‚ making it a popular choice for shed construction.

Concrete Slab Foundation

According to the Patiowell 10×10 shed instructions PDF‚ a concrete slab provides the most durable and level foundation. Pour a slab at least four inches thick‚ reinforced with rebar for added strength. Proper preparation is key – ensure the ground is compacted and level before pouring.

Allow the concrete to cure completely before beginning shed assembly. This method requires more effort and expense but offers superior long-term stability and resistance to settling.

Wooden Skid Foundation

The Patiowell 10×10 shed instructions PDF details a wooden skid foundation as a cost-effective and relatively simple option. Construct a frame using pressure-treated lumber‚ ensuring it’s level and square. This allows for easier relocation of the shed if needed.

Place gravel underneath the skids for drainage and stability. Regularly inspect the wood for rot or damage‚ as this foundation type is more susceptible to moisture-related issues than concrete.

Shed Frame Assembly

The Patiowell 10×10 shed instructions PDF emphasizes careful frame assembly as the foundation for structural integrity. Begin with the base frame‚ ensuring square corners and secure connections using provided hardware. Next‚ construct the wall frames‚ following the diagrams precisely.

Pay close attention to door and window openings. The PDF will guide you through rafter installation‚ crucial for roof support. Accurate measurements and proper alignment are vital throughout this stage.

Wall Frame Construction

The Patiowell 10×10 shed instructions PDF details wall frame construction‚ starting with assembling the side and end wall frames individually. Use the provided lumber and connectors‚ ensuring precise measurements as indicated in the diagrams.

Pay close attention to stud spacing and top/bottom plate alignment. The PDF stresses the importance of pre-drilling holes to prevent splitting the wood. Once assembled‚ temporarily brace the frames for stability before proceeding to the next step.

Roof Rafter Installation

The Patiowell 10×10 shed instructions PDF guides you through roof rafter installation‚ emphasizing accurate spacing and secure attachment to the wall frames. Begin by identifying the rafter angle and cutting the ends accordingly.

The PDF highlights using appropriate fasteners and ensuring rafters are plumb and level. Temporary bracing is crucial for stability during installation. Pay attention to the ridge board connection‚ as it’s vital for roof integrity. Following the diagram closely is essential for a structurally sound roof.

Door Frame Installation

The Patiowell 10×10 shed instructions PDF details door frame installation‚ stressing the importance of a square and plumb setup. Begin by assembling the door frame on a flat surface‚ ensuring accurate dimensions. The PDF emphasizes using shims to achieve perfect alignment within the wall opening.

Secure the frame with screws‚ referencing the diagram for correct placement; Proper installation prevents door binding and ensures smooth operation. Double-check measurements before permanently fixing the frame to the shed’s structure.

Wall Panel Installation

The Patiowell 10×10 shed instructions PDF guides users through wall panel installation‚ highlighting the need for a helper due to panel size and weight; Begin by carefully lifting each panel into position‚ aligning it with the assembled frame. The PDF stresses using screws to securely attach the panels‚ following the specified pattern.

Maintaining squareness is critical; utilize temporary bracing to ensure walls remain plumb during attachment. Consistent screw placement guarantees structural integrity and a professional finish.

Attaching Wall Panels to the Frame

According to the Patiowell 10×10 shed instructions PDF‚ attaching wall panels requires precision. Start by positioning the panel against the frame‚ ensuring a flush fit. The manual details specific screw types and placement – typically spaced every 6-8 inches along studs and top/bottom plates.

Pre-drilling pilot holes is recommended to prevent splitting the wood. The PDF emphasizes using a level to confirm vertical alignment before fully securing each panel‚ contributing to overall shed stability.

Ensuring Squareness and Alignment

The Patiowell 10×10 shed instructions PDF stresses the importance of a square structure. Utilize the 3-4-5 triangle method – measuring diagonally from corner to corner – to verify squareness before fully securing wall panels. Any discrepancy indicates a need for adjustment.

Consistent alignment is achieved by frequently checking with a level and plumb bob during panel attachment. The PDF highlights that a slightly out-of-square shed can cause roofing and door installation issues later on.

Roofing Installation

The Patiowell 10×10 shed instructions PDF details a two-stage roofing process. First‚ install the roof sheathing‚ ensuring proper overlap and secure fastening to the rafters‚ as illustrated in the diagrams.

Next‚ apply your chosen roofing material – shingles or metal – following the PDF’s specific guidance for overlap‚ nailing patterns‚ and sealing. Proper installation prevents leaks and ensures long-term weather protection. The manual emphasizes careful measurement and cutting for a neat finish.

Installing Roof Sheathing

The Patiowell 10×10 shed instructions PDF clearly outlines sheathing installation. Begin by laying plywood sheets perpendicularly to the rafters‚ ensuring a slight overhang on all sides for drip edge attachment.

Secure each sheet with nails or screws‚ spaced according to the manual’s specifications – typically 6 inches along the edges and 12 inches in the field. Stagger the seams for added strength and stability. Precise alignment is crucial for a level roofing surface.

Applying Roofing Material (Shingles/Metal)

The Patiowell 10×10 shed instructions PDF details roofing material application. Start at the bottom edge‚ overlapping each row according to the material’s guidelines – typically exposing 3-5 inches. Secure shingles with roofing nails‚ driven straight and flush.

For metal roofing‚ follow the manufacturer’s instructions for panel overlap and fastener placement. Proper sealing around vents and chimneys is vital to prevent leaks. Careful adherence to the PDF’s diagrams ensures a weatherproof roof.

Door Installation

The Patiowell 10×10 shed instructions PDF guides door installation‚ beginning with hanging the door within the prepared frame. Ensure proper alignment and smooth swing before securing hinges. Adjustments may be needed for a flush fit.

Next‚ install door hardware – latch‚ handle‚ and potentially a lock. The PDF provides specific placement details for these components. A properly installed door is crucial for security and weather protection‚ so follow the instructions closely for optimal results.

Hanging the Shed Door

Referring to the Patiowell 10×10 shed instructions PDF‚ carefully position the door within the door frame. Align the hinges with the pre-drilled holes‚ ensuring a snug fit. Secure the hinges using the provided screws‚ starting with the top hinge for initial support.

Test the door’s swing‚ making adjustments as needed to achieve smooth operation. The PDF emphasizes checking for squareness and levelness before fully tightening all screws. A properly hung door prevents drafts and ensures secure closure.

Installing Door Hardware (Latch‚ Handle)

The Patiowell 10×10 shed instructions PDF details hardware installation. Begin by marking the latch and handle positions on the door‚ referencing the provided diagrams. Drill pilot holes before attaching the hardware with screws‚ preventing wood splitting;

Ensure the latch aligns correctly with the strike plate on the door frame for secure closure. Test the handle and latch functionality repeatedly. Tighten all screws firmly‚ but avoid over-tightening‚ which could damage the wood or strip the screw holes.

Window Installation (If Applicable)

The Patiowell 10×10 shed instructions PDF guides window installation‚ if your kit includes them. Carefully prepare the window openings in the wall panels‚ ensuring accurate dimensions. Apply a bead of sealant around the window frame before inserting it into the opening.

Secure the window with screws‚ checking for squareness and plumb. Insulate around the window frame with expanding foam to prevent drafts and moisture intrusion. Finally‚ test the window’s operation and apply any finishing trim.

Preparing Window Openings

Referring to the Patiowell 10×10 shed instructions PDF is vital when preparing window openings. Accurately mark the designated areas on the wall panels‚ using a level to ensure straight lines. Carefully cut out the openings with a saw‚ following the PDF’s specified dimensions.

Reinforce the edges of the openings with additional framing lumber for structural support. Ensure the openings are sized correctly to accommodate the windows‚ allowing for a snug fit and proper sealing.

Securing Windows in Place

The Patiowell 10×10 shed instructions PDF details window installation. Carefully position the windows within the prepared openings‚ ensuring they are square and level. Utilize shims to achieve a perfect fit and support the window frame.

Secure the windows using screws or nails‚ as indicated in the PDF‚ driving them into the framing lumber. Apply a weatherproof sealant around the window perimeter to prevent water infiltration and drafts‚ guaranteeing a durable‚ airtight seal.

Siding Installation

The Patiowell 10×10 shed instructions PDF guides siding attachment. Begin at the bottom‚ aligning the first siding panel carefully. Overlap each subsequent panel according to the PDF’s specifications‚ ensuring a weather-resistant barrier.

Secure the siding using nails or screws‚ maintaining consistent spacing. Pay close attention to corner and edge treatments‚ following the diagram in the PDF. Proper installation prevents moisture damage and enhances the shed’s aesthetic appeal‚ creating a finished look.

Attaching Siding Panels

Referring to the Patiowell 10×10 shed instructions PDF is vital for correct siding attachment. Start at the base‚ ensuring panels are level and square before securing. The PDF details nail or screw placement – typically spaced every 12-16 inches along studs.

Maintain consistent overlap as shown in the diagrams. Pre-drilling can prevent splitting‚ especially with harder wood siding. Careful attachment ensures a weatherproof and structurally sound exterior‚ protecting your shed’s contents from the elements.

Overlapping and Securing Siding

The Patiowell 10×10 shed instructions PDF emphasizes proper overlapping for weather resistance. Typically‚ siding panels overlap by at least one inch‚ creating a shingle-like effect to shed water effectively. Secure each panel using the specified fasteners – nails or screws – detailed in the manual.

Ensure fasteners penetrate the siding and stud framing. Consistent overlap and secure attachment prevent gaps and potential water damage‚ maintaining the shed’s structural integrity and protecting stored items.

Troubleshooting Common Assembly Issues

The Patiowell 10×10 shed instructions PDF often addresses common hurdles. Misaligned parts are frequent; double-check connections and loosen bolts for adjustments. Roofing leaks can occur if sheathing isn’t properly sealed – apply roofing cement as needed.

Payment issues or account discrepancies with Audible can disrupt focus; resolve those separately. Refer to the PDF’s diagrams and re-examine steps if encountering difficulties. Patience and careful review are key to overcoming assembly challenges.

Dealing with Misaligned Parts

The Patiowell 10×10 shed instructions PDF highlights that slight misalignments are common during assembly. Don’t force connections! Loosen previously tightened bolts on adjacent sections to allow for adjustment. Gently nudge parts into place‚ ensuring they fit flush before re-tightening.

If significant misalignment persists‚ double-check the orientation of each piece against the diagrams. A stable foundation is crucial; uneven ground exacerbates alignment issues. Remember to pause Audible subscriptions if shed building consumes your time!

Addressing Roofing Leaks

The Patiowell 10×10 shed instructions PDF emphasizes careful roofing installation to prevent leaks. Ensure proper overlap of shingles or metal panels‚ following the specified guidelines. Inspect all seams and nail/screw placements for secure fastening. Apply roofing sealant around vents‚ chimneys‚ or any penetrations.

If leaks occur‚ immediately locate the source and re-seal. Consider pausing your Audible subscription for focused repairs; a quiet workspace aids concentration. Check for damaged roofing materials needing replacement.

Post-Assembly Maintenance

The Patiowell 10×10 shed instructions PDF recommends regular inspections to maintain structural integrity. Check for loose screws‚ damaged siding‚ and roof issues annually. Apply wood treatment to protect against rot and insects‚ extending the shed’s lifespan.

While maintaining your shed‚ consider an Audible subscription for enjoyable work companionship! Listen to DIY audiobooks during upkeep. Address any concerns promptly to avoid costly repairs‚ and ensure continued protection of your stored items.

Regular Inspections

Following the Patiowell 10×10 shed instructions PDF‚ conduct inspections at least twice yearly – spring and fall. Examine the roof for leaks‚ siding for damage‚ and the door for proper alignment. Check all screws and bolts‚ tightening as needed.

During these checks‚ an Audible audiobook can make the task more pleasant! Look for potential issues early to prevent larger problems. Consistent upkeep‚ paired with engaging audio content‚ ensures a long-lasting‚ secure shed.

Wood Treatment and Protection

As detailed in the Patiowell 10×10 shed instructions PDF‚ protect the wood with a quality sealant or stain annually. This shields against moisture‚ UV damage‚ and insect infestation. Consider a wood preservative for enhanced longevity‚ especially for the base.

While applying treatment‚ listen to an Audible audiobook for motivation! Proper wood care‚ combined with enjoyable audio‚ extends the shed’s life and maintains its structural integrity‚ saving future repair costs.

Audible Subscription Issues Related to Shed Building (Time Management)

Building a Patiowell 10×10 shed demands significant time. An Audible subscription can provide engaging company during repetitive tasks‚ but construction delays might disrupt listening schedules. Pausing or cancelling subscriptions‚ as many users explore‚ can alleviate financial strain when unexpected shed expenses arise.

Prioritize shed completion; consider pausing Audible to focus‚ then resume enjoying audiobooks post-build. Efficient time management is key!

Audible Account Access During Shed Construction (Mobile App Issues)

Shed building often occurs outdoors‚ potentially impacting mobile data connectivity. Users report difficulties accessing their Audible accounts or downloading audiobooks via the mobile app due to unstable networks. Accessing Audible through a web browser on a stable Wi-Fi connection is recommended when app access fails.

Ensure the Audible app is updated; outdated versions can exacerbate connectivity problems. Verify login credentials if account access is denied.

Cancelling Audible Subscriptions for Financial Flexibility (Shed Costs)

Shed construction can be a significant expense‚ prompting some builders to reassess discretionary spending. Cancelling an Audible subscription frees up funds for materials like lumber‚ roofing‚ and hardware. Users seeking cancellation guidance often find it easier to manage their Audible account through the Amazon website‚ rather than the mobile app.

Cancellation doesn’t affect the primary Amazon account.

Audible Credit Usage & Shed Building Resources (Audiobooks on DIY)

While assembling a Patiowell shed‚ consider utilizing Audible credits for DIY-focused audiobooks. Many resources cover carpentry‚ construction techniques‚ and project management – skills directly applicable to shed building. Despite credit availability issues reported by some users‚ exploring relevant audiobooks can enhance the building process.

Credits can provide valuable knowledge during construction.

Audible Payment Issues & Shed Material Purchases (Credit Card Verification)

Unexpected Audible payment problems can disrupt audiobook access while funding Patiowell shed materials. Users sometimes encounter credit card verification delays or interruptions‚ potentially impacting resource availability during construction. Ensure your Audible payment method is current and verified to avoid issues.

A new card may trigger extra verification steps‚ delaying access to helpful DIY audiobooks.

Audible App Updates & Shed Instruction PDF Access (Connectivity)

A stable internet connection is vital for both Audible app functionality and downloading the Patiowell 10×10 shed instructions PDF. Outdated apps can cause connectivity issues‚ hindering access to audiobooks offering building guidance. Confirm the Audible app on your device is updated to the latest version.

Poor network connections can also impede PDF downloads‚ delaying shed construction progress.

Audible Refund Requests & Unexpected Shed Expenses (Charge Disputes)

Unexpected costs during shed building can strain finances‚ potentially leading to Audible subscription charge disputes. If facing financial hardship due to unforeseen shed expenses‚ explore Audible’s refund policies carefully.

Document all shed-related costs and Audible charges for potential dispute resolution. Remember‚ accessing the Patiowell 10×10 shed instructions PDF is free‚ but materials aren’t!

PDF

goodman capacitor chart pdf

Goodman Capacitor Charts & Information

Goodman capacitor charts detail standard sizes and codes, crucial for HVAC maintenance. A Goodman Capacitor Size Chart categorizes capacitance (µF) by equipment type and voltage.

Specifically, the CAP050450440CT (45/5 µF 440V) and CAP050450440RTS (5/45/440V) are frequently referenced models, alongside common sizes readily available online.

Goodman capacitors are essential components within HVAC systems, playing a vital role in both starting and running the compressor and fan motors. Understanding their function and specifications is paramount for effective maintenance and repair. These capacitors store electrical energy, delivering a boost when needed, and ensuring efficient operation of the air conditioning or heating unit.

A Goodman capacitor chart, often available as a PDF, serves as a critical reference tool. It details the various capacitor models, their corresponding capacitance values (measured in µF), and voltage ratings. Identifying the correct capacitor is crucial; using an incorrect one can lead to system malfunction or even damage. The charts help technicians and homeowners quickly locate the appropriate replacement capacitor based on the existing unit’s specifications.

Furthermore, Goodman offers both dual run and single run capacitors, each designed for specific applications within the HVAC system. Accessing a reliable Goodman capacitor chart PDF simplifies the selection process, ensuring compatibility and optimal performance.

Understanding Capacitor Size Charts

Goodman capacitor size charts, frequently found as downloadable PDFs, are organized to simplify the selection process. These charts typically list capacitors by their µF (microfarad) rating, indicating the amount of electrical energy they can store. Voltage ratings are also prominently displayed, crucial for matching the capacitor to the HVAC system’s requirements.

Understanding the dual-value nature of many Goodman capacitors is key. For example, a “45/5 µF” capacitor has two ratings for different functions – typically 45µF for the compressor and 5µF for the fan. The chart will clearly indicate these dual values. Charts also categorize capacitors by voltage, commonly 440V, ensuring safe and reliable operation.

When using a Goodman capacitor chart PDF, always verify that the replacement capacitor matches both the µF and voltage ratings of the original. Incorrect sizing can lead to inefficient performance or component failure.

Capacitor Codes and Terminology

Goodman capacitor codes, detailed in their charts and PDFs, follow a specific pattern. A typical code like “CAP050450440CT” breaks down as follows: “CAP” identifies it as a capacitor, “050” is a series identifier, “450440” represents the 45/5 µF rating at 440V, and “CT” denotes a specific construction type.

Key terminology includes “µF” (microfarad), the unit of capacitance; “Voltage” (V), indicating the maximum voltage the capacitor can handle; and “Dual Run,” signifying a capacitor used for both compressor and fan motors. Understanding these terms is vital when interpreting a Goodman capacitor chart PDF.

“RTS” in a code (like CAP050450440RTS) often indicates a rapid-start capacitor. Charts may also list “M” numbers (M4, M5, M6) referring to terminal configurations. Accurate decoding of these codes, using the chart as a guide, ensures correct replacement.

Goodman Capacitor Types

Goodman manufactures diverse capacitors, including dual run, single run, oil-filled, and film types. Charts detail specifications for each, aiding selection based on HVAC system requirements and PDF guides.

Dual Run Capacitors

Dual run capacitors, commonly found in Goodman HVAC systems, serve a critical function by providing the necessary electrical boost for both the compressor and the fan motor. These capacitors, like the frequently referenced CAP050450440CT (45/5 µF 440V), feature two separate capacitance ratings within a single unit – one for the compressor (typically higher µF) and one for the fan (lower µF).

Goodman capacitor charts, often available as PDFs, clearly illustrate these dual ratings, enabling accurate identification and replacement. Understanding these charts is vital, as using an incorrect capacitor can lead to system inefficiency or even component failure. The charts detail the µF values and voltage ratings necessary for optimal performance. When replacing a dual run capacitor, it’s crucial to match both the µF and voltage specifications precisely, ensuring compatibility with the specific Goodman HVAC model.

Furthermore, proper discharge procedures are essential before handling any capacitor, as they store a potentially dangerous electrical charge.

Single Run Capacitors

Single run capacitors, unlike their dual counterparts, are designed to support only one motor – typically the compressor in an HVAC system. While less common than dual run capacitors in some Goodman units, they are still essential components. Goodman capacitor charts, often found in PDF format, clearly delineate the specifications for these single-value capacitors, including the required capacitance (measured in µF) and voltage rating.

These charts are invaluable for ensuring correct replacement, as using a capacitor with an incorrect µF or voltage can severely impact system performance and potentially cause damage. Identifying the correct capacitor from the chart involves matching the existing capacitor’s markings with the corresponding values listed.

It’s important to note that even though they support only one motor, safety precautions regarding discharge procedures still apply before handling or replacing a single run capacitor. Accurate referencing of the Goodman capacitor chart is paramount for a successful repair.

Oil-Filled Capacitors

Oil-filled capacitors represent an older technology, though still encountered in some Goodman HVAC systems, particularly older models. These capacitors utilize oil as a dielectric, offering robust performance and reliability. However, they are generally larger and heavier than more modern film capacitors. Goodman capacitor charts, often available as downloadable PDFs, provide crucial specifications for these components.

When referencing a Goodman capacitor chart for oil-filled types, pay close attention to both the capacitance (µF) and voltage rating. These values are critical for ensuring compatibility and preventing system malfunctions. Due to the oil contained within, special care must be taken during handling and disposal, adhering to environmental regulations.

While increasingly replaced by film capacitors, understanding the specifications listed on the Goodman chart is vital when servicing or repairing older HVAC units utilizing this capacitor type. Proper identification is key to a successful replacement.

Film Capacitors

Film capacitors are increasingly prevalent in modern Goodman HVAC systems, offering a compact and efficient alternative to oil-filled designs. These capacitors utilize a thin plastic film as the dielectric, resulting in smaller size and lighter weight. Goodman capacitor charts, frequently found in PDF format, detail the specific characteristics of these components.

When consulting a Goodman capacitor chart for film capacitors, carefully note the capacitance (µF) and voltage rating. These parameters are essential for selecting a compatible replacement. Film capacitors generally exhibit lower equivalent series resistance (ESR) compared to oil-filled types, contributing to improved system efficiency.

The charts will also often indicate the operating temperature range and expected lifespan. Proper installation, guided by wiring diagrams, is crucial for optimal performance. Utilizing the correct specifications from the Goodman chart ensures reliable operation and prevents potential damage to the HVAC unit.

Goodman Capacitor Sizing

Goodman capacitor sizing relies on matching µF and voltage ratings to your HVAC unit, detailed in Goodman capacitor charts often available as PDFs.

Determining Correct Capacitance (µF)

Determining the correct capacitance, measured in microfarads (µF), is paramount for optimal HVAC system performance. Goodman capacitor charts, frequently found in PDF format online, are invaluable resources for this process. These charts correlate specific HVAC unit models with the appropriate µF values for both run and start capacitors.

Typically, a dual capacitor will display two µF ratings – one for the fan motor and one for the compressor. Incorrect capacitance can lead to issues like motor overheating, reduced efficiency, or even complete system failure. Always consult the Goodman capacitor chart specific to your unit’s model number.

If the original capacitor is unavailable, cross-reference charts can help identify compatible replacements from other manufacturers like Jard. However, ensure the replacement’s µF rating precisely matches the original specification. Slight deviations can negatively impact performance. Prioritize accuracy when selecting a replacement capacitor based on the chart’s guidance.

Voltage Ratings Explained

Voltage ratings on Goodman capacitors, typically expressed in Volts (V), indicate the maximum voltage the capacitor can safely handle. Goodman capacitor charts, often available as PDFs, clearly display these ratings alongside the capacitance values. It’s crucial to select a replacement capacitor with a voltage rating equal to or higher than the original.

Using a capacitor with a lower voltage rating is extremely dangerous and can lead to capacitor failure, potentially causing damage to the HVAC system and creating a fire hazard. A higher voltage rating is acceptable because the capacitor will only operate at the system’s voltage, but it must never be lower.

Common Goodman capacitor voltage ratings include 370V, 440V, and 460V. Always verify the correct voltage rating on the existing capacitor and consult the Goodman chart to ensure a safe and compatible replacement. Prioritize safety and adherence to the specified voltage.

Matching Capacitors to HVAC Unit Size

Matching the correct capacitor to your Goodman HVAC unit’s size is vital for optimal performance and efficiency. Goodman capacitor charts, frequently found as downloadable PDFs, correlate unit capacity (measured in tons) with the appropriate capacitance (µF) and voltage ratings.

Larger HVAC units generally require capacitors with higher µF values to provide the necessary starting and running power for the compressor and fan motors. Conversely, smaller units need lower µF values. Incorrect sizing can lead to inefficient operation, motor overheating, and premature component failure.

Always consult the unit’s service manual or a detailed Goodman capacitor chart to determine the precise specifications. When in doubt, referencing the original capacitor’s markings is a reliable method. Proper matching ensures the longevity and reliable operation of your HVAC system.

Goodman Capacitor Charts (Specific Models)

Goodman offers detailed charts for specific models like CAP050450440CT (45/5 µF 440V) and CAP050450440RTS (5/45/440V), often available as PDF downloads.

CAP050450440CT Chart (45/5 µF 440V)

The Goodman CAP050450440CT capacitor, rated at 45/5 µF and 440V, is a commonly used dual-run capacitor in many HVAC systems. Detailed charts, often found as downloadable PDFs, illustrate its specifications and applications;

These charts typically showcase the capacitor’s physical dimensions, terminal configurations, and performance characteristics. Understanding these details is vital for correct replacement. The 45/5 µF rating indicates two capacitance values within a single unit – 45 µF for the fan motor and 5 µF for the compressor.

The 440V rating signifies the maximum voltage the capacitor can safely handle. When replacing, always ensure the new capacitor matches or exceeds these specifications. Cross-reference guides, also available in PDF format, help identify compatible Jard or universal replacements, like the Jard 1279 455, ensuring seamless integration and optimal system performance.

CAP050450440RTS Chart (5/45/440V)

The Goodman CAP050450440RTS capacitor, a 5/45 µF 440V unit, is another frequently encountered dual-run capacitor. Comprehensive charts, often available as PDF downloads, provide essential technical information for proper identification and replacement.

These charts detail the capacitor’s physical attributes, including terminal arrangements and overall size. Crucially, the 5/45 µF designation signifies a reversed capacitance configuration compared to the CAP050450440CT – 5 µF for the compressor and 45 µF for the fan motor. Maintaining the correct configuration is paramount.

The 440V rating remains the maximum permissible voltage. PDF cross-reference guides assist in locating equivalent capacitors from brands like Jard, ensuring compatibility. Always verify the µF and voltage ratings before installation. Incorrect replacement can lead to system malfunction or damage, highlighting the importance of accurate chart interpretation.

Common Goodman Capacitor Sizes

Goodman HVAC systems utilize a range of capacitor sizes, with several configurations appearing frequently in service calls. Common sizes, detailed in readily available PDF charts, include 45/5 µF 440V (like the CAP050450440CT and RTS variants), 35/5 µF 440V, and 40/5 µF 440V. These are primarily dual-run capacitors, supporting both compressor and fan motor functions.

PDF charts often categorize sizes by tonnage, assisting technicians in selecting the appropriate replacement. Beyond these, 50/5 µF 440V and various single-run capacitors for specific fan or compressor applications are also prevalent. Accurate identification, using the markings on the existing capacitor and referencing a Goodman capacitor size chart PDF, is vital.

Understanding these common sizes streamlines the replacement process, minimizing downtime. Always prioritize matching both the µF and voltage ratings for optimal performance and system longevity.

Cross-Reference & Replacement

Goodman capacitors have equivalents from brands like Jard; a chart PDF helps identify compatible replacements; Universal capacitors can work, but verify µF and voltage match.

Jard Capacitor Equivalents

Jard capacitors frequently serve as direct replacements for Goodman models, offering a reliable and often readily available alternative. For instance, the Goodman CAP050450440CT (45/5 µF 440V) commonly cross-references with the Jard 1279 455 capacitor. Utilizing a Goodman capacitor chart PDF is invaluable when confirming these equivalencies, ensuring correct µF (microfarad) and voltage ratings.

However, always double-check the terminal configuration – ‘C’, ‘HERM’, and ‘FAN’ – to guarantee proper wiring. While many Jard models are functionally identical, subtle differences can exist. Online resources and HVAC forums often provide detailed cross-reference lists, supplementing the information found in official Goodman documentation. When sourcing replacements, prioritize OEM-approved suppliers or reputable HVAC parts distributors to ensure quality and compatibility. Incorrect capacitor selection can lead to HVAC system malfunction or damage.

Universal Capacitor Compatibility

While Goodman-specific capacitors are recommended, certain “universal” capacitors can function as replacements, provided they meet critical specifications. A detailed Goodman capacitor chart PDF is essential for verifying compatibility, focusing on µF (microfarad) rating, voltage tolerance, and terminal arrangement. Universal capacitors must precisely match the original’s capacitance – the 45/5 µF combination is common – and exceed the system’s voltage requirement (typically 440V).

However, be cautious; not all universal capacitors are created equal. Quality varies significantly, impacting lifespan and performance. Prioritize capacitors with similar temperature ratings and certifications. Always confirm the terminal markings (C, FAN, HERM) align with the existing wiring. Improper installation or mismatched specifications can damage the HVAC unit. Consulting an HVAC professional is advisable when considering universal replacements, especially for complex systems or if uncertainty exists regarding compatibility.

Finding Replacement Capacitors Online

Numerous online retailers specialize in HVAC components, offering a wide selection of Goodman capacitors and compatible replacements. Utilizing a Goodman capacitor chart PDF is crucial when searching online, ensuring you input the correct part number (e.g., CAP050450440CT, CAP050450440RTS) or equivalent specifications (µF/Voltage). Major e-commerce platforms like Amazon, eBay, and dedicated HVAC supply websites stock these parts.

Compare prices and shipping costs across multiple vendors. Read customer reviews to assess product quality and seller reliability. Be wary of significantly lower prices, as they may indicate counterfeit or substandard products. Verify the capacitor’s dimensions and terminal configuration match your existing unit before finalizing the purchase. Many sites offer cross-reference tools to identify compatible Jard or other brand equivalents. Always prioritize reputable suppliers and confirm return policies for peace of mind.

Troubleshooting & Installation

Goodman capacitor issues often require professional diagnosis; however, a Goodman capacitor chart PDF aids in identifying the correct replacement during installation or repair procedures.

Identifying a Bad Capacitor

Identifying a failing capacitor is crucial for HVAC system performance. Visual inspection is a starting point; bulging, leaking, or burning smells indicate a problem. However, these aren’t always present.

A Goodman capacitor chart PDF can assist in verifying the correct specifications of the existing capacitor before testing. Using a multimeter to check capacitance (µF) is essential. A reading significantly outside the range specified on the chart suggests failure.

Furthermore, a shorted capacitor will show near-zero resistance, while an open capacitor will display infinite resistance. Listen for humming or clicking sounds from the capacitor itself, as these can also indicate internal issues. Remember to always discharge the capacitor before handling or testing it for safety!

Consistent HVAC system failures, like the fan not starting or the unit overheating, can also point to a faulty capacitor needing replacement.

Safe Capacitor Discharge Procedures

Prioritizing safety is paramount when working with capacitors. They store electrical energy, even when the HVAC unit is off, posing a shock hazard. Before any inspection or replacement, complete discharge is mandatory.

Using a properly insulated screwdriver with a well-insulated handle, carefully short the capacitor terminals. A resistor (around 20,000 ohms, 5 watts) connected across the terminals provides a safer, controlled discharge. Referencing a Goodman capacitor chart PDF helps confirm voltage ratings before discharge.

Verify discharge with a multimeter, confirming zero voltage across the terminals. Repeat the process several times to ensure complete discharge. Never rely solely on visual inspection. Always wear appropriate personal protective equipment (PPE), including safety glasses and insulated gloves.

Improper discharge can damage the capacitor and, more importantly, cause severe injury. Treat every capacitor as if it’s fully charged until proven otherwise.

Wiring Diagrams & Connections

Correct wiring is crucial for proper HVAC operation and capacitor functionality. Dual run capacitors, commonly found in Goodman units, have three terminals: ‘C’ (Common), ‘FAN’, and ‘HERM’ (Hermetic). Understanding these connections is vital.

Wiring diagrams, often included in Goodman unit service manuals or available via a Goodman capacitor chart PDF search, illustrate the specific connections for each model. Typically, the ‘C’ terminal receives power, ‘FAN’ connects to the fan motor, and ‘HERM’ connects to the compressor.

Incorrect wiring can lead to motor failure, compressor damage, or even a fire hazard. Always disconnect power before working with wiring. Carefully label wires before disconnecting them to ensure correct reconnection. Double-check all connections against the diagram before restoring power.

If unsure, consult a qualified HVAC technician. Improperly connected capacitors will not function correctly and can cause significant damage;

Resources & Further Information

Explore the Goodman Manufacturing official website for detailed specifications and support. HVAC forums and online communities offer valuable insights and a Goodman capacitor chart PDF.

Goodman Manufacturing Official Website

Goodman’s official website serves as the primary resource for comprehensive information regarding their HVAC components, including capacitors. While a directly downloadable Goodman capacitor chart PDF isn’t always prominently featured, the site offers detailed specification sheets for individual capacitor models like CAP050450440CT and CAP050450440RTS;

Users can navigate the “Parts” or “Support” sections to locate technical documentation. This documentation often includes crucial details like capacitance (µF), voltage ratings, and physical dimensions, effectively functioning as a digital equivalent of a capacitor chart. Furthermore, the website provides access to installation manuals and troubleshooting guides, which may reference capacitor specifications.

For specific capacitor model numbers, utilizing the website’s search function is highly recommended. Goodman Manufacturing Company, L.P. reserves the right to update information, so regularly checking the site ensures access to the most current data. Direct contact with Goodman’s customer support can also yield specific capacitor charts or detailed model information.

HVAC Forums & Online Communities

HVAC-focused online forums and communities represent valuable, user-driven resources for locating a Goodman capacitor chart PDF and gaining practical insights. Technicians and DIY enthusiasts frequently share documents, including capacitor sizing charts and cross-reference guides, within these platforms. Discussions often center around specific Goodman models, like those utilizing CAP050450440CT or CAP050450440RTS capacitors.

These communities offer a space to ask questions and receive advice regarding capacitor selection and compatibility. Members often share their experiences with Jard capacitor equivalents and universal compatibility options. Searching forum archives using keywords like “Goodman capacitor chart,” “capacitor sizing,” or specific model numbers can quickly yield relevant results.

However, it’s crucial to verify information obtained from forums with official Goodman documentation or a qualified HVAC professional. User-submitted charts may not always be entirely accurate or up-to-date, so cross-referencing is essential for ensuring correct capacitor selection.

PDF

hanuman chalisa in hindi pdf

Hanuman Chalisa in Hindi PDF: A Comprehensive Guide (Updated December 13, 2025)

Discover readily available Hanuman Chalisa PDFs online, including options from radiovd․com, offering convenient access to this sacred text for devotional practice and study․

The Hanuman Chalisa, a devotional hymn dedicated to Lord Hanuman, holds immense significance in Hindu spirituality․ Finding a reliable Hanuman Chalisa in Hindi PDF format allows devotees convenient access for daily recitation and study․

This 40-verse poem, penned by Tulsidas, beautifully narrates the qualities and heroic deeds of Hanuman, the epitome of devotion, strength, and selfless service․ Many seek the PDF version for portability and ease of learning․

Digital copies facilitate consistent practice, enabling individuals to connect with the divine energy of Hanuman regardless of location․ Numerous online resources, like radiovd․com, provide downloadable PDFs, catering to a wide audience seeking spiritual enrichment through this powerful hymn․

What is the Hanuman Chalisa?

The Hanuman Chalisa is a Hindu devotional hymn consisting of forty verses (chaupais) celebrating Lord Hanuman․ A Hanuman Chalisa in Hindi PDF presents these verses in their original language, allowing for authentic recitation and understanding․

Each verse praises Hanuman’s strength, courage, devotion, and unwavering loyalty to Lord Rama․ The poem isn’t merely a recounting of his feats; it’s a powerful mantra believed to invoke his blessings․

Accessing the Chalisa as a PDF, such as those found on sites like radiovd․com, offers a practical way to engage with this sacred text․ It’s a tool for spiritual practice, offering solace, strength, and a deeper connection to Hindu faith and mythology․

The Significance of Reciting the Hanuman Chalisa

Reciting the Hanuman Chalisa, especially from a Hanuman Chalisa in Hindi PDF, holds immense spiritual weight for devotees․ It’s believed to bestow strength, courage, and devotion, mirroring Hanuman’s own qualities․

Regular recitation is thought to remove obstacles, protect against negative energies, and foster a sense of peace and well-being․ The verses, when chanted with sincerity, are considered a powerful form of prayer․

Many find solace and guidance within the Chalisa’s verses․ Utilizing a PDF version, readily available online, allows for consistent practice and deeper engagement with this revered hymn, fostering a stronger connection to Hanuman’s divine energy․

Historical Background of the Hanuman Chalisa

The Hanuman Chalisa’s origins are deeply rooted in the Bhakti movement of 16th-century India․ While the exact date remains debated, it’s widely accepted that the hymn was composed by Tulsidas, a renowned poet and devotee of Lord Rama․

Accessing a Hanuman Chalisa in Hindi PDF allows modern readers to connect with this historical devotional piece․ The Chalisa emerged during a period of significant religious and cultural transformation, reflecting the widespread devotion to Hanuman․

Its enduring popularity speaks to its timeless message of devotion, courage, and selfless service․ The PDF format ensures its preservation and accessibility for generations to come, maintaining its historical and spiritual relevance․

Tulsidas and the Composition of the Hanuman Chalisa

Explore the profound connection between Tulsidas and the creation of the Hanuman Chalisa, readily available in Hindi PDF format for devotional study․

Tulsidas: The Author

Goswami Tulsidas, a revered poet and saint, is celebrated as the author of the Hanuman Chalisa․ His devotion to Lord Rama is legendary, and the Chalisa is considered a testament to his unwavering faith․ Finding a Hanuman Chalisa in Hindi PDF allows access to his original verses․

Born in the 16th century, Tulsidas’s life was deeply rooted in spirituality․ He composed numerous devotional works, including the Ramcharitmanas, but the Chalisa holds a special place due to its concise and powerful nature․ Many online resources, like those offering Hanuman Chalisa PDF downloads, acknowledge his authorship․

His literary contributions continue to inspire millions, and the accessibility of the Hanuman Chalisa in Hindi PDF format ensures his teachings reach a wider audience, fostering devotion and spiritual growth․

The Time Period of Composition

Determining the precise date of the Hanuman Chalisa’s composition remains a subject of scholarly discussion, generally placed in the 16th or 17th century․ This timeframe aligns with Tulsidas’s lifespan and prolific writing period․ Accessing a Hanuman Chalisa in Hindi PDF allows one to connect with a text rooted in this historical context․

While definitive proof is elusive, most sources agree the Chalisa was likely composed after Tulsidas completed the Ramcharitmanas․ The availability of Hanuman Chalisa PDF versions online doesn’t pinpoint the exact date, but preserves the work for future generations․

Understanding this period enhances appreciation for the cultural and religious landscape that shaped the Chalisa, making the Hanuman Chalisa in Hindi PDF a valuable historical and spiritual resource․

The Inspiration Behind Writing the Chalisa

Tulsidas’s deep devotion to Lord Hanuman served as the primary inspiration for composing the Hanuman Chalisa․ Legend suggests he wrote it while facing personal hardships, seeking Hanuman’s strength and grace․ Studying a Hanuman Chalisa in Hindi PDF reveals the profound bhakti (devotion) woven into each verse․

The Chalisa wasn’t merely a literary creation; it was a heartfelt prayer born from genuine faith․ Downloading a Hanuman Chalisa PDF allows individuals to experience this devotional energy firsthand․ Tulsidas aimed to encapsulate Hanuman’s virtues and power in a concise, accessible form․

The Hanuman Chalisa in Hindi PDF stands as a testament to the transformative power of devotion, offering solace and inspiration to countless devotees through the ages․

Understanding the Structure of the Hanuman Chalisa

Explore the Chalisa’s 40 verses (chaupais) within a Hanuman Chalisa in Hindi PDF, noting its specific meter, rhythm (chhand), and beautiful Hindi language style․

The 40 Verses (Chaupais)

Delve into the heart of the Hanuman Chalisa in Hindi PDF – its forty verses, known as chaupais․ Each chaupai meticulously narrates aspects of Hanuman’s life, devotion, and unparalleled strength․ A PDF format allows for focused study of these individual verses, revealing layers of meaning․

These verses aren’t simply descriptive; they are potent mantras․ Examining a Hanuman Chalisa in Hindi PDF reveals the consistent structure of each chaupai, contributing to the overall rhythmic flow․ The verses progressively build a vivid portrait of Hanuman, culminating in a powerful expression of devotion and a plea for blessings․ Readers can easily follow along and understand the narrative within the PDF document․

The PDF format facilitates deeper engagement with each individual chaupai, aiding in memorization and contemplation․

The Meter and Rhythm (Chhand)

Explore the musicality embedded within the Hanuman Chalisa in Hindi PDF through its specific meter and rhythm, known as chhand․ The Chalisa is primarily composed in the chaupai meter, a quatrain with a consistent rhythmic pattern․ A PDF version allows for visual analysis of this structure, highlighting the syllable count and arrangement in each line․

This rhythmic consistency isn’t merely aesthetic; it’s believed to enhance the meditative quality of recitation․ Studying a Hanuman Chalisa in Hindi PDF reveals how the chhand contributes to the poem’s flow and memorability․ The predictable rhythm aids in focused chanting and deeper absorption of the verses’ meaning․

The PDF format preserves the original rhythmic structure, crucial for authentic recitation and experiencing the Chalisa’s full spiritual impact․

The Language and Style (Hindi)

Delve into the beauty of the Hanuman Chalisa in Hindi PDF, appreciating its refined and accessible Hindi language․ Tulsidas employs a blend of Awadhi and Sanskrit-influenced Hindi, creating a style that is both poetic and devotional․ A PDF allows close examination of the original script, revealing the nuances of the language used․

The language is characterized by its simplicity and clarity, making the Chalisa understandable to a wide audience․ However, it also incorporates rich imagery and metaphors, enhancing its spiritual depth․ Accessing a Hanuman Chalisa in Hindi PDF provides an opportunity to study the specific vocabulary and grammatical structures employed by Tulsidas․

The stylistic choices contribute significantly to the Chalisa’s enduring popularity and its power to evoke devotion․

Hanuman Chalisa in Hindi PDF: Accessing and Downloading

Explore numerous online resources, like radiovd․com, to easily download a Hanuman Chalisa in Hindi PDF for convenient reading and personal devotion․

Reliable Sources for PDF Downloads

Finding a trustworthy source for your Hanuman Chalisa in Hindi PDF is crucial for ensuring authenticity and a clear, accurate text․ Several websites offer downloadable PDFs, but caution is advised․ Radiovd․com is presented as a potential source, providing direct access to the Chalisa in PDF format․

However, it’s wise to cross-reference with other reputable spiritual websites or organizations dedicated to Hindu scriptures․ Look for sites affiliated with established temples or known scholars of the Hanuman Chalisa․ Before downloading, check user reviews or comments regarding the PDF’s quality and accuracy․ Always scan downloaded files with antivirus software to protect your device․ Prioritize sources that offer a clean, easily readable layout and correct transliteration of the Hindi verses․

Free vs․ Paid PDF Versions

Numerous websites offer the Hanuman Chalisa in Hindi PDF for free download, making it widely accessible․ However, the quality can vary significantly․ Free versions may contain errors, poor formatting, or intrusive advertisements․ Paid PDF versions, often available through spiritual organizations or dedicated apps, generally offer a more polished and accurate experience․

These paid options frequently include features like clear fonts, proper transliteration, audio recitations, and detailed explanations of the verses․ While a free PDF serves its purpose, investing in a paid version can enhance your understanding and devotional practice․ Consider your needs and budget when choosing; a carefully vetted free version can be sufficient, but a paid version offers added value․

Ensuring Authenticity of the PDF

When downloading a Hanuman Chalisa in Hindi PDF, verifying its authenticity is crucial․ Many unofficial versions circulate online, potentially containing inaccuracies or deviations from the traditional text․ Compare the PDF with established sources, like those from reputable religious institutions or well-known publishers․

Look for PDFs that clearly state their source and any editorial notes․ Check for consistent formatting and accurate transliteration of the Hindi verses․ Be wary of PDFs with excessive advertisements or unusual fonts․ Prioritize downloads from trusted websites and consider cross-referencing with a physical copy of the Hanuman Chalisa to ensure accuracy and maintain the sanctity of the text․

Benefits of Reciting the Hanuman Chalisa

Experience profound spiritual upliftment, enhanced well-being, and the overcoming of life’s obstacles through consistent recitation of the powerful Hanuman Chalisa verses․

Spiritual Benefits

Delve into the profound spiritual advantages of regularly reciting the Hanuman Chalisa․ This devotional practice fosters a deep connection with Lord Hanuman, embodying unwavering devotion and selfless service․ Accessing the Chalisa in Hindi PDF format allows for focused study and internalization of its sacred verses․

Consistent recitation cultivates inner peace, reduces negative tendencies, and strengthens faith․ It’s believed to purify the heart, leading to increased compassion and detachment from worldly desires․ The Chalisa’s verses invoke divine grace, facilitating spiritual growth and self-realization․ Downloading a Hindi PDF enables accurate pronunciation and understanding of the original text, maximizing its spiritual impact․

Furthermore, the Chalisa is considered a powerful tool for removing obstacles on the spiritual path, promoting clarity of mind, and fostering a closer relationship with the divine․

Physical and Mental Well-being

Beyond its spiritual merits, reciting the Hanuman Chalisa, readily available as a Hindi PDF, offers tangible benefits for physical and mental health․ The rhythmic chanting acts as a natural stress reliever, calming the nervous system and promoting relaxation․ Consistent practice can reduce anxiety, improve focus, and enhance overall mental clarity․

The positive vibrations generated during recitation are believed to energize the body, boosting vitality and strengthening the immune system․ Utilizing a Hindi PDF ensures correct pronunciation, amplifying these beneficial effects․ Many practitioners report improved sleep quality and a greater sense of inner peace․

Moreover, the Chalisa’s devotional nature fosters a positive mindset, promoting emotional resilience and a sense of hope, contributing to holistic well-being․

Overcoming Obstacles and Challenges

The Hanuman Chalisa, easily accessible as a Hindi PDF, is widely revered for its power to dismantle obstacles and navigate life’s challenges․ Hanuman’s unwavering devotion and strength, embodied within the verses, inspire courage and resilience in the face of adversity;

Reciting the Chalisa is believed to invoke Hanuman’s blessings, clearing pathways and removing impediments․ A Hindi PDF ensures accurate recitation, maximizing its protective and empowering influence․ Practitioners often turn to the Chalisa during difficult times, seeking solace and guidance․

The verses instill a sense of hope and faith, fostering a belief in one’s ability to overcome hurdles․ Regular practice strengthens inner resolve, enabling individuals to confront challenges with unwavering determination and a positive outlook․

How to Recite the Hanuman Chalisa

Proper recitation, guided by a Hindi PDF, emphasizes correct pronunciation and understanding of the verses for a deeply meaningful and spiritually rewarding experience․

Proper Pronunciation (Hindi)

Achieving accurate pronunciation when reciting the Hanuman Chalisa in Hindi is crucial for conveying the correct meaning and invoking the divine energy․ Utilizing a Hindi PDF resource allows for careful study of the Devanagari script and transliteration․

Pay close attention to the ‘matras’ (vowel signs) and the inherent sounds of each consonant․ Online audio recitations, often linked alongside PDF versions, can serve as invaluable guides․ Focus on clarity and rhythm, avoiding rushed or slurred speech․

Certain sounds, unique to Hindi, may require practice․ Consistent use of a PDF alongside audio will build confidence and ensure respectful, accurate delivery of this powerful devotional hymn․

Recommended Time for Recitation

Traditionally, reciting the Hanuman Chalisa is considered most potent during specific times․ Many devotees prefer early mornings, before sunrise, to establish a positive and focused start to the day․

Evening recitations, particularly at dusk, are also highly favored, offering a calming and protective influence․ Tuesdays, dedicated to Lord Hanuman, are especially auspicious for reciting the Chalisa․

However, a Hindi PDF resource emphasizes that sincere devotion transcends timing․ Reciting with faith and concentration at any time is beneficial․ Consistency is key; establishing a regular practice, guided by the PDF text, amplifies the spiritual impact․

Frequency of Recitation (Daily, Weekly)

Determining the ideal frequency of Hanuman Chalisa recitation is personal, though guidance exists within Hindi PDF versions․ Daily recitation is widely recommended for consistent spiritual benefit and protection․ This fosters a deeper connection with Lord Hanuman․

However, starting with a weekly practice, perhaps on Tuesdays, is also effective, especially when initially incorporating the Chalisa into one’s routine․ Many devotees choose to recite it multiple times daily, utilizing the Hindi PDF for accurate pronunciation․

Ultimately, the frequency should align with individual capacity and devotion; Consistent, heartfelt recitation, guided by the PDF text, yields the most significant results․

Hanuman Chalisa and its Connection to Hanuman

Explore how the Hanuman Chalisa, often found in Hindi PDF format, beautifully encapsulates the virtues and unwavering devotion of Lord Hanuman himself․

Hanuman: The Divine Devotee

Hanuman, a central figure in the Ramayana, embodies selfless service, unwavering devotion, and extraordinary strength – qualities deeply revered and celebrated within the Hanuman Chalisa․

Numerous Hindi PDF versions of the Chalisa highlight Hanuman’s pivotal role in assisting Lord Rama, showcasing his humility and dedication․ He isn’t merely a powerful warrior, but a perfect bhakta (devotee), whose life exemplifies the path to spiritual liberation․

The Hanuman Chalisa, readily available as a downloadable PDF, serves as a powerful medium to connect with Hanuman’s divine energy and internalize his exemplary virtues․ Studying the text, even in its Hindi PDF form, inspires devotees to cultivate similar qualities within themselves, fostering a deeper spiritual connection․

The Qualities of Hanuman Embodied in the Chalisa

The Hanuman Chalisa, often accessed via Hindi PDF downloads, beautifully illustrates Hanuman’s exceptional virtues․ Each verse meticulously details his strength, courage, wisdom, and unwavering celibacy – qualities deeply admired by devotees․

PDF versions of the text emphasize Hanuman’s selfless service to Rama, his mastery of scriptures, and his profound humility․ The Chalisa isn’t simply a recitation; it’s a contemplation of these divine attributes․

Through the verses, readily available in Hindi PDF format, practitioners are encouraged to embody these qualities in their own lives․ The text serves as a guide for cultivating devotion, discipline, and a steadfast commitment to righteousness, mirroring Hanuman’s exemplary character․

Hanuman Temples and the Chalisa Recitation

Across India, and increasingly worldwide, Hanuman temples serve as vibrant centers for Hanuman Chalisa recitation․ Many temples offer communal recitations, often accompanied by devotional singing (bhajans), fostering a powerful spiritual atmosphere․

Devotees frequently access Hindi PDF versions of the Chalisa to follow along during these gatherings or for personal practice within the temple grounds․ The echoing chants create a palpable energy, believed to invoke Hanuman’s blessings;

Digital PDFs enhance accessibility, allowing individuals to participate fully, even if unfamiliar with memorization․ These temples become focal points for experiencing the Chalisa’s power, strengthening faith and community bonds․

Different Versions and Translations

Explore variations in Hindi script for the Hanuman Chalisa PDF, alongside English translations, noting potential accuracy differences and regional recitation styles․

Variations in Hindi Script

Examining Hanuman Chalisa PDFs reveals subtle differences in Devanagari script․ These variations stem from differing publishing houses and regional printing traditions․ Some PDFs might utilize slightly different vowel markings or conjunct consonants, impacting visual presentation but not necessarily the core meaning․

Furthermore, font choices within the PDF can influence readability and aesthetic appeal․ Older, scanned PDFs may exhibit lower resolution, leading to character inconsistencies․ Modern, digitally typeset versions generally offer clearer and more standardized script․

It’s crucial to note that these script variations are generally minor and do not alter the devotional essence of the Chalisa․ However, for learners of Hindi, comparing different PDFs can be a valuable exercise in recognizing script nuances․

English Translations and their Accuracy

Numerous English translations of the Hanuman Chalisa accompany Hindi PDF versions, catering to a wider audience․ However, achieving perfect accuracy in translation proves challenging due to the rich cultural and poetic nuances embedded within the original Hindi verses․

Literal translations sometimes struggle to capture the devotional fervor and symbolic depth of Tulsidas’s work․ More interpretive translations prioritize conveying the overall spirit and meaning, potentially sacrificing word-for-word precision․

Readers should be aware that translations represent interpretations․ Comparing multiple English versions alongside the Hindi text can offer a more comprehensive understanding․ Utilizing PDFs that present both Hindi and English side-by-side is highly recommended for deeper study and appreciation․

Regional Variations in Recitation Styles

While the core verses of the Hanuman Chalisa remain consistent, regional variations in recitation styles are prevalent across India․ These differences manifest in pronunciation, melodic intonation, and even slight alterations in phrasing, passed down through generations․

PDF resources often don’t capture these nuanced audio variations․ North Indian recitations may emphasize a faster tempo and more elaborate ornamentation, while South Indian styles might prioritize a slower, more deliberate pace․

Accessing audio recordings alongside Hindi PDF texts provides a richer understanding․ Observing how different communities approach the Chalisa highlights its widespread cultural significance and adaptability, enriching the devotional experience․

manual 996 carrera 4s

The 996 Carrera 4S manual represents a pivotal shift in 911 design, offering increased practicality and shared components with the Boxster platform.

Its 3.6-liter flat-six engine delivers a pure driving experience, enhanced by a precise 6-speed manual gearbox, creating a uniquely engaging connection for enthusiasts.

Released in 2001 with wider arches, and a Cabriolet version in 2003, the 996 4S provides a blend of performance and everyday usability.

Overview of the 996 Generation

The 996 generation (1997-2004) marked a significant departure for the iconic Porsche 911, representing the first complete redesign of the model in nearly three decades. It was a substantial leap forward in terms of modernization, incorporating water cooling for the engine – a first for the 911 – and adopting a more aerodynamic and contemporary aesthetic.

Compared to its predecessor, the 993, the 996 is noticeably larger and more practical, sharing over 40% of its components with the Porsche Boxster, a move that initially drew criticism from purists but ultimately helped to reduce production costs. This generation introduced new technologies and features, enhancing both performance and comfort.

The 996’s design language, while initially controversial, paved the way for future 911 iterations. It established a new baseline for the model, blending tradition with innovation and setting the stage for the continued evolution of Porsche’s flagship sports car.

Focus on the Carrera 4S Model

The Carrera 4S occupies a special position within the 996 lineup, representing a compelling blend of performance, capability, and style. Introduced in November 2001, it distinguished itself with wider, turbo-style wheel arches, providing a more aggressive and visually striking appearance. This aesthetic enhancement wasn’t merely cosmetic; it accommodated a wider track, contributing to improved handling and stability.

In 2003, Porsche expanded the 4S range with the addition of a Cabriolet model, offering open-top driving thrills without compromising the all-wheel-drive system’s benefits. The 4S models consistently delivered a more planted and confident driving experience, particularly in challenging conditions, thanks to their sophisticated all-wheel-drive system.

The manual transmission option further enhanced the driver engagement, making the 996 Carrera 4S a highly sought-after variant for enthusiasts who appreciate a direct connection to the car.

Why Choose a Manual Transmission?

Opting for the manual transmission in a 996 Carrera 4S fundamentally alters the driving experience, prioritizing driver engagement and control. Unlike the convenience of the Tiptronic automatic, the 6-speed manual fosters a direct connection between driver and machine, allowing for precise gear selection and a more immersive feel.

The 3.6-liter flat-six engine truly shines when paired with a manual gearbox, delivering a “symphony of engineering” that’s best appreciated through deliberate shifts. This setup provides a heightened sense of control, particularly during spirited driving, and allows the driver to fully exploit the engine’s power band.

For purists and enthusiasts, the manual transmission isn’t just a choice; it’s an essential element of the 911 experience, offering a level of involvement that an automatic simply cannot replicate.

Technical Specifications of the 996 Carrera 4S Manual

The 996 Carrera 4S manual boasts a 3.6-liter flat-six engine, a 6-speed manual gearbox, and an all-wheel-drive system, delivering exceptional performance.

Engine Details: 3.6-liter Flat-Six

The heart of the 996 Carrera 4S manual is its naturally aspirated 3.6-liter flat-six engine, a hallmark of Porsche engineering. This powerplant isn’t focused on forced induction; instead, it delivers a smooth, linear powerband that’s incredibly rewarding to explore.

The engine gained 20 horsepower over the pre-facelifted versions, enhancing its overall performance capabilities. It’s a design prioritizing driver engagement and a visceral connection to the machine. The engine’s responsiveness, coupled with the precise manual transmission, creates a truly immersive driving experience. It’s a symphony of mechanical harmony, offering a pure and unadulterated feel that many enthusiasts cherish. This engine is a testament to Porsche’s commitment to naturally aspirated performance.

Transmission: 6-Speed Manual Gearbox

The 996 Carrera 4S manual is defined by its engaging 6-speed manual gearbox, a crucial component for purists. This transmission isn’t simply a means of changing gears; it’s an integral part of the driving experience, fostering a direct connection between driver and machine.

The precise and tactile shift feel provides exceptional control, allowing drivers to fully exploit the engine’s powerband. It’s a robust and reliable unit, designed to withstand the rigors of spirited driving. Offered as standard, the 6-speed manual enhances the car’s overall responsiveness and driver involvement. It complements the engine’s characteristics perfectly, creating a harmonious and rewarding driving dynamic. The alternative 5-speed Tiptronic was available as an option, but the manual remains the preferred choice for enthusiasts.

All-Wheel Drive System

The 996 Carrera 4S distinguishes itself with a sophisticated all-wheel drive (AWD) system, enhancing both performance and stability. Unlike rear-wheel drive models, the 4S distributes power to all four wheels, providing superior traction, particularly in challenging conditions.

This system utilizes a viscous coupling to manage power distribution, seamlessly shifting torque between the front and rear axles as needed. The AWD system contributes to increased cornering grip and confidence, allowing drivers to push the car’s limits with greater security. It’s a key element of the 4S’s appeal, making it a capable and versatile sports car. The system doesn’t introduce significant weight penalty, maintaining the 911’s balanced handling characteristics.

Ownership and Maintenance

Owning a 996 Carrera 4S manual requires diligent maintenance, with factory service manuals being invaluable, though costly; updates were previously available annually.

Electrical diagrams are notably good in these manuals, while common repair tutorials often lack sufficient detail for effective DIY work.

Availability of Factory Service Manuals

Factory service manuals for the 996 Carrera 4S manual are highly sought after by owners, representing the most comprehensive resource for repair and maintenance information. Originally, Porsche offered these manuals in a substantial 17-volume set, bound in three-ring binders, costing around $600 in the year 2000.

However, the investment didn’t end there. Porsche continued to release annual updates for approximately six years, adding roughly $100 per year to the total cost, eventually bringing the complete set’s price to over $1200. Unfortunately, Porsche discontinued printing these manuals several years ago, increasing their rarity and value on the secondary market.

While digital versions may exist, many enthusiasts prefer the detailed diagrams and organized format of the original printed manuals, particularly noting the exceptional quality of the electrical system schematics.

Common Repair Tutorials and Their Limitations

While numerous online repair tutorials exist for the 996 Carrera 4S manual, owners frequently report that they often lack the depth and detail found in the original factory service manuals. Many tutorials provide a basic overview of procedures but fall short when it comes to nuanced steps or troubleshooting complex issues.

Experienced DIY mechanics may find them helpful for simple tasks, but those tackling more involved repairs often encounter gaps in information. A common complaint is that tutorials frequently state “Remove…” without providing sufficient guidance on how to remove specific components safely and effectively.

Therefore, relying solely on these resources can be risky, and supplementing them with the factory manuals or professional assistance is highly recommended.

Electrical System Diagrams and Resources

Accessing comprehensive electrical system diagrams for the 996 Carrera 4S manual can be challenging, but is crucial for diagnosing and repairing electrical faults. The Porsche factory service manuals are considered the gold standard, containing detailed wiring schematics and component layouts.

However, these manuals can be expensive and difficult to acquire, especially updated versions. Owners have noted that the electrical drawings within the 996 manuals are exceptionally well-done and hard to find elsewhere.

Online Porsche forums and enthusiast websites may offer some diagrams or troubleshooting tips, but their accuracy and completeness can vary. Investing in a quality scan tool capable of reading Porsche-specific diagnostic codes is also highly recommended for efficient electrical system analysis.

Driving Experience

The manual 996 Carrera 4S delivers a uniquely engaging experience, blending a smooth, powerful flat-six engine with a precise gearbox for pure driving pleasure.

Its all-wheel drive enhances handling and road feel, offering a confident and connected drive unlike other 911 generations.

Performance Characteristics

The 996 Carrera 4S manual showcases a naturally aspirated 3.6-liter flat-six engine, delivering a responsive and engaging performance. Initially, this engine produced a respectable power output, but a later facelift brought a notable increase of 20 horsepower.

Coupled with the standard 6-speed manual transmission, the 4S offers precise gear changes and direct control, enhancing the driving experience. Acceleration is brisk, providing a thrilling sensation without the complexities of turbocharging.

The all-wheel-drive system contributes to excellent traction, allowing for confident acceleration in various conditions. While not the fastest 911, the 996 Carrera 4S manual prioritizes a balanced and rewarding driving experience, making it a joy on both the road and track.

It’s a symphony of engineering, not a turbocharged monster.

Handling and Road Feel

The 996 Carrera 4S manual delivers a uniquely connected driving experience, benefiting from its all-wheel-drive system. This provides exceptional stability and traction, inspiring confidence through corners and in challenging conditions.

The steering is direct and communicative, offering a good sense of feel for the road surface. While the 996’s chassis isn’t as overtly playful as its predecessors, it remains balanced and predictable.

The manual gearbox further enhances driver involvement, allowing for precise control over the engine’s power delivery. Compared to the 964 and 993, the 996 feels more modern and refined, offering a smoother ride and improved composure at higher speeds.

It’s a blend of precision and control, making it a rewarding car to drive.

Comparison to Other 911 Generations (964, 993)

The 996 Carrera 4S manual represents a significant departure from the air-cooled 964 and 993 generations. It’s notably larger and more practical, sharing components with the Boxster, a move that initially drew criticism from purists.

Compared to the 964, the 996 offers a more refined driving experience, with improved ride quality and a more modern interior. The 993, being the last of the air-cooled 911s, provides a more raw and visceral feel.

The 996’s water-cooled engine delivers smoother power delivery, while the 993’s air-cooled engine offers a unique character. The 996’s all-wheel-drive system provides greater stability than either of its predecessors.

Ultimately, the 996 bridges the gap between classic and modern 911s.

Potential Issues and Reliability

The 996 Carrera 4S manual is known for potential issues, notably the Intermediate Shaft (IMS) bearing, requiring diligent maintenance and careful pre-purchase inspection.

Common repairs can be lacking in detail, despite good electrical diagrams being available.

Known Problems with the 996

The 996 generation, including the Carrera 4S manual, presents several well-documented issues for potential owners. The most infamous is the Intermediate Shaft (IMS) bearing failure, a concern due to its potential for catastrophic engine damage. While not all 996s experience this, it necessitates careful consideration and potential preventative replacement.

Beyond the IMS, owners report issues with the cooling system, including coolant leaks from the coolant pipes and radiator. The electrical system, while having good diagrams, can also present challenges, with potential failures in sensors and components.

Furthermore, some models exhibit problems with the hydraulic lifters, leading to engine noise, and the Variocam system can experience issues affecting performance. Thorough pre-purchase inspections are crucial to identify and address these potential problems.

Maintenance Schedule and Costs

Maintaining a 996 Carrera 4S manual requires diligent adherence to a schedule, impacting overall costs. Basic services, including oil and filter changes, are relatively affordable, but specialized Porsche maintenance commands higher prices. Expect to spend approximately $1,000 — $2,000 annually for routine upkeep, excluding unexpected repairs.

The IMS bearing check or replacement adds a significant cost, potentially $800 ー $1,500. Cooling system overhauls, including pipe and radiator replacement, can range from $500 to $1,000.

Factory service manuals, while detailed, were expensive – initially around $600, with ongoing updates costing $100/year for several years, totaling over $1,200. Regular inspections and proactive maintenance are key to mitigating larger, more expensive issues down the line.

Intermediate Shaft (IMS) Bearing Concerns

The IMS bearing is a well-documented concern for the 996 Carrera 4S, potentially leading to catastrophic engine failure. Located within the engine case, its failure can restrict oil flow, causing significant damage. Early 996 models (1997-2005) utilized a dual-row bearing, considered more prone to failure than the later single-row design.

Preventative replacement of the IMS bearing is a common practice, costing between $800 and $1,500, involving significant labor due to engine disassembly; Some owners opt for an upgraded bearing with improved lubrication.

While not all 996s experience IMS failure, it’s a critical area to address during pre-purchase inspections and ongoing maintenance, offering peace of mind and potentially saving substantial repair costs.

Modifications and Upgrades

Enhancements for the 996 Carrera 4S range from performance upgrades like exhaust systems to cosmetic changes and interior refinements, personalizing the driving experience.

Popular Performance Upgrades

For the manual 996 Carrera 4S, several performance upgrades consistently prove popular among enthusiasts seeking to elevate their driving experience. A frequently chosen modification is the installation of a performance exhaust system, offering gains in both horsepower and a more aggressive exhaust note.

Upgraded clutch kits are also common, particularly for those engaging in spirited driving or track days, ensuring reliable power transfer. Many owners opt for suspension enhancements, such as lowering springs or coilover systems, to improve handling and reduce body roll.

Furthermore, software tunes can remap the engine’s parameters, unlocking additional power and refining throttle response. While more involved, engine internals upgrades, like lightweight flywheels, can further optimize performance. These modifications collectively contribute to a more engaging and capable 911.

Cosmetic Enhancements

Enhancing the aesthetic of a manual 996 Carrera 4S is a popular pursuit, with numerous options available to personalize the vehicle. Many owners begin with wheel upgrades, choosing aftermarket designs that complement the car’s lines and improve stance. A lip spoiler or full aerodynamic kit can further accentuate the sporty appearance.

Interior enhancements range from simple upgrades like shift knobs and pedals to more extensive modifications such as custom upholstery and carbon fiber trim. Replacing the factory stereo with a modern infotainment system is also a common choice.

Exterior detailing, including paint correction and ceramic coating, can restore and protect the finish. These cosmetic enhancements allow owners to tailor their 996 to their individual tastes, creating a unique and visually appealing vehicle.

Interior Modifications

Upgrading the interior of a manual 996 Carrera 4S can significantly enhance the driving experience, blending modern convenience with classic Porsche feel. Popular modifications include replacing the stock steering wheel with a smaller, sportier option for improved control and feel. Shifter bushings and weighted shift knobs offer a more precise and engaging gear change.

Many owners opt for custom upholstery, utilizing premium leather or Alcantara to refresh worn seats or personalize the cabin. Modern infotainment systems with navigation, Bluetooth, and smartphone integration are also frequently installed.

Sound deadening materials can reduce road noise, while adding aftermarket gauges provides valuable performance data. These interior modifications create a more comfortable, refined, and driver-focused environment.

Buying Guide

Acquiring a manual 996 Carrera 4S requires careful inspection, focusing on maintenance records and potential IMS bearing issues.

Prices range considerably, so research market value and prioritize a pre-purchase inspection by a Porsche specialist for peace of mind.

What to Look for When Purchasing

When considering a manual 996 Carrera 4S, a thorough inspection is paramount. Prioritize vehicles with complete service histories, documenting regular maintenance. Scrutinize for evidence of oil leaks, particularly around the engine and transmission. Examine the bodywork for signs of previous accident damage or poor repairs, paying close attention to panel gaps and paint consistency.

The interior should show reasonable wear for its age, but check for excessive damage or modifications. Critically, investigate the IMS bearing – a known weak point. A pre-purchase inspection (PPI) performed by a Porsche specialist is invaluable, including a bore scope inspection of the IMS bearing. Verify the functionality of all electrical systems, as these can be complex and costly to repair. Finally, confirm the car’s VIN and check for any outstanding recalls or liens.

Price Range and Market Value

The market value of a manual 996 Carrera 4S fluctuates based on condition, mileage, and service history. As of late 2025, expect prices to range from approximately $28,000 to $55,000. Lower mileage, well-maintained examples with documented IMS bearing upgrades command a premium. Cars requiring significant maintenance or exhibiting known 996 issues will be priced accordingly lower.

Early 996s (1998-2001) generally fall on the lower end of the spectrum, while later models (2002-2005) with the updated interior and minor mechanical improvements tend to be more valuable. Auction results and online marketplaces provide valuable data points for assessing current market trends. Remember to factor in potential repair costs when evaluating a vehicle’s overall value.

Pre-Purchase Inspection Checklist

A thorough pre-purchase inspection is crucial for any 996 Carrera 4S, especially a manual transmission model. Prioritize a professional Porsche mechanic familiar with the 996 generation. Inspect the IMS bearing – a documented replacement is highly desirable. Check for coolant leaks, oil leaks (especially around the rear main seal), and evidence of previous accident damage.

Verify the functionality of all electrical systems, including the windows, locks, and climate control. Examine the condition of the tires, brakes, and suspension components. Review service records meticulously, looking for consistent maintenance. A compression test can reveal engine health. Don’t hesitate to request a Porsche Production Date (PPD) check to verify originality.