Archive: November 7, 2025

post op extraction instructions spanish

Article Plan: Post-Op Extraction Instructions ⎻ Spanish

Crafting clear, accessible post-operative care guides in Spanish is crucial for diverse patient populations, ensuring successful healing and minimizing potential complications.

Resources from the American Dental Association and Northern Texas Facial & Oral Surgery offer downloadable PDFs for comprehensive Spanish instructions.

Providing post-operative extraction instructions in Spanish is no longer simply a courtesy, but a necessity for modern dental practice. The demographic landscape of the United States, and specifically areas like Keller, Texas, includes a significant Spanish-speaking population.

Effective communication is paramount to successful patient outcomes. Utilizing resources like those offered by Northern Texas Facial & Oral Surgery, which include downloadable Spanish PDF guides, demonstrates a commitment to inclusive care.

These translated materials, alongside guidance from the American Dental Association, ensure patients fully understand crucial aftercare steps, leading to reduced anxiety and improved healing processes. Ignoring language barriers can compromise care quality.

Why Provide Instructions in Spanish?

Offering post-extraction instructions in Spanish directly addresses the needs of a substantial patient base, fostering a more equitable healthcare experience. This proactive approach expands reach, ensuring vital information isn’t lost due to language differences.

Improved patient compliance is a key benefit. When individuals comprehend their aftercare regimen – regarding diet, hygiene, and medication – they are far more likely to follow it diligently.

Furthermore, clear Spanish instructions significantly reduce misunderstandings that could lead to complications like dry socket or infection. Resources from organizations like the ADA and Northern Texas Facial & Oral Surgery facilitate this crucial communication, ultimately enhancing patient safety and satisfaction.

Reaching a Wider Patient Base

Dental practices serving diverse communities must acknowledge and address linguistic needs. Providing post-operative extraction instructions in Spanish immediately expands access to quality care for a significant portion of the population.

Ignoring language barriers creates disparities in healthcare, potentially leading to poorer outcomes. By offering materials in Spanish, clinics demonstrate cultural sensitivity and a commitment to inclusivity.

This proactive step isn’t merely about translation; it’s about removing obstacles to understanding. Resources like downloadable PDFs from Northern Texas Facial & Oral Surgery and guidance from the ADA empower Spanish-speaking patients to actively participate in their recovery process, fostering trust and improving overall health equity.

Improving Patient Compliance

When patients fully understand their post-operative care, adherence to instructions dramatically increases. Spanish-language materials eliminate ambiguity and ensure patients grasp crucial steps for proper healing after a tooth extraction.

Clear communication regarding pain management, dietary restrictions, and oral hygiene routines minimizes confusion and reduces the likelihood of complications. This, in turn, fosters a sense of ownership over their recovery.

Utilizing readily available resources, such as the Spanish PDFs offered by Northern Texas Facial & Oral Surgery and the ADA’s guidance, empowers patients to follow through with recommended care. Improved compliance translates to faster healing times and greater patient satisfaction.

Reducing Misunderstandings & Complications

Language barriers can significantly contribute to post-operative complications. Providing instructions in Spanish directly addresses this, minimizing the risk of misinterpreted directions regarding medication, wound care, or warning signs.

Accurate understanding of potential issues like dry socket or infection – explained in a patient’s native language – enables prompt recognition and timely intervention. This proactive approach can prevent minor concerns from escalating into serious problems.

By leveraging translated resources from organizations like the American Dental Association and Northern Texas Facial & Oral Surgery, dental professionals can proactively reduce the potential for misunderstandings and ensure optimal patient outcomes.

Essential Information to Include (General)

Comprehensive Spanish post-operative instructions must prioritize readily accessible contact information for emergencies, including the practice’s phone number and after-hours support options. This ensures patients know where to turn with urgent concerns.

Detailed guidance on pain management is also critical; Instructions should cover both over-the-counter and prescription medications, including proper dosages and potential side effects, all clearly translated into Spanish.

Furthermore, these materials should emphasize the importance of following all provided directions carefully. Resources like those from Northern Texas Facial & Oral Surgery offer excellent templates for structuring this essential information effectively.

Contact Information for Emergencies

Clearly display the practice’s primary phone number in a prominent location within the Spanish post-op instructions. Include specific instructions for after-hours emergencies, detailing a dedicated contact method or referral to an on-call dentist.

Specify what constitutes a true emergency requiring immediate attention – such as uncontrolled bleeding, severe pain unresponsive to medication, or signs of infection. Provide a concise list of these warning signs in Spanish.

Consider including the local emergency number (911 in the US) for situations demanding immediate medical intervention. Emphasize that this number is reserved for life-threatening emergencies only, ensuring appropriate resource allocation.

Pain Management Strategies

Explain in Spanish that some post-extraction discomfort is normal and expected. Reassure patients that pain typically diminishes over several days. Outline a tiered approach to pain management, starting with over-the-counter options like ibuprofen or acetaminophen – providing Spanish names and dosage guidelines.

Detail how to properly administer any prescribed pain medication, including the correct dosage, frequency, and potential side effects, all translated into Spanish. Warn against combining medications without consulting a dentist or physician.

Suggest non-pharmacological methods for pain relief, such as applying ice packs to the affected area and resting. Emphasize the importance of following prescribed medication schedules.

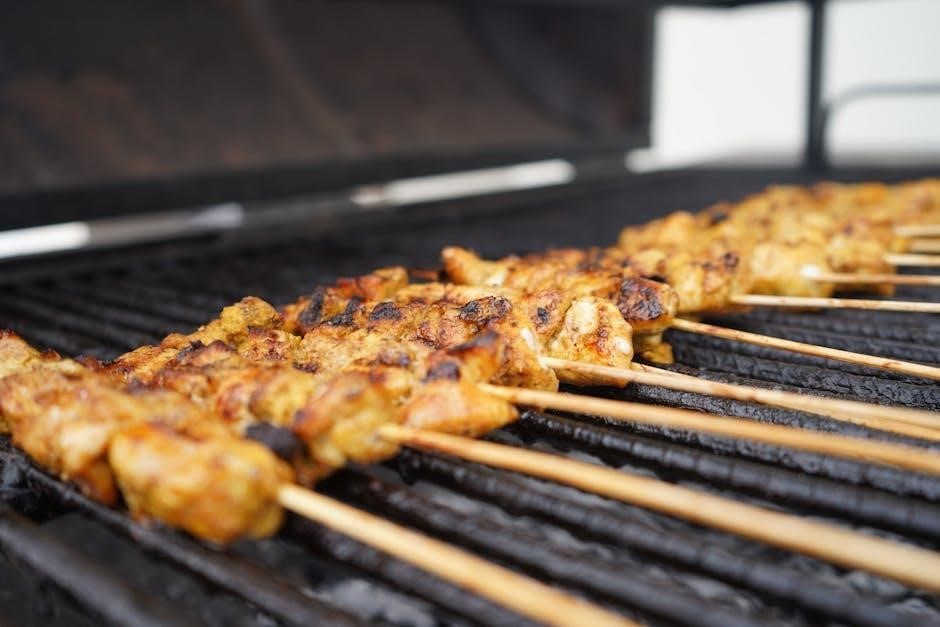
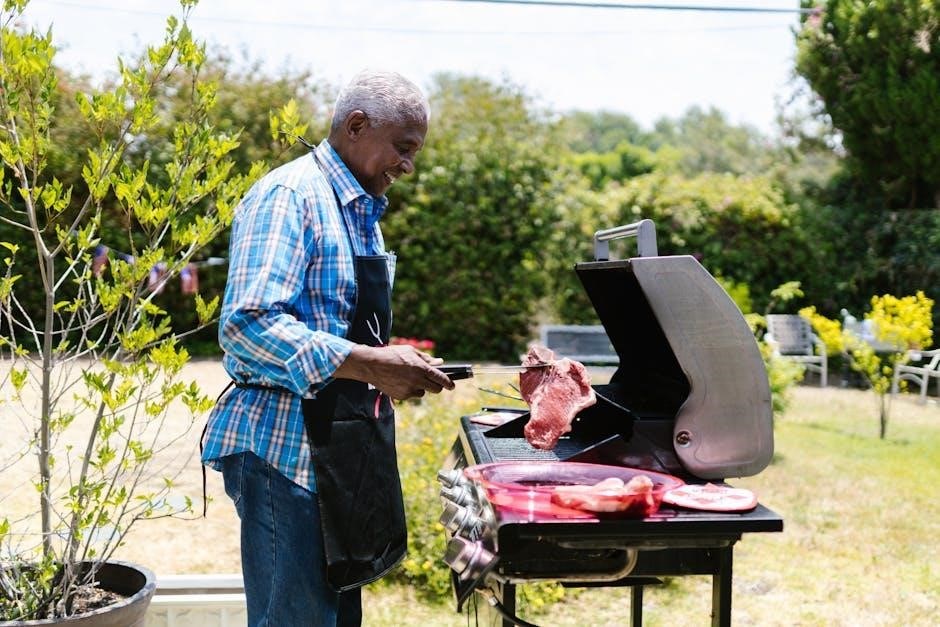
Immediate Post-Extraction Care (First 24 Hours)

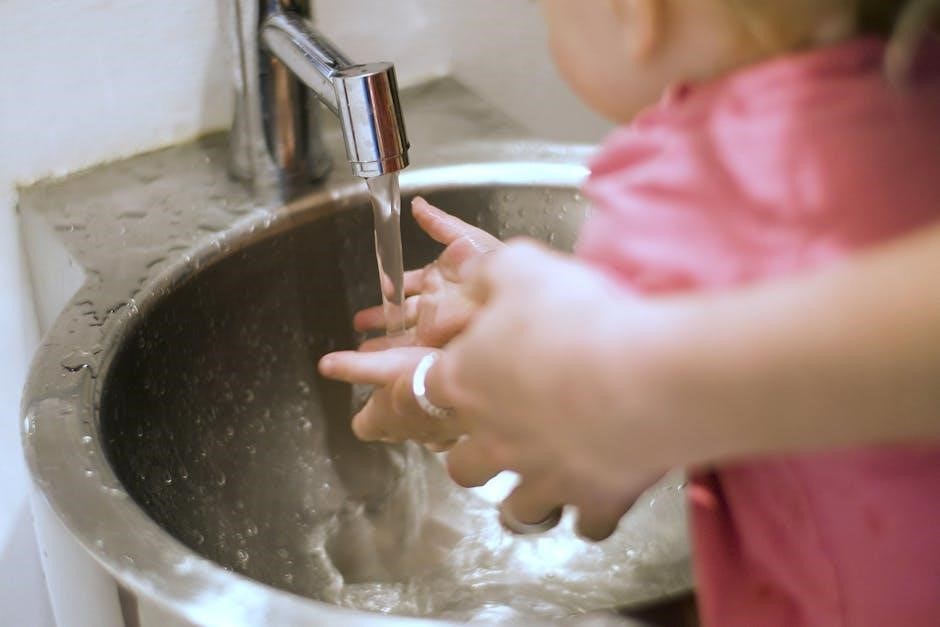
Instruct patients, in Spanish, to bite down firmly on the gauze pad placed over the extraction site. Explain this pressure helps control bleeding and promotes clot formation – a vital step in healing. Advise them to maintain this pressure for at least 30-60 minutes, changing the gauze as needed.

Detail how to manage bleeding, explaining that some oozing is normal. Recommend applying gentle pressure with fresh gauze if bleeding persists. Caution against vigorous rinsing or disturbing the clot.

Emphasize the importance of rest and avoiding strenuous activity during the first 24 hours to minimize bleeding and discomfort. Advise keeping the head elevated.

Bite Down on Gauze – Spanish Translation & Explanation

The Spanish translation for “bite down on gauze” is “Muerda firmemente una gasa”. Explain to patients, in Spanish, that immediately after the extraction, a gauze pad will be placed over the surgical area. Instruct them to bite down firmly and consistently on this gauze for a minimum of 30 to 60 minutes.

Emphasize the purpose: this pressure is crucial for controlling bleeding and initiating the formation of a blood clot. Clarify that the clot acts as a natural bandage, protecting the bone and nerve endings.

Advise changing the gauze every 30-60 minutes, or sooner if it becomes saturated with blood. Reassure patients that some oozing is normal, but persistent, heavy bleeding requires contacting the office.

Controlling Bleeding – Spanish Translation & Explanation

The Spanish phrase for “controlling bleeding” is “Control de sangrado”. Explain to Spanish-speaking patients that some bleeding is expected for the first 24 hours post-extraction. Instruct them to maintain firm, consistent pressure by biting down on the gauze, as previously explained.

Advise avoiding strenuous activity, spitting, or rinsing vigorously, as these can disrupt the clot and restart bleeding. Recommend resting with the head elevated.

If bleeding persists despite these measures, tell patients to apply a moistened tea bag (black tea contains tannic acid, which aids clotting) to the extraction site for 20-30 minutes. Emphasize contacting the office immediately for excessive or uncontrolled bleeding.

Pain Management – Detailed Spanish Guidance

Effective pain management is vital for a comfortable recovery. Explain to patients, in Spanish, that some discomfort is normal after a tooth extraction – “Es normal sentir algo de dolor después de una extracción dental”. Discuss both over-the-counter and potential prescription options.

Recommend readily available medications like ibuprofen (Ibuprofeno) or acetaminophen (Acetaminofén), providing clear Spanish dosage instructions. If prescription pain medication is provided, thoroughly translate all warnings and instructions, emphasizing responsible use and potential side effects.

Stress the importance of taking medication as directed and not exceeding the recommended dosage. Encourage patients to contact the office with any concerns regarding pain or medication.

Recommended Pain Medications (Over-the-Counter) – Spanish Names & Dosages

For mild to moderate pain, over-the-counter options are often sufficient. Ibuprofen (Ibuprofeno) is a common choice, typically 200-400mg every 6-8 hours, no exceder 1200mg en 24 horas (do not exceed 1200mg in 24 hours).

Acetaminophen (Acetaminofén), like Tylenol, can also be used, generally 500-1000mg every 4-6 hours, no exceder 4000mg en 24 horas (do not exceed 4000mg in 24 hours). Advise patients to alternar (alternate) ibuprofen and acetaminophen to maximize pain relief.

Always remind patients to follow dosage instructions carefully and to check with their doctor if they have any underlying medical conditions or are taking other medications. Consulte a su médico (consult your doctor) if unsure.

Prescription Pain Medication Instructions – Spanish Translation & Warnings

If over-the-counter medications are insufficient, your dentist may prescribe stronger pain relief. Commonly prescribed options include opioids. Siga las instrucciones de su médico al pie de la letra (Follow your doctor’s instructions to the letter).

Important warnings: these medications can cause drowsiness, so no conduzca ni opere maquinaria pesada (do not drive or operate heavy machinery). Avoid alcohol while taking these medications. Potential side effects include nausea, constipation, and dizziness. Informe a su médico (Inform your doctor) of any adverse reactions.

Do not share your prescription with anyone. Guarde los medicamentos fuera del alcance de los niños (Keep medications out of reach of children). Dispose of any unused medication safely.

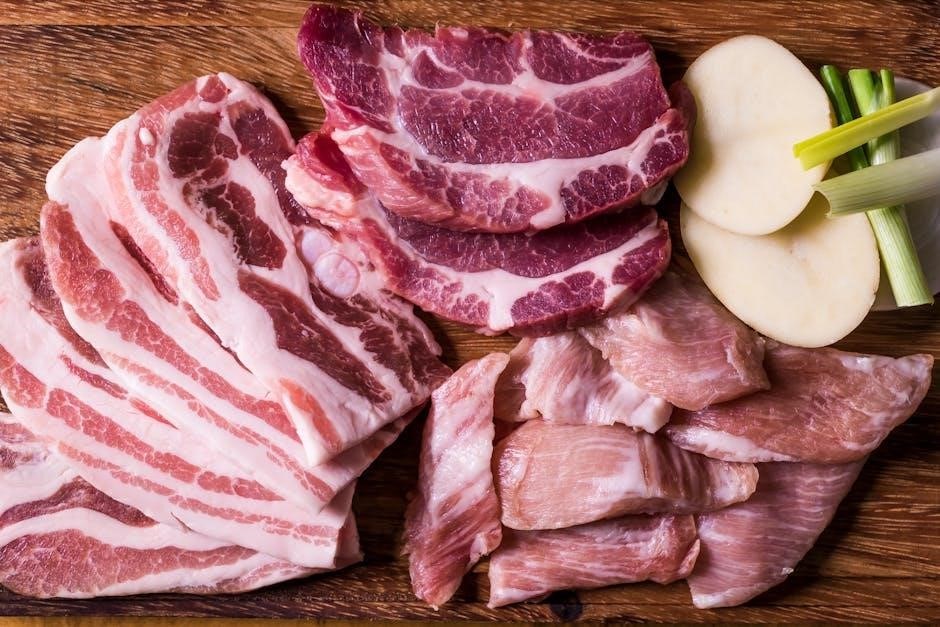
Diet & Hydration – Spanish Instructions

Following a soft food diet is muy importante (very important) after a tooth extraction. For the first 24-48 hours, focus on liquids like caldo (broth), jugo de manzana (apple juice), and agua (water). Avoid using a straw, as the sucking motion can dislodge the blood clot.

Gradually introduce soft foods such as puré de papas (mashed potatoes), yogur (yogurt), huevos revueltos (scrambled eggs), and compota de manzana (applesauce). Avoid hard, crunchy, or spicy foods that could irritate the extraction site. Stay hydrated by drinking plenty of fluids, but evite las bebidas alcohólicas (avoid alcoholic beverages).

Ensure adequate nutrition to promote healing. Coma alimentos nutritivos (Eat nutritious foods) and maintain proper hydration throughout your recovery.

Soft Food Recommendations – Spanish Examples

After your extraction, comience (begin) with very soft foods. Excellent choices include puré de papas (mashed potatoes) – ensure they are lukewarm, not hot. Also beneficial is sopa crema de tomate (creamy tomato soup), providing hydration and nutrients. Consider yogur (yogurt), especially plain varieties, avoiding those with fruit pieces initially.

Other suitable options are huevos revueltos (scrambled eggs), cooked until very soft, and compota de manzana (applesauce) – a gentle source of fiber. You can also try avena cocida (cooked oatmeal), making sure it’s not too hot and is well-cooked. Avoid anything requiring chewing, and gradually introduce slightly more textured foods as healing progresses. ¡Buen provecho! (Enjoy your meal!).

Liquids to Drink & Avoid – Spanish Translation

Staying hydrated is muy importante (very important) post-extraction. Drink plenty of agua (water) throughout the day. Jugos de frutas sin pulpa (fruit juices without pulp) are also good, but consume in moderation due to sugar content. Cool té (tea) can be soothing, but avoid hot beverages.

Absolutely evite (avoid) bebidas carbonatadas (carbonated drinks) as they can disrupt clot formation. Do not use a pajita (straw) as the suction can dislodge the blood clot. Also avoid alcohol and café caliente (hot coffee) for several days. Focus on cool, non-irritating liquids to promote healing and prevent complications. ¡Manténgase hidratado! (Stay hydrated!).

Oral Hygiene – Spanish Guidance

Maintaining oral hygiene is vital, but requires a gentle approach post-extraction. For the first 24 hours, no se cepille (do not brush) directly over the extraction site. After 24 hours, you may gently brush other areas, avoiding the surgical area.

Begin gentle enjuagues bucales (mouth rinses) with agua tibia con sal (warm salt water) – half a teaspoon of salt in 8 ounces of water – after each meal. Do not vigorously swish; simply let the solution gently cleanse the area. Avoid commercial mouthwashes containing alcohol. Resume normal brushing and flossing around the site when comfortable, usually after a few days. ¡Cuidado! (Be careful!).

Gentle Rinsing – Spanish Instructions (Saltwater Rinses

Enjuague bucal suave (gentle mouth rinse) with warm salt water is crucial for keeping the extraction site clean and promoting healing. Instruct patients to mezclar (mix) half a teaspoon of salt in eight ounces of agua tibia (warm water).

Emphasize that rinsing should be suave (gentle) – avoid vigorous swishing, as this can dislodge the blood clot. Instead, gently tilt the head and allow the solution to flow over the area. Repeat this process after each meal and before bedtime. Explain “No escupa con fuerza” (do not spit forcefully). Continue saltwater rinses for at least a week, or as directed.

Brushing & Flossing – When to Resume (Spanish)

Cepillado y uso de hilo dental (brushing and flossing) require careful timing post-extraction. Advise patients to avoid brushing directly on the extraction site for the first 24-48 hours – “Evite cepillar directamente sobre el área de la extracción”.

Instruct them to gently brush other areas of the mouth to maintain oral hygiene. After 48 hours, they can cepillar suavemente (gently brush) around the extraction site, being extremely cautious. Flossing should be resumed around the extraction site after 3-5 days, again with extreme gentleness. Remind patients to “Sea muy cuidadoso” (be very careful) to avoid disrupting the healing process.

Potential Complications & When to Seek Help (Spanish)

Educate patients about potential complications and when immediate attention is needed. Explain “Alvéolo seco” (dry socket), a painful condition occurring when the blood clot dislodges, causing exposed bone. Symptoms include intense throbbing pain radiating to the ear – “Dolor intenso y pulsátil”.

Also discuss infection, indicated by increased pain, swelling, fever, or pus – “Fiebre, hinchazón o pus”. Emphasize the importance of contacting the oral surgeon immediately for these symptoms. Instruct patients to seek help if excessive bleeding persists despite gauze application, or if they experience difficulty breathing or swallowing. Reiterate prompt action is vital.

Dry Socket – Spanish Explanation & Symptoms

Explain to patients, in Spanish, that “Alvéolo seco” (dry socket) happens when the blood clot protecting the bone after extraction is lost prematurely. This exposes the bone and nerves, causing significant pain. Emphasize it’s not an infection, but a common complication.

Describe the symptoms: intense, throbbing pain that typically begins 2-5 days post-extraction, often radiating to the ear, jaw, or temple – “Dolor intenso que se irradia”. A bad odor or taste in the mouth can also be present. Reassure patients that while painful, it’s treatable by the oral surgeon with medicated dressings. Stress avoiding smoking and vigorous rinsing.

Infection – Spanish Explanation & Symptoms

Clearly explain to patients, in Spanish, that a post-extraction infection – “Infección después de la extracción” – is a serious concern requiring immediate attention. Describe it as a bacterial invasion of the extraction site, potentially spreading. Emphasize the importance of recognizing early signs.

Detail the symptoms: increasing pain and swelling, often accompanied by redness and warmth around the extraction site – “Aumento del dolor e hinchazón”. Also mention fever, chills, and a persistent bad taste or odor. Instruct patients to contact the office immediately if they experience these symptoms. Reassure them that infections are typically treated with antibiotics – “Antibióticos” – prescribed by the surgeon.

Resources for Spanish-Language Post-Op Instructions

Fortunately, several reputable organizations offer readily available, high-quality post-operative extraction instructions in Spanish. The American Dental Association (ADA) provides comprehensive Spanish guidance on tooth extractions, covering healing, complication prevention, and comfort measures – a valuable resource for patients.

Additionally, Northern Texas Facial & Oral Surgery directly offers downloadable PDF documents specifically tailored for post-operative care. These include general oral surgery instructions, sinus lift guidance, and detailed tooth extraction instructions, all in Spanish. Providing these direct links – and encouraging staff familiarity with the content – ensures consistent and accurate patient education. These resources empower patients to actively participate in their recovery.

American Dental Association – Spanish Extraction Guidance

The American Dental Association (ADA) stands as a trusted source for professional dental information, and their Spanish-language extraction guidance is no exception. Their materials comprehensively cover essential post-operative care, specifically designed for Spanish-speaking patients.

This guidance details crucial aspects like proper wound care, pain management techniques, and dietary recommendations – all translated for clarity and understanding. Importantly, the ADA’s resources also emphasize complication prevention, outlining potential issues and when to seek immediate dental attention. Accessing these instructions ensures patients receive consistent, evidence-based advice, promoting optimal healing and minimizing risks. Utilizing the ADA’s resources demonstrates a commitment to inclusive and effective patient care.

Northern Texas Facial & Oral Surgery – Spanish PDF Download

Northern Texas Facial & Oral Surgery provides readily accessible, downloadable PDF documents containing detailed post-operative instructions in Spanish. These resources are specifically tailored to aid patients recovering from various oral surgery procedures, including tooth extractions and sinus lifts.

The PDFs cover essential topics such as managing discomfort, maintaining proper wound care, and adhering to a suitable diet during the healing process. They also offer clear guidance on oral hygiene practices to prevent infection and promote optimal recovery. Offering these downloadable instructions demonstrates a proactive approach to patient education and ensures Spanish-speaking individuals receive comprehensive care. This commitment enhances patient compliance and contributes to successful surgical outcomes.

free printable tumbler care instructions

Article Plan: Free Printable Tumbler Care Instructions (as of 12/13/2025)

Today’s date is 12/13/2025. This guide details creating printable instructions for tumbler care, covering materials like stainless steel and ceramic, ensuring longevity and optimal performance.

Tumblers have become essential for enjoying beverages on the go, maintaining temperature for hours, whether hot coffee or icy drinks. However, to ensure your tumbler continues performing optimally and lasts for years, proper care is crucial. This guide focuses on providing comprehensive tumbler care instructions, suitable for creating a free printable resource.

Different tumbler materials – stainless steel, ceramic-lined, and plastic – require specific cleaning approaches. Understanding these nuances prevents damage and preserves insulation. We’ll explore general guidelines, dishwasher safety, hand-washing techniques, and stain removal, alongside lid and straw care. Maintaining your tumbler isn’t just about cleanliness; it’s about preserving its functionality and extending its lifespan;

Why Tumbler Care Instructions are Important

Providing clear tumbler care instructions safeguards a consumer’s investment. Tumblers, particularly popular brands like Stanley, Simple Modern, and RTIC, represent a significant purchase. Incorrect cleaning can lead to discoloration, metallic tastes, reduced insulation, scratches, or even damage, diminishing the product’s value and performance.

A printable guide empowers users to maintain their tumblers correctly, preventing issues and extending their lifespan. It also reduces customer support inquiries for retailers and manufacturers. Detailing dishwasher safety (or lack thereof), proper washing techniques, and stain removal ensures consistent care. Ultimately, well-maintained tumblers deliver a superior drinking experience and promote brand loyalty.

Understanding Tumbler Materials

Tumbler construction significantly impacts care requirements. Stainless steel tumblers, known for durability, benefit from regular cleaning to prevent metallic tastes. Ceramic-lined tumblers, like those from RTIC, offer a pure drinking experience but require gentle handling to avoid chipping the interior coating. Plastic tumblers, while lightweight, are more susceptible to staining and scratching.

Knowing the material dictates appropriate cleaning methods – dishwasher suitability, recommended soaps, and scrubbing intensity. Double-wall vacuum insulation, common in many stainless steel designs, needs protection from harsh abrasives. Understanding these material nuances is crucial for creating effective, targeted care instructions.

3.1 Stainless Steel Tumblers

Stainless steel tumblers are incredibly popular for both hot and cold beverages. Their durability makes them a long-lasting choice, but proper care is essential. Hand washing with mild dish soap and warm water is generally recommended, even if some are dishwasher safe – check the base for guidance! Avoid abrasive cleaners that can scratch the surface.

To prevent metallic tastes, thorough rinsing is vital. Regular cleaning prevents buildup. These tumblers often feature double-wall vacuum insulation, which should be protected from impact. Consistent care ensures your stainless steel tumbler maintains its performance and aesthetic appeal for years to come.

3.2 Ceramic-Lined Tumblers

Ceramic-lined tumblers, like those from RTIC, offer a pure, taste-free drinking experience. However, the ceramic lining requires gentle handling. Hand washing is strongly recommended to prevent chipping or cracking of the delicate interior. Avoid harsh scrubbing pads and abrasive detergents. While offering excellent temperature retention, the ceramic is susceptible to damage from significant impacts.

Carefully inspect the lining for any cracks before each use. Avoid extreme temperature shocks – don’t pour boiling liquid into a cold tumbler, and vice versa. Proper care will preserve the integrity of the ceramic lining, ensuring a consistently enjoyable drinking experience without any metallic aftertaste.

3.3 Plastic Tumblers

Plastic tumblers are generally the most durable and budget-friendly option, but require specific care. Many are dishwasher safe, though checking the manufacturer’s instructions is crucial – particularly for lids and straws. Avoid prolonged exposure to direct sunlight, as UV rays can cause the plastic to become brittle and discolor over time.

While resistant to shattering, plastic can absorb odors and stains. Regular cleaning with mild soap and warm water is essential. For stubborn stains, a paste of baking soda and water can be effective. Avoid abrasive cleaners, as they can scratch the surface. Proper care extends the life and maintains the appearance of plastic tumblers.

General Care Guidelines for All Tumblers

Regardless of the tumbler material, consistent cleaning is paramount. Rinse your tumbler immediately after each use to prevent residue buildup. Avoid using harsh chemicals or abrasive scrubbers, as these can damage the finish and insulation. Regular cleaning prevents lingering tastes and odors, ensuring a pleasant drinking experience.

Always disassemble the lid and straw for thorough cleaning. Inspect for cracks or damage, replacing parts as needed. Store tumblers with the lid off to allow for proper ventilation and prevent mildew growth. Following these simple guidelines will significantly extend the lifespan of your favorite beverage container.

Dishwasher Safety: A Detailed Look

Determining dishwasher safety is crucial for tumbler longevity. While some tumblers, particularly certain stainless steel models, may be labeled dishwasher safe, hand washing is generally recommended to preserve their quality. High heat and harsh detergents can compromise the vacuum insulation and damage exterior coatings.

Always refer to the manufacturer’s care instructions, often found on the tumbler’s base. If dishwasher safe, use a gentle cycle and mild detergent. For tumblers not dishwasher safe, avoid this method entirely. Consistent hand washing ensures a longer lifespan and maintains optimal performance, preventing potential damage.

5.1 Tumblers Safe for Dishwashers

Certain tumblers are designed to withstand the dishwasher’s environment. Specifically, some stainless steel tumblers, if explicitly stated by the manufacturer, can be cleaned using this method. However, even with dishwasher-safe models, precautions are vital. Utilize a gentle cycle, avoiding high-heat settings, which can degrade the insulation’s effectiveness over time.

Mild dish soap is essential; harsh detergents can dull finishes or cause discoloration. Regularly inspect tumblers for any signs of damage after each wash. If any issues arise, revert to hand washing to prolong the tumbler’s life and maintain its aesthetic appeal.

5.2 Tumblers NOT Safe for Dishwashers

Many tumblers, particularly those with specialized coatings or materials, are not dishwasher safe. Ceramic-lined tumblers and plastic varieties are especially vulnerable to heat damage. Dishwasher cycles can compromise the vacuum insulation, reducing the tumbler’s ability to maintain temperature. Coatings may fade, peel, or become compromised, impacting both appearance and functionality.

For these tumblers, hand washing is crucial; The intense heat and powerful jets of a dishwasher can cause irreversible damage. Always check the manufacturer’s care instructions, often found on the tumbler’s base, before cleaning.

Hand Washing: The Preferred Method

Hand washing extends the life of your tumbler and preserves its insulation properties. It’s particularly vital for tumblers explicitly marked as “hand wash only” or those with delicate finishes. This method allows for gentle cleaning, avoiding the harshness of dishwasher detergents and high temperatures.

Using a soft sponge or cloth prevents scratches. Thorough rinsing ensures no soap residue remains, which could impart a metallic taste. Consistent hand washing maintains the tumbler’s aesthetic appeal and functional performance, safeguarding against potential damage and ensuring long-lasting enjoyment.

6.1 Recommended Soaps & Detergents

For optimal tumbler cleaning, opt for mild dish soaps. Harsh chemicals and abrasive cleaners can damage coatings and compromise insulation. Avoid detergents containing bleach or chlorine, as these can discolor and degrade materials. Gentle, fragrance-free options are ideal, minimizing residue that might affect beverage flavor.

Specifically, look for pH-neutral formulas. These are less likely to cause corrosion or etching. A small amount of soap is sufficient; excessive suds require more rinsing. Prioritize soaps designed for delicate items to ensure thorough cleaning without compromising your tumbler’s integrity.

6.2 Water Temperature for Hand Washing

Lukewarm water is the recommended temperature for hand washing tumblers. Hot water, while seemingly more effective, can potentially damage vacuum seals and coatings over time. Extremely cold water may not dissolve residues effectively. Lukewarm water strikes a balance, providing sufficient cleaning power without risking structural integrity.

Avoid drastic temperature changes; don’t switch from hot to cold water abruptly. This thermal shock can cause warping or cracking, especially in stainless steel models. Rinse thoroughly with lukewarm water to remove all soap residue, ensuring a clean and flavor-neutral drinking experience.

Removing Stubborn Stains

Persistent stains require targeted approaches. Coffee and tea stains respond well to a paste of baking soda and water, gently scrubbed with a soft cloth. Smoothie and juice residues often benefit from soaking in warm, soapy water before scrubbing. For wine and soda stains, a diluted vinegar solution can prove effective, followed by a thorough rinse.

Avoid abrasive cleaners or scouring pads, as these can scratch the tumbler’s surface. Patience is key; repeated gentle cleaning is preferable to aggressive scrubbing. Always test any cleaning solution in an inconspicuous area first to ensure it doesn’t damage the finish.

7.1 Coffee & Tea Stains

Coffee and tea leave notoriously stubborn stains. Begin by rinsing the tumbler with warm water to remove loose particles. Create a paste using baking soda and a small amount of water – this acts as a gentle abrasive. Apply the paste to the stained areas and let it sit for 15-20 minutes.

Gently scrub with a soft cloth or sponge, avoiding harsh scrubbing that could damage the tumbler’s finish. Rinse thoroughly with warm water, ensuring all baking soda residue is removed. For particularly tough stains, repeat the process or consider a specialized tumbler cleaning solution.

7.2 Smoothie & Juice Stains

Smoothies and juices, with their vibrant colors, can leave persistent stains. Immediate rinsing with warm water is crucial to prevent setting. A solution of warm water and dish soap is a good starting point; let it soak for 30 minutes to loosen the stain. For tougher marks, utilize white vinegar – its acidity helps break down fruit pigments.

Combine equal parts white vinegar and water, apply to the stain, and allow it to sit for another 30 minutes before scrubbing gently with a soft brush. Rinse thoroughly and repeat if necessary. Avoid abrasive cleaners, as they can dull the tumbler’s surface.

7.3 Wine & Soda Stains

Wine and soda stains present a unique challenge due to their tannins and sugars. Prompt action is vital! Immediately rinse the tumbler with cool water to dilute the staining agents. Create a paste of baking soda and water, apply it to the stain, and let it sit for at least an hour, or even overnight for stubborn marks.

Gently scrub with a soft brush, then rinse thoroughly. For red wine, a splash of white wine can surprisingly help neutralize the color before cleaning. Avoid harsh chemicals, as they can react with the tumbler material. Repeat the process if the stain persists.

Lid & Straw Care

Proper lid and straw cleaning is crucial for hygiene and preventing lingering odors. Disassemble lids completely whenever possible. Wash all components with warm, soapy water after each use, paying close attention to crevices where residue can accumulate. Utilize small brushes, like straw cleaning brushes, to reach difficult areas within straws.

For thorough disinfection, soak lids and straws in a solution of warm water and baking soda. Regularly inspect straws for cracks or damage and replace them as needed. Ensure all parts are completely dry before reassembling to prevent mildew growth.

8.1 Cleaning Straws Thoroughly

Cleaning Straws Thoroughly

Maintaining straw cleanliness prevents bacteria buildup and ensures a pleasant drinking experience. Dedicated straw cleaning brushes are essential for removing residue from inside the straw. Rinse the straw immediately after use to prevent drinks from drying and sticking. Use warm, soapy water and the brush to scrub the entire length, both inside and out.

For a deeper clean, soak straws in a baking soda and water solution. Regularly inspect straws for cracks or damage; replace them if found. Thoroughly dry straws after washing to avoid mold or mildew growth. Consider silicone straws for easier cleaning.

8.2 Disinfecting Lids

Disinfecting Lids

Tumbler lids harbor bacteria due to frequent contact with mouths and surfaces. Disinfecting regularly is crucial for hygiene. Disassemble the lid components as much as possible. Wash all parts with warm, soapy water, paying attention to crevices where residue accumulates.

For disinfection, use a diluted bleach solution (1 teaspoon bleach per 1 cup of water) or a commercial disinfectant spray. Allow the solution to sit for a few minutes before rinsing thoroughly with clean water. Ensure all traces of disinfectant are removed before reassembling and using the lid. Air dry completely.

Preventing Metallic Taste

A metallic taste in your tumbler can be unpleasant, but is often preventable. This typically occurs with stainless steel tumblers if the inner lining isn’t properly maintained. Avoid prolonged soaking or using abrasive cleaners, as these can damage the protective layer.

Regular cleaning with mild dish soap and warm water is key. If a metallic taste persists, try filling the tumbler with a baking soda and water solution, letting it sit overnight, then rinsing thoroughly. The RTIC Essential Tumbler’s ceramic lining helps prevent this issue, offering a pure taste.

Maintaining Insulation Performance

To keep your tumbler performing optimally, avoid extreme temperature shocks. Don’t immediately fill a hot tumbler with ice water, or vice versa, as this can compromise the vacuum insulation. Consistent care is crucial for both hot and cold beverages.

Ensure the lid is securely fastened when in use, as a loose lid allows heat transfer. Regularly check the lid’s seal for damage. Proper cleaning, avoiding harsh abrasives, also preserves insulation. Brands like Stanley and Simple Modern emphasize this in their care instructions, ensuring lasting temperature retention.

Dealing with Scratches & Dents

Minor scratches are often unavoidable with regular tumbler use, but they generally don’t affect insulation. Avoid abrasive cleaners or scouring pads, as these worsen surface damage. For dents, especially on stainless steel, gently try to massage the metal back into shape from the inside.

While significant dents can impact performance, most are cosmetic. Coatings and finishes are more susceptible to scratching; careful handling is key. RTIC and Stanley tumblers, known for durability, still benefit from preventative measures. Remember, a well-maintained tumbler lasts longer!

Care for Tumbler Coatings & Finishes

Tumbler coatings, like powder coating, provide color and grip, but require gentle care. Avoid harsh chemicals and abrasive cleaners, opting instead for mild soap and warm water. Prolonged sun exposure can fade colors, so store tumblers in shaded areas when not in use. Simple Modern tumblers, with their variety of finishes, benefit from extra caution.

Regularly wiping down the exterior prevents buildup that can dull the finish. For stubborn marks, a damp cloth with a tiny bit of baking soda can help. Remember, preserving the coating protects the underlying material and maintains the tumbler’s aesthetic appeal.

Specific Care Instructions for Popular Brands

Each brand has unique care recommendations. Stanley Tumblers thrive with hand washing using mild dish soap and warm water to maintain their shine. RTIC tumblers, boasting ceramic-lined interiors, also benefit from hand washing to protect the ceramic. Simple Modern tumblers are often dishwasher safe (check the base!), but hand washing extends their life.

Always refer to the manufacturer’s specific guidelines, often found on their website or the tumbler’s packaging. Following these instructions ensures optimal performance and preserves the tumbler’s insulation and finish, maximizing your investment.

13.1 Stanley Tumbler Care

Stanley Tumblers are renowned for durability, but require specific care. Hand washing with mild dish soap and warm water is strongly recommended to preserve the finish and avoid potential damage in dishwashers. Avoid abrasive cleaners, which can scratch the surface. For stubborn stains, a paste of baking soda and water can be gently applied.

Regular cleaning prevents metallic tastes and maintains insulation. Inspect the lid and seals frequently for wear and tear, replacing them as needed. Proper care ensures your Stanley tumbler remains a reliable companion for years to come.

13.2 Simple Modern Tumbler Care

Simple Modern tumblers, known for affordability and leak-resistance, benefit from gentle cleaning practices. While some models may be dishwasher safe (check the base!), hand washing is preferred to prolong the life of the finish and insulation. Use mild soap and warm water, avoiding harsh chemicals or abrasive scrubbers.

Pay close attention to the lids, ensuring both the straw and flip-top options are thoroughly cleaned. Regular maintenance prevents staining and maintains the tumbler’s ability to keep beverages cold or warm for extended periods.

13.3 RTIC Tumbler Care

RTIC Essential Tumblers, featuring a ceramic-lined interior, require specific care to maintain their quality and prevent metallic tastes. Hand washing with mild dish soap and warm water is highly recommended, as the ceramic lining can be sensitive to harsh dishwasher detergents. Avoid abrasive cleaners that could scratch the interior surface.

Regularly inspect the spill-proof lid for any cracks or damage, and ensure it’s thoroughly cleaned. Proper care will preserve the tumbler’s insulation performance and ensure enjoyable sips of both hot and cold beverages for years to come.

Printable Care Instruction Template Design

Designing an effective printable template requires balancing aesthetics with clarity. Consider a clean layout with easily readable fonts and concise instructions. Incorporate visual elements like small icons representing hand washing, dishwasher safety (or lack thereof), and stain removal techniques. A color scheme that complements popular tumbler finishes can enhance appeal.

Prioritize a logical flow of information, grouping instructions by tumbler material or care method. Leave sufficient white space to prevent a cluttered appearance. The design should be easily adaptable for various tumbler brands and models, offering a versatile solution for customers.

Essential Information to Include on Printable Instructions

Comprehensive instructions must detail washing methods: hand washing with mild soap is preferred for many, while specifying dishwasher-safe models is crucial. Clearly state whether the tumbler is suitable for both hot and cold beverages, referencing double-wall vacuum insulation. Include warnings about potential metallic tastes and how to prevent them.

Highlight proper lid and straw cleaning, emphasizing thoroughness. Advise on stain removal for common culprits like coffee, tea, smoothies, wine, and soda. Mention maintaining insulation performance and addressing minor scratches or dents. Brand-specific guidance (Stanley, Simple Modern, RTIC) is valuable.

Creating a Visually Appealing Printable

Design should prioritize clarity and readability. Utilize a clean layout with ample white space, avoiding a cluttered appearance. Incorporate relevant icons alongside text – a dishwasher symbol for safe items, a hand-wash icon for others. Choose a color palette that complements popular tumbler finishes, ensuring legibility.

Font selection is key; opt for easily readable fonts in appropriate sizes. Consider adding a small image of a tumbler to the design for visual appeal. Break up text into concise bullet points or numbered lists. A visually engaging design encourages users to actually read and follow the care instructions.

File Formats for Printable Instructions (PDF, JPG)

PDF (Portable Document Format) is highly recommended. It preserves formatting across different devices and operating systems, ensuring consistent appearance. PDFs are also easily printable without distortion. However, JPG (Joint Photographic Experts Group) offers broader compatibility and smaller file sizes, ideal for sharing online or via email.

Consider offering both formats to cater to diverse user needs. When saving as JPG, use a high-resolution setting to maintain image quality. PDF is superior for professional-looking, printable documents, while JPG provides convenience for quick sharing and viewing.

Where to Print Your Instructions

Home printing offers convenience and control, but quality depends on your printer. Ensure sufficient ink and quality paper for best results. Alternatively, numerous online and local print shops provide professional printing services. Staples, FedEx Office, and local copy centers are excellent options.

For larger quantities or a more polished look, consider professional printing. Online services often offer various paper stocks and finishes. When choosing a printing method, factor in cost, quantity, and desired quality. Remember to select appropriate settings for your chosen file format (PDF or JPG).

Distributing Your Printable Instructions

Sharing your tumbler care guide is simple! Include a printed copy with each tumbler sold, fostering customer satisfaction and reducing potential issues. Digital distribution is also effective – email the PDF to customers after purchase, or host it on your website for easy download.

Social media platforms like Tumblr are great for wider reach. Consider creating an engaging post with a link to the printable. Offering a free resource builds trust and brand loyalty. Ensure the file is easily accessible and clearly labeled for optimal user experience.

Troubleshooting Common Tumbler Issues

Metallic tastes can occur; thorough cleaning often resolves this. Stubborn stains from coffee, tea, smoothies, wine, or soda require specific attention – baking soda pastes or specialized cleaners can help. If insulation performance declines, avoid extreme temperatures and ensure a tight-fitting lid.

Scratches and dents, while cosmetic, don’t usually affect function. However, damaged coatings may require replacement. Addressing these issues promptly extends the tumbler’s life. Refer customers to brand-specific care guides (Stanley, Simple Modern, RTIC) for detailed solutions.

Extending the Life of Your Tumbler

Consistent, gentle care is key. Hand washing, using mild soap, and avoiding abrasive cleaners preserve finishes and insulation. Regularly inspect for damage – address scratches or dents promptly to prevent further issues. Proper lid and straw cleaning prevents bacterial growth and odors.

Storing tumblers correctly, away from extreme temperatures and direct sunlight, also helps. Following brand-specific guidelines (Stanley, Simple Modern, RTIC) ensures optimal longevity. A well-maintained tumbler provides years of reliable use, reducing waste and saving money.

Hot vs. Cold Drink Considerations

Tumblers excel with both hot and cold beverages thanks to their double-wall vacuum insulation. However, extreme temperature fluctuations can impact longevity. Avoid rapid shifts – don’t immediately fill a hot tumbler with ice water, or vice versa. This prevents potential stress on the materials.

For hot drinks, be cautious when handling to avoid burns. Cold drinks may cause condensation; a coaster prevents surface damage. Regular cleaning is crucial regardless of the beverage type, preventing stains and maintaining taste neutrality.

Tumbler Safety Precautions

Always exercise caution when using tumblers with hot liquids, as external surfaces can become hot to the touch. Secure lids tightly to prevent spills and potential burns. Avoid dropping tumblers, as dents can compromise insulation. Do not use abrasive cleaners, as they can damage finishes.

Inspect tumblers regularly for cracks or damage; discontinue use if found. Keep out of reach of young children when filled with hot beverages. Never microwave tumblers unless specifically indicated as microwave-safe by the manufacturer.

Consistent, gentle care is key to maximizing your tumbler’s lifespan and maintaining its performance. Following these guidelines – prioritizing hand washing, appropriate cleaning agents, and mindful handling – will prevent damage and preserve insulation. Remember to consult brand-specific instructions for optimal results, like those for Stanley, Simple Modern, or RTIC.

By implementing these simple steps, you’ll enjoy your favorite beverages at the perfect temperature for years to come, reducing waste and saving money. A well-maintained tumbler is a sustainable choice!

PDF

sri krishna ashtakam in telugu pdf

Sri Krishna Ashtakam in Telugu PDF: A Comprehensive Guide

This guide details accessing the Sri Krishna Ashtakam in Telugu, often available as a PDF. Resources include Stotra Nidhi, Hari Ome, and direct downloads.

Numerous online sources offer the text, lyrics, and meanings, facilitating devotional practice. PDF versions cater to convenient offline study and recitation.

Explore options for Telugu eBooks, mobile apps, and related stotras by Adi Shankaracharya, enhancing your spiritual journey with this sacred hymn.

Sri Krishna Ashtakam, a revered hymn composed by Adi Shankaracharya, is a devotional masterpiece dedicated to Lord Krishna. This octet, consisting of eight verses, beautifully encapsulates the glory, virtues, and divine leelas (playful activities) of the Supreme Personality of Godhead. For devotees seeking to connect with Krishna through the Telugu language, accessing the Ashtakam in Telugu script is profoundly significant.

The availability of the Sri Krishna Ashtakam in Telugu PDF format has greatly facilitated its widespread dissemination and practice. This allows individuals, regardless of location or access to traditional resources, to readily engage with the hymn’s powerful verses. The text, often found on platforms like Stotra Nidhi and Hari Ome, provides a direct pathway to experiencing Krishna’s divine presence.

Understanding the Ashtakam requires appreciating its poetic structure and the depth of its philosophical insights. The verses are crafted to evoke a sense of devotion, surrender, and ultimately, realization of Krishna as the ultimate reality. The Telugu translation ensures that the essence of Shankaracharya’s original Sanskrit composition remains accessible to a wider audience, fostering a deeper connection with the divine.

Whether seeking to learn the lyrics, understand the meaning, or simply bask in the hymn’s spiritual vibrations, the Telugu PDF version of the Sri Krishna Ashtakam serves as an invaluable resource for devotees on their spiritual journey.

The Author: Adi Shankaracharya

Adi Shankaracharya, a towering figure in the history of Indian philosophy and spirituality, is the composer of the Sri Krishna Ashtakam. Born in Kalady, Kerala, in the 8th century CE, he was a prodigious scholar and a relentless advocate for Advaita Vedanta – the philosophy of non-dualism. His profound insights and unwavering devotion led him to travel across India, establishing monasteries and revitalizing Hinduism.

Shankaracharya’s compositions, including the Sri Krishna Ashtakam, are renowned for their poetic beauty, philosophical depth, and devotional fervor. While primarily known for his commentaries on the Upanishads, Brahma Sutras, and Bhagavad Gita, his stotras (hymns) like the Ashtakam demonstrate his deep love for various deities, including Lord Krishna.

The availability of the Sri Krishna Ashtakam in Telugu PDF format allows devotees to connect with Shankaracharya’s teachings and devotion in a culturally relevant manner. His ability to distill complex philosophical concepts into accessible verses makes his work timeless and universally appealing. The Telugu translation preserves the essence of his original Sanskrit composition, ensuring its continued relevance for generations to come.

Through the Ashtakam, Shankaracharya invites us to contemplate Krishna’s divine attributes and surrender to His grace. Accessing this hymn in Telugu PDF form is a testament to the enduring legacy of this great spiritual master.

Significance of the Ashtakam

The Sri Krishna Ashtakam holds immense significance for devotees of Lord Krishna, serving as a powerful prayer and a profound expression of devotion. Composed by Adi Shankaracharya, this octet (eight verses) encapsulates Krishna’s glory, divine attributes, and ultimate reality. Recitation of the Ashtakam is believed to bestow blessings, purify the mind, and foster a deeper connection with the divine.

In Telugu, the Ashtakam gains further cultural resonance, allowing devotees to experience its spiritual power through their native language. The availability of the text in PDF format enhances accessibility, enabling individuals to easily study, recite, and internalize its teachings. This is particularly valuable for those seeking a convenient and portable means of devotional practice.

The Ashtakam isn’t merely a poetic composition; it’s a pathway to realizing Krishna as the ‘Guru of the entire universe’. It highlights His role as the supreme being, the source of all creation, and the ultimate refuge for all beings. The Telugu PDF versions often include transliterations and meanings, aiding comprehension and facilitating heartfelt devotion.

Ultimately, the significance lies in its ability to awaken devotion and lead to spiritual liberation. The Sri Krishna Ashtakam in Telugu, readily available as a PDF, continues to inspire and uplift countless devotees.

Understanding the Text

Exploring the Sri Krishna Ashtakam in Telugu PDF format reveals core themes of devotion and Krishna’s divine nature; Translations and meanings unlock deeper understanding.

The eight verses, written in Sanskrit and available in Telugu, offer insights into Krishna’s glory and ultimate reality.

Sri Krishna Ashtakam: Core Themes

The Sri Krishna Ashtakam, readily accessible in Telugu PDF format, revolves around several central devotional themes. Primarily, it emphasizes the supreme glory and divine attributes of Lord Krishna, portraying Him as the ultimate reality and the guiding force of the universe. The Ashtakam beautifully articulates Krishna’s role as the Guru, the divine teacher, for all beings.

A significant theme is the concept of surrender – sharanagati – urging devotees to completely relinquish themselves to Krishna’s will. This surrender isn’t born of fear, but of profound love and trust in His benevolent nature. The verses highlight Krishna’s all-encompassing presence and His ability to liberate souls from the cycle of birth and death.

Furthermore, the text explores the multifaceted nature of Krishna’s divinity, encompassing His playful, compassionate, and powerful aspects. The Telugu PDF versions often include detailed explanations of these nuances, aiding devotees in a deeper comprehension of Krishna’s character. The Ashtakam also underscores the importance of bhakti – unwavering devotion – as the path to realizing Krishna’s grace. It’s a celebration of divine love and a call to cultivate a personal relationship with the Lord.

The Eight Verses (Ashtaka) – An Overview

The Sri Krishna Ashtakam, conveniently found in Telugu PDFs, comprises eight verses, each a jewel in the crown of devotional poetry. These verses, penned by Adi Shankaracharya, systematically unfold the glory of Lord Krishna. The first verse typically introduces Krishna’s magnificence, setting the tone for the subsequent praises;

Subsequent verses delve into specific aspects of Krishna’s divinity – His role as the cosmic sustainer, His enchanting beauty, and His power to dispel ignorance. The fourth verse, often highlighted, emphasizes Krishna as the ultimate reality, the source of all existence. Each verse builds upon the previous, creating a crescendo of devotion.

Telugu PDF versions often include transliteration, word-by-word meanings, and comprehensive explanations, making the verses accessible to a wider audience. The seventh verse frequently describes Krishna’s playful nature, while the eighth verse culminates in a heartfelt plea for surrender and divine grace. Studying these verses, readily available in digital format, offers a profound spiritual experience.

Language and Script: Sanskrit & Telugu

The Sri Krishna Ashtakam originates in Sanskrit, the ancient language of Hindu scriptures, renowned for its precision and spiritual depth. However, its profound message has been beautifully translated and rendered into Telugu, making it accessible to a broader audience in Andhra Pradesh and Telangana.

Telugu versions, frequently available as PDFs, employ the Telugu script, a distinct and elegant writing system. These translations strive to maintain the essence and poetic beauty of the original Sanskrit verses. The script itself adds a cultural layer to the devotional experience.

Many PDF resources provide both the original Sanskrit verses alongside the Telugu translation, allowing for comparative study. This dual presentation is invaluable for those learning Sanskrit or seeking a deeper understanding of the nuances of the text. The availability of both languages ensures the Ashtakam’s continued relevance and accessibility, preserving its spiritual power for generations.

Availability of the Sri Krishna Ashtakam in Telugu

Numerous PDF versions are readily available online via Stotra Nidhi, Hari Ome, and direct downloads. Resources also include online lyrics and mobile applications.

Access is easy, supporting devotional practice and study of this sacred hymn in the Telugu language.

PDF Versions: Sources and Reliability

Locating a reliable PDF version of the Sri Krishna Ashtakam in Telugu requires careful consideration of the source. Several websites offer downloadable PDF files, including Stotra Nidhi, which provides a collection of Adi Shankaracharya’s stotras in various languages, including Telugu. Hari Ome is another source, offering the Ashtakam text in Telugu script.

However, the reliability of these PDFs can vary. It’s crucial to verify the accuracy of the text by comparing it with established sources or consulting with individuals knowledgeable in Sanskrit and Telugu; Some PDFs may contain transcription errors or variations in transliteration, potentially affecting the meaning and pronunciation of the verses.

When downloading, prioritize sources known for their commitment to accuracy and authenticity. Look for PDFs that clearly indicate the source of the text and any editorial notes. Be cautious of websites with unclear origins or those offering multiple versions without explanation. Checking file sizes and dates can also provide clues about the document’s origin and potential updates. Always scan downloaded files with antivirus software to ensure they are safe.

Furthermore, consider the formatting and readability of the PDF. A well-formatted document with clear Telugu script and proper verse divisions will enhance your reading and recitation experience. If possible, cross-reference the PDF with online lyrics or audio recordings to confirm its accuracy.

Online Resources for Telugu Lyrics

Numerous online platforms provide access to the Sri Krishna Ashtakam lyrics in Telugu, complementing PDF resources. Stotra Nidhi serves as a central repository, offering the text alongside transliterations and meanings. Websites dedicated to Hindu stotras frequently host the Ashtakam, allowing for convenient online viewing and copying.

Hari Ome presents the lyrics in Telugu script, enabling devotees to read and learn the verses directly. Searching for “Krishna Ashtakam Telugu lyrics” yields various results, including dedicated pages and forum discussions where users share transcriptions and interpretations. These resources often include audio pronunciations, aiding in correct recitation.

However, it’s essential to verify the accuracy of online lyrics, as transcriptions can sometimes contain errors. Comparing multiple sources and cross-referencing with established texts is recommended. Look for websites that cite their sources or offer editorial notes. Utilize online Telugu dictionaries to confirm the meanings of unfamiliar words.

Additionally, platforms like YouTube host videos featuring recitations of the Sri Krishna Ashtakam with Telugu subtitles, providing a visual and auditory learning experience. These resources can be invaluable for understanding the pronunciation and flow of the verses. Remember to prioritize reputable sources and exercise caution when relying solely on user-generated content.

Mobile App Availability

Several mobile applications offer the Sri Krishna Ashtakam in Telugu, providing convenient access for devotees on the go. Stotra Nidhi, known for its extensive collection of stotras, often includes a mobile app featuring the Ashtakam with synchronized Telugu lyrics and audio recitations.

These apps typically allow users to adjust font sizes, bookmark favorite verses, and share the content with others. Offline access is a significant advantage, enabling recitation even without an internet connection. Searching app stores for “Sri Krishna Ashtakam Telugu” reveals various options, ranging from dedicated stotra apps to broader devotional platforms.

When selecting an app, consider factors like user interface, audio quality, and the accuracy of the Telugu text. Read user reviews to gauge the app’s reliability and functionality. Some apps offer additional features, such as translations, commentaries, and daily reminders for recitation.

Furthermore, apps may include related stotras like the Balakrishna Ashtakam or the Krishna Ashtottara Sata Namavali in Telugu, enriching the devotional experience. Ensure the app is compatible with your device and operating system before downloading. Regular updates are crucial for bug fixes and improved performance.

Key Verses and Their Meanings

Exploring select verses reveals Krishna’s glory, ultimate reality, and the path to devotion. PDF resources often include Telugu translations and detailed explanations of each shloka’s significance.

Understanding these verses deepens connection and facilitates meaningful recitation of the Sri Krishna Ashtakam.

The opening verse of the Sri Krishna Ashtakam, readily available in Telugu PDF formats, serves as a powerful introduction to the divine splendor of Lord Krishna. It establishes Krishna as the embodiment of supreme bliss, the ultimate reality, and the source of all creation. The verse, often beginning with “Shriyashtishto Vishno,” beautifully portrays Krishna as the one who possesses unparalleled beauty and grace.

In the Telugu translations found within these PDF documents, the verse emphasizes Krishna’s role as the preserver and sustainer of the universe. It highlights His divine attributes – steadfastness, wisdom, and purity; The verse isn’t merely a description; it’s an invocation, a heartfelt plea to connect with Krishna’s divine energy.

Many PDF versions include transliteration alongside the Telugu text, aiding those unfamiliar with the script. Furthermore, detailed commentaries explain the nuances of each word, revealing the profound philosophical depth embedded within this initial verse. Reciting this verse, as presented in the Telugu PDF, is believed to purify the mind and awaken devotion, setting the stage for a deeper exploration of Krishna’s divine qualities throughout the Ashtakam.

Verse 4: Krishna as the Ultimate Reality

Verse four of the Sri Krishna Ashtakam, frequently accessed through Telugu PDF resources, profoundly declares Krishna as the ultimate truth, the very foundation of existence. This verse transcends a simple description, asserting Krishna’s identity as Brahman – the absolute reality underlying the phenomenal world. The PDF versions often present the verse alongside detailed explanations in Telugu, clarifying its philosophical implications.

The Telugu translations emphasize that Krishna isn’t merely a deity among many, but the source from which all other deities and all creation emanate. It highlights His all-pervading nature, stating that He resides within every being and every object. Studying this verse within a Telugu PDF allows for a deeper understanding of Advaita Vedanta principles, subtly woven into the devotional poetry.

Many commentaries accompanying the PDF texts explain how recognizing Krishna as the ultimate reality leads to liberation from the cycle of birth and death. Recitation of this verse, as found in the Telugu PDF, is believed to dissolve ignorance and reveal the inherent divinity within oneself, fostering a profound sense of peace and unity with the cosmos.

Verse 8: Surrender and Devotion

The final verse of the Sri Krishna Ashtakam, readily available in Telugu PDF formats, encapsulates the essence of Bhakti Yoga – complete surrender and unwavering devotion to Lord Krishna. This verse isn’t merely a concluding statement, but a heartfelt plea for grace and liberation, often emphasized within the Telugu PDF commentaries.

Translations in Telugu PDF versions highlight the poet’s complete relinquishment of ego and worldly attachments, offering everything at Krishna’s feet. It’s a declaration of helplessness and a simultaneous expression of profound faith, recognizing Krishna as the sole refuge. The verse stresses that true devotion isn’t about ritualistic practices, but about a genuine, loving connection.

Numerous Telugu PDF resources explain that reciting this verse with sincerity dissolves the sense of separation and fosters a deep, intimate relationship with the divine. It’s believed to purify the heart, remove obstacles, and ultimately lead to the attainment of Moksha. The PDF often includes guidance on proper pronunciation and meditative practices to enhance the verse’s transformative power.

Related Ashtakams and Stotras

Explore the Balakrishna Ashtakam in Telugu PDF, alongside the Krishna Ashtottara Sata Namavali. Discover other stotras by Adi Shankaracharya, readily available online.

These related texts deepen devotional practice and understanding.

Balakrishna Ashtakam in Telugu

The Balakrishna Ashtakam, a beautiful hymn dedicated to the infant Krishna, complements the Sri Krishna Ashtakam in Telugu devotional practice. Often found alongside resources for the Sri Krishna Ashtakam in PDF format, the Balakrishna Ashtakam focuses on the endearing childhood pastimes of Lord Krishna, offering a different perspective on his divine glory.

Like the Sri Krishna Ashtakam, the Balakrishna Ashtakam is frequently available as a Telugu PDF download from websites like Stotra Nidhi and Hari Ome, providing easy access for devotees. The lyrics, often transliterated and translated, allow for deeper understanding and heartfelt recitation. The opening line, “Leelayo Kuchela,” immediately evokes the playful nature of young Krishna and his interactions with friends.

Devotees often study and chant both Ashtakams together, appreciating the complete spectrum of Krishna’s divinity – from his playful infancy to his profound wisdom and power. Searching online for “Sri Bala Krishna Ashtakam in Telugu Lyrics Pdf” will yield numerous results, including downloadable PDF files and websites offering the text and audio renditions. This allows for both visual learning and auditory immersion in the devotional experience. The availability of these resources in Telugu ensures accessibility for a wider audience, fostering a deeper connection with Lord Krishna.

Krishna Ashtottara Sata Namavali (Telugu)

The Krishna Ashtottara Sata Namavali, meaning 108 names of Lord Krishna, is a powerful supplementary practice to reciting the Sri Krishna Ashtakam in Telugu. Frequently encountered alongside PDF resources for the Ashtakam, the Namavali offers a comprehensive exploration of Krishna’s attributes and divine forms.

Available in Telugu script and often as a downloadable PDF, the Namavali allows devotees to immerse themselves in the myriad qualities of the Lord. Websites like those hosting the Sri Krishna Ashtakam in Telugu, often include the Ashtottara Sata Namavali as a related resource. This provides a holistic devotional experience, combining the poetic beauty of the Ashtakam with the expansive enumeration of names.

Reciting these 108 names is believed to bestow immense spiritual benefits, purifying the mind and fostering devotion. Many online sources offer the Namavali in PDF format, alongside translations and explanations of each name’s significance. Searching for “Sri Krishna Ashtottara Sata Namavali Telugu” will reveal numerous options for download and study. The practice complements the Sri Krishna Ashtakam, deepening one’s understanding and love for Lord Krishna, and is often found bundled with Ashtakam PDFs.

Other Relevant Stotras by Adi Shankaracharya

Adi Shankaracharya, the revered composer of the Sri Krishna Ashtakam, authored numerous other stotras equally enriching for spiritual seekers. Exploring these works alongside the Telugu PDF of the Ashtakam provides a broader understanding of his philosophical depth and devotional fervor.

Notable stotras include the Bhaja Govindam, a concise yet profound hymn emphasizing the importance of devotion and self-realization. Similarly, the Shiva Manasa Puja offers a beautiful mental worship of Lord Shiva, showcasing Shankaracharya’s inclusivity. These stotras, like the Sri Krishna Ashtakam, are frequently available in Telugu translations and PDF formats.

Devotees seeking a comprehensive spiritual practice can benefit from studying Shankaracharya’s complete works. Resources like Stotra Nidhi often compile his stotras, including Telugu versions and downloadable PDFs. Furthermore, exploring his commentaries on the Upanishads provides deeper insights into the philosophical underpinnings of his devotional poetry. Accessing these stotras alongside the Sri Krishna Ashtakam in Telugu enhances the overall devotional experience, fostering a holistic spiritual journey and enriching understanding of the composer’s genius.

Practical Applications & Usage

The Sri Krishna Ashtakam, in Telugu PDF format, facilitates daily recitation for spiritual benefit. It’s used in pujas, aiding devotion and memorization through consistent practice.

Regular chanting fosters inner peace and connection with Lord Krishna;

Daily Recitation and Benefits

Consistent daily recitation of the Sri Krishna Ashtakam in Telugu, readily available as a PDF, offers profound spiritual benefits. The practice cultivates a deeper connection with Lord Krishna, fostering inner peace, tranquility, and a heightened sense of devotion. Regular chanting purifies the mind, reducing stress and anxiety, and promoting emotional well-being.

The eight verses, when recited with sincerity and understanding, are believed to dispel negative energies and attract positive vibrations. Many devotees find that consistent recitation enhances their focus, concentration, and overall mental clarity. Accessing the text via PDF allows for convenient practice at any time and in any location, integrating the sacred hymn seamlessly into daily life.

Furthermore, the lyrical beauty and profound meaning of the Ashtakam inspire contemplation and self-reflection. It encourages a deeper understanding of Krishna’s divine attributes and the path to liberation. The Telugu PDF format ensures accessibility for native speakers, preserving the nuances of the language and enhancing the devotional experience. Ultimately, daily recitation is a powerful tool for spiritual growth and a pathway to realizing one’s true self.

Use in Pujas and Ceremonies

The Sri Krishna Ashtakam, conveniently accessible in Telugu PDF format, holds a significant place in various Hindu Pujas and ceremonial practices dedicated to Lord Krishna. Its recitation is considered highly auspicious, enhancing the sanctity and effectiveness of the rituals. During Krishna Jayanthi or other devotional gatherings, the Ashtakam is often chanted as an integral part of the worship.

The verses are frequently incorporated into elaborate Pujas, creating a spiritually charged atmosphere. Priests and devotees alike utilize the Telugu PDF version to ensure accurate pronunciation and understanding of the lyrics. The rhythmic flow and devotional content of the Ashtakam elevate the energy of the ceremony, fostering a deeper connection with the divine.

Moreover, the Sri Krishna Ashtakam can be used to invoke blessings for special occasions, such as weddings, housewarmings, or the commencement of new ventures. Its recitation is believed to remove obstacles and bestow prosperity. Having the text readily available as a PDF simplifies its inclusion in these ceremonies, making it accessible to all participants and enriching the overall devotional experience.

Learning and Memorization Techniques

Utilizing the readily available Sri Krishna Ashtakam in Telugu PDF format, devotees can employ several effective techniques for learning and memorization. Begin by breaking down each verse into smaller, manageable phrases, focusing on understanding the meaning in Telugu and its translation. Repeated reading aloud, coupled with listening to audio recitations, significantly aids retention.

A helpful method involves writing out the verses from the PDF, reinforcing muscle memory and visual recognition. Creating flashcards with key phrases or words can also be beneficial for quick recall. Associating each verse with a specific image or story related to Lord Krishna’s life further enhances memorization.

Consistent daily practice, even for a short duration, is crucial. Chanting along with a recording, then attempting to recite from memory, builds confidence and fluency. Sharing the learning process with others, forming a study group, provides mutual support and encouragement. The convenience of the PDF allows for flexible learning, anytime and anywhere, fostering a deeper connection with the divine verses.

calrose rice cooking instructions

Calrose Rice Cooking Instructions: A Comprehensive Guide

Calrose rice demands precise instructions for fluffy results; rinsing is key‚ and ratios vary—typically 1․25 water to 1 rice‚ or even 1:1 for rice cookers․

Understanding Calrose Rice

Calrose rice‚ a medium-grain variety‚ is renowned for its versatility and slightly sticky texture‚ making it ideal for a wide range of dishes․ Developed in California‚ it’s a staple in many cuisines‚ particularly Asian-inspired meals․ Unlike long-grain rice which remains separate and fluffy‚ Calrose possesses a higher starch content‚ contributing to its cohesive quality․

This unique characteristic stems from the specific cultivation and milling processes․ Understanding this inherent stickiness is crucial when determining the appropriate water ratio and cooking method․ While it’s forgiving‚ mastering the nuances of Calrose ensures consistently perfect results․ It’s also important to note that Calrose generally requires less water compared to other white rice varieties‚ often around 1 ¼ cups of water per cup of rice․

Its ability to absorb flavors beautifully makes it a fantastic base for pilafs‚ risotto-style dishes‚ and even simple steamed rice served alongside flavorful entrees․

What is Calrose Rice?

Calrose rice is a medium-grain Japanese cultivar developed in California‚ becoming a cornerstone for both home cooks and commercial kitchens․ It’s celebrated for its exceptional ability to absorb flavors‚ making it incredibly versatile․ This rice boasts a slightly sticky texture when cooked‚ a characteristic highly valued in cuisines like Japanese‚ Korean‚ and Latin American․

Originally bred from a cross between Japonica rice varieties‚ Calrose offers a balance between the fluffiness of long-grain rice and the stickiness of short-grain․ This makes it perfect for dishes where grains need to cling together‚ such as sushi or paella․ It cooks up tender and slightly chewy‚ providing a satisfying mouthfeel․

Compared to other white rices‚ Calrose typically requires a slightly different water ratio‚ often less water‚ to achieve optimal results․ Its consistent quality and reliable performance have cemented its place as a favorite among rice enthusiasts․

Rinsing Calrose Rice: The Importance

Rinsing Calrose rice is a crucial step often overlooked‚ yet profoundly impacts the final texture․ This process removes excess starch from the rice grains’ surface․ Without rinsing‚ the released starch can lead to a gummy or sticky consistency‚ hindering the desired fluffy outcome․ Thorough rinsing ensures individual grains remain distinct and separate during cooking․

To effectively rinse‚ place the rice in a fine-mesh strainer and run cold water over it‚ gently agitating with your hand․ Continue until the water runs clear – this typically requires several changes of water․ The cloudy water indicates remaining starch․

While some advocate skipping rinsing for nutrient retention‚ the textural benefits for Calrose are significant․ Properly rinsed rice cooks more evenly and yields a superior‚ less-mushy result‚ especially important for dishes where grain definition is key․

Optimal Rice to Water Ratio for Calrose

Determining the optimal rice to water ratio is paramount for perfectly cooked Calrose rice․ Unlike many other rice varieties‚ Calrose generally requires less water․ A common starting point is a 1:1․25 ratio – one cup of rice to 1 ¼ cups of water․ However‚ this can be adjusted based on personal preference and cooking method․

Rice cookers often utilize a 1:1 ratio successfully‚ as their controlled environment compensates for the reduced water․ Stovetop cooking may benefit from slightly more water‚ around 1 ½ cups per cup of rice‚ particularly when aiming for a softer texture․

Experimentation is encouraged! Factors like pot type and heat intensity influence water absorption․ Observing the rice during cooking and adjusting the ratio in subsequent attempts will yield consistently ideal results․

Stovetop Cooking Method

The stovetop method offers direct control over the cooking process for Calrose rice․ Begin by combining rinsed rice and water – typically 1 ½ cups water per 1 cup rice – in a medium saucepan․ Bring the mixture to a rapid boil over medium-high heat․

Once boiling‚ immediately reduce the heat to the lowest setting‚ ensuring a gentle simmer․ Cover the saucepan tightly with a lid; this is crucial for trapping steam and even cooking․ Allow the rice to simmer undisturbed for 18-20 minutes‚ or until all the water is absorbed․

Avoid lifting the lid during simmering‚ as this releases steam and disrupts the cooking process․ After simmering‚ remove the saucepan from the heat and let it rest‚ covered‚ for 10 minutes before fluffing with a fork․

Detailed Stovetop Instructions

Step 1: Rinse 1 cup of Calrose rice under cold water until the water runs clear․ This removes excess starch for a fluffier texture․ Step 2: Combine the rinsed rice with 1 ¼ to 1 ½ cups of water in a medium saucepan․ A tighter lid helps retain steam․

Step 3: Bring the mixture to a boil over medium-high heat․ Once boiling‚ immediately reduce heat to low‚ cover tightly‚ and simmer for 18-20 minutes․ Do not lift the lid during simmering!

Step 4: After simmering‚ remove from heat and let stand‚ covered‚ for 10 minutes․ This allows the steam to redistribute‚ finishing the cooking process․ Step 5: Gently fluff the rice with a fork before serving․ Adjust water slightly for desired texture․

Rice Cooker Method

Calrose rice cooks beautifully in a rice cooker‚ offering convenience and consistent results․ Begin by thoroughly rinsing 1 cup of rice under cold water until the water runs clear․ This step is crucial for removing excess starch․

Add the rinsed rice to your rice cooker pot․ Then‚ pour in 1 cup to 1 ¼ cups of water‚ depending on your cooker and desired texture․ Many rice cookers have markings for rice and water levels; utilize these if available․

Secure the lid and select the “white rice” setting․ Allow the cooker to complete its cycle․ Once finished‚ let the rice rest‚ covered‚ for 10 minutes before fluffing with a fork․ This resting period ensures even moisture distribution and a perfect final product․

Rice Cooker Ratio Adjustments

Calrose rice‚ when cooked in a rice cooker‚ often requires slight ratio adjustments for optimal texture․ While a standard 1:1 rice-to-water ratio works well for many cookers‚ some may benefit from a touch more water․

If your rice consistently emerges too dry‚ incrementally increase the water by 1-2 tablespoons per cup of rice․ Conversely‚ if the rice is mushy‚ reduce the water slightly․ Experimentation is key to finding the sweet spot for your specific cooker․

Consider your rice cooker’s age and model․ Older models may require more water due to potential heating element variations․ Always start with the manufacturer’s recommended ratio and adjust from there․ Remember to rinse the rice thoroughly before cooking‚ as this impacts water absorption․

Instant Pot Cooking Method

Calrose rice cooks beautifully in an Instant Pot‚ offering a convenient and efficient method․ Begin by rinsing the rice until the water runs clear․ A common starting ratio is 1 cup rice to 1 ¼ cups water‚ though slight adjustments may be needed based on your Instant Pot model․

Combine the rinsed rice and water in the Instant Pot․ Secure the lid‚ ensuring the valve is set to sealing․ Cook on high pressure for 3-5 minutes‚ followed by a 10-minute natural pressure release․ After the natural release‚ manually release any remaining pressure․

Fluff the rice gently with a fork before serving․ The Instant Pot’s sealed environment ensures even cooking and a consistently tender result․ This method is particularly useful for larger batches of rice‚ saving time and effort․

Instant Pot Pressure Cooking Times

Precise timing is crucial when utilizing the Instant Pot for Calrose rice․ For 1 cup of rice‚ a 3-minute cook time at high pressure generally yields perfect results‚ followed by a full 10-minute natural pressure release․ Increasing the quantity to 2 cups requires a slightly extended cook time of 4 minutes‚ maintaining the 10-minute natural release․

For larger batches – 3 cups or more – a 5-minute cook time at high pressure is recommended‚ again with a 10-minute natural release․ Remember that the natural release is vital for allowing the rice to finish steaming and achieve optimal texture․

These times assume a rice-to-water ratio of 1:1․25․ Always prioritize a complete natural release to avoid mushy rice․ Experimenting with minor adjustments may be necessary based on your specific Instant Pot model and desired consistency․

Soaking Calrose Rice: Benefits and How-To

Soaking Calrose rice before cooking offers several advantages‚ leading to a more even texture and reduced cooking time․ The process helps remove excess starch‚ resulting in fluffier‚ less sticky grains․ To soak‚ simply rinse 1 cup of Calrose rice thoroughly under cold water until the water runs clear․

Then‚ place the rinsed rice in a bowl and cover with fresh‚ cool water․ Allow it to soak for at least 30 minutes‚ or even up to several hours․ Drain the water completely before cooking‚ using a fine-mesh sieve․

When using the stovetop method‚ reduce the water slightly – a ratio of 1 cup rice to 1 1/4 cups water is ideal․ For rice cookers‚ follow the manufacturer’s instructions‚ potentially adjusting the water level downwards․

Adjusting Water Levels for Desired Texture

Calrose rice versatility allows for texture customization through water level adjustments․ For softer‚ more tender rice‚ slightly increase the water – try a ratio of 1 cup rice to 1 3/4 cups water when using the stovetop method․ Conversely‚ for firmer‚ more distinct grains‚ reduce the water to 1 1/4 cups per 1 cup of rice․

Rice cooker users should consult their appliance’s manual‚ as optimal ratios vary․ However‚ a general guideline is to decrease the water by 1/4 cup for firmer rice or increase it by 1/4 cup for softer rice‚ relative to the standard 1:1․25 ratio․

Remember to account for soaking; if the rice has been soaked‚ further reduce the water to prevent mushiness․ Experimentation is key to finding your perfect texture!

Troubleshooting Common Issues

Calrose rice cooking isn’t always perfect; common issues arise․ Mushy rice often results from too much water; next time‚ reduce the liquid slightly․ Ensure accurate measurement and avoid overcooking․ If rice is too dry and hard‚ increase the water by a small increment – perhaps 1/4 cup – in your next attempt․

Uneven cooking can occur on the stovetop if the heat is too high or the pot isn’t covered tightly; Maintain a consistent simmer and a secure lid․ For rice cookers‚ ensure the cooker is functioning correctly and the ratio is appropriate for the model․

Burnt rice indicates excessive heat or insufficient water․ Lower the heat and add a touch more liquid next time․ Careful monitoring and adjustment are crucial for consistently successful results․

Rice is Too Mushy

Mushy Calrose rice typically indicates an excess of water during cooking․ The most common culprit is an inaccurate rice-to-water ratio; remember‚ Calrose generally requires less water than other varieties․ Next time‚ reduce the amount of water used by a small increment – start with reducing it by ¼ cup for each cup of rice․

Overcooking also contributes to mushiness․ Ensure you’re adhering to the recommended cooking times for your chosen method (stovetop‚ rice cooker‚ or Instant Pot)․ Avoid lifting the lid frequently during stovetop cooking‚ as this releases steam and affects the cooking process․

If using a rice cooker‚ verify that you’ve selected the correct setting for white rice․ A longer cooking cycle will naturally yield a softer‚ potentially mushy‚ texture․

Rice is Too Dry

Dry Calrose rice usually stems from insufficient water during the cooking process․ Double-check your rice-to-water ratio; Calrose needs a specific amount‚ and even a slight deviation can lead to dryness․ Increase the water by ¼ cup increments for each cup of rice in your next attempt․

Ensure your pot has a tight-fitting lid during stovetop cooking․ A loose lid allows steam to escape‚ reducing the available moisture․ Avoid peeking during cooking‚ as each lift releases valuable steam․

If using a rice cooker‚ confirm you’ve used the appropriate setting and haven’t accidentally selected a setting for a different type of rice․ Also‚ verify the rice cooker’s measuring cup is accurate‚ as variations exist․

Fluffing and Resting the Rice

Fluffing cooked Calrose rice is crucial for achieving a light and airy texture‚ preventing clumping․ Immediately after cooking‚ gently use a fork to separate the grains․ Avoid vigorous stirring‚ which can make the rice gummy․

Resting the rice‚ with the lid on‚ for 10-15 minutes after cooking is equally important․ This allows the steam to redistribute evenly‚ completing the cooking process and ensuring consistent moisture throughout each grain․

During resting‚ avoid lifting the lid‚ as this releases steam and can affect the final texture․ The residual heat continues to gently steam the rice‚ resulting in a more tender and flavorful outcome․ This simple step significantly elevates the quality of your Calrose rice․

Seasoning Options for Calrose Rice

Calrose rice‚ with its mild flavor‚ is a versatile base for countless seasonings․ Simple additions like a pinch of salt during cooking enhance its natural taste․ For a savory boost‚ consider a pat of butter or a drizzle of olive oil after fluffing․

Expand your flavor profiles with herbs – parsley‚ cilantro‚ or chives add freshness․ Spices like turmeric‚ cumin‚ or paprika introduce warmth and complexity․ A bay leaf simmered during cooking imparts a subtle aromatic note․

Beyond basic seasonings‚ explore bolder options․ Soy sauce‚ garlic powder‚ or onion powder create umami-rich flavors․ A squeeze of lemon or lime juice brightens the rice․ Experiment to discover your perfect seasoning blend!

Storage of Cooked Calrose Rice

Proper storage is crucial for maintaining the quality of cooked Calrose rice․ Allow the rice to cool completely before storing‚ ideally within one hour to minimize bacterial growth․ Transfer the cooled rice to an airtight container; this prevents it from drying out and absorbing odors․

Refrigerated‚ cooked Calrose rice will stay fresh for up to four days․ Ensure the container is tightly sealed to preserve moisture and texture․ For longer storage‚ freezing is an excellent option․ Portion the rice into freezer-safe bags or containers‚ removing as much air as possible․

Frozen Calrose rice can last for up to six months․ When reheating‚ add a tablespoon or two of water to restore moisture․ Always ensure the rice is thoroughly heated before consuming․

Calrose Rice: Nutritional Information

Calrose rice‚ while a carbohydrate source‚ offers valuable nutritional benefits․ A one-cup serving (cooked) typically contains around 205 calories‚ with approximately 45 grams of carbohydrates‚ including 0․5 grams of fiber․ It provides a modest amount of protein‚ roughly 4․3 grams per cup․

This rice variety is naturally low in fat‚ containing less than 0․5 grams per serving․ Calrose rice also contributes essential minerals like manganese and magnesium‚ important for energy production and bone health․ It’s a gluten-free grain‚ making it suitable for individuals with gluten sensitivities․

However‚ it’s important to note that Calrose rice is not a complete protein and should be paired with other protein sources for a balanced diet․ Consider incorporating vegetables and lean proteins alongside your rice for optimal nutritional intake․

PDF

germs guns and steel pdf

Guns, Germs, and Steel: A Comprehensive Overview

Jared Diamond’s groundbreaking work, available as a PDF, synthesizes history, biology, and linguistics to explore differing rates of human societal development globally.

The 1997 book, Guns, Germs, and Steel, examines environmental factors influencing inequality, offering an ambitious and multidisciplinary perspective on human history.

Numerous online sources, including the Internet Archive, provide access to the PDF version, facilitating research and study of Diamond’s influential thesis.

Jared Diamond’s central argument, detailed in Guns, Germs, and Steel – readily accessible as a PDF – challenges conventional historical narratives. He posits that geographical and environmental factors, rather than inherent racial or cultural superiority, primarily shaped the disparate trajectories of human societies.

The book, published in 1997, represents an ambitious synthesis of disciplines, including history, biology, ecology, and linguistics. Diamond seeks to explain why Eurasian civilizations achieved dominance, while others, like those in the Americas, lagged behind. The PDF format allows for widespread study of this complex theory.

His work isn’t about dismissing cultural factors, but rather framing them within a broader ecological context.

The Core Question: Why Eurasian Dominance?

Jared Diamond’s Guns, Germs, and Steel, available as a PDF, fundamentally asks why Eurasian civilizations, rather than those of other continents, came to dominate the modern world. He rejects explanations based on racial superiority, instead focusing on geographical advantages.

The book explores how Eurasia’s east-west axis facilitated agricultural diffusion, alongside a greater availability of domesticable plants and animals. Access to these resources fostered food surpluses, population density, and technological advancements – key components of Eurasian power, detailed within the PDF.

Ultimately, Diamond argues, these factors created a cascade of advantages.

Geographical Luck: The Foundation of Development

Diamond’s Guns, Germs, and Steel PDF highlights how geographical factors—like continental orientation and resource availability—were crucial in shaping societal development trajectories.

Eurasia’s favorable conditions enabled agricultural advancements and subsequent societal complexity.

East-West Axis and Agricultural Diffusion

Jared Diamond’s Guns, Germs, and Steel, readily available as a PDF, emphasizes Eurasia’s east-west axis as a key advantage. This orientation facilitated the rapid spread of crops and livestock.

Similar latitudes meant comparable climates, allowing for easier agricultural adaptation and diffusion across the continent. This contrasts sharply with the Americas and Africa, where north-south axes presented significant climatic barriers to agricultural spread, hindering development.

The PDF details how this geographical advantage fostered food surpluses and population growth.

Availability of Domesticable Plants and Animals

Jared Diamond’s Guns, Germs, and Steel, accessible in PDF format, highlights the crucial role of domesticable species. Eurasia possessed a significantly larger number of readily domesticable plants and animals compared to other continents.

This abundance provided early Eurasian societies with reliable food sources, draft animals, and materials, accelerating agricultural development. The PDF details how this head start fueled population growth and societal complexity.

Conversely, limited domesticable options hindered progress elsewhere.

The Role of Wild Ancestors

Jared Diamond’s Guns, Germs, and Steel, available as a PDF, emphasizes the importance of wild ancestor traits for successful domestication. Species with desirable characteristics – like large seed size or docile temperament – were more easily transformed into crops and livestock.

Eurasia benefited from a wealth of such ancestors, simplifying the domestication process. The PDF illustrates how these genetic predispositions were key to agricultural origins.

Other regions lacked suitable wild progenitors, creating a significant developmental barrier.

Geographic Constraints on Domestication

Jared Diamond’s Guns, Germs, and Steel, accessible as a PDF, highlights how continental orientation impacted domestication. Eurasia’s east-west axis facilitated the spread of crops and livestock across similar latitudes and climates.

Conversely, the north-south axis of the Americas presented significant barriers, hindering agricultural diffusion. The PDF details how these geographic limitations shaped societal development.

Environmental diversity and ecological barriers restricted the range of domesticable species in certain regions.

The Rise of Agriculture and its Consequences

Diamond’s Guns, Germs, and Steel PDF explains how food surpluses from agriculture enabled population growth and the formation of settled villages and complex societies.

Food Surplus and Population Density

Jared Diamond’s work, accessible in PDF format, details how the advent of agriculture created food surpluses, a pivotal factor in societal development.

These surpluses allowed for increased population densities, shifting communities from nomadic lifestyles to settled existence.

This demographic shift, as outlined in Guns, Germs, and Steel, supported specialization of labor and the emergence of hierarchical social structures, ultimately fueling innovation.

Sedentary Lifestyle and Village Formation

The PDF version of Jared Diamond’s Guns, Germs, and Steel explains how agricultural surpluses enabled a transition to sedentary lifestyles.

No longer needing to roam for sustenance, populations began forming permanent settlements – villages – fostering community and cooperation.

This shift, central to Diamond’s thesis, laid the groundwork for complex societies, technological advancements, and ultimately, the disparities in power observed throughout history.

Germs: The Unseen Weapon

Diamond’s Guns, Germs, and Steel PDF details how animal-borne diseases, to which Eurasians developed immunity, devastated indigenous populations upon contact.

These “unseen weapons” played a crucial role in Eurasian dominance, as outlined in the comprehensive analysis within the downloadable document.

The Origins of Infectious Diseases

Jared Diamond’s Guns, Germs, and Steel, accessible as a PDF, explains that infectious diseases didn’t originate with human contact, but jumped from animals.

The book details how the domestication of animals brought humans into close proximity with animal pathogens, fostering the development of these diseases.

Eurasia’s abundance of domesticable animals, detailed in the PDF, meant greater exposure and, ultimately, the development of immunities unavailable elsewhere.

This crucial factor, explored within the text, significantly impacted the course of history and continental power dynamics.

Animal-Borne Diseases and Immunity

Jared Diamond’s Guns, Germs, and Steel, readily available as a PDF, highlights how close contact with domesticated animals led to the transmission of diseases to humans.

Repeated exposure fostered immunity within Eurasian populations, a critical advantage when encountering previously unexposed groups.

The PDF details how diseases like smallpox, measles, and influenza became potent “unseen weapons” during colonization.

Indigenous populations, lacking prior exposure, suffered devastating consequences from these animal-borne illnesses, altering the balance of power.

Impact on Indigenous Populations

Jared Diamond’s Guns, Germs, and Steel, accessible as a PDF, emphasizes the catastrophic impact of Eurasian diseases on indigenous populations worldwide.

Lacking prior exposure and immunological defenses, these groups experienced massive mortality rates following contact with colonizers.

The PDF illustrates how diseases decimated populations, weakening resistance to conquest and facilitating European dominance.

This demographic collapse profoundly reshaped societies and contributed to the historical power imbalances observed across continents.

Steel: Technology and Warfare

Diamond’s Guns, Germs, and Steel PDF details how metallurgy enabled Eurasian societies to develop superior weaponry and complex social structures.

Steel production facilitated military advantages, contributing to conquest and the establishment of dominant power dynamics.

Metallurgy and Weaponry

Jared Diamond’s Guns, Germs, and Steel, accessible in PDF format, highlights how the development of metallurgy provided a crucial advantage to Eurasian civilizations.

The ability to forge steel into weaponry – swords, spears, and armor – dramatically altered the landscape of warfare, granting a significant military edge.

This technological superiority, detailed within the PDF, wasn’t simply about better tools; it fostered more complex societies capable of large-scale organization and conquest.

Consequently, societies with advanced metallurgy were better equipped for both defense and expansion, shaping the course of history as outlined in the book.

The Development of Complex Societies

Jared Diamond’s Guns, Germs, and Steel, readily available as a PDF, argues that geographical advantages spurred the rise of complex societies in Eurasia.

Food surpluses, enabled by favorable environments, supported larger populations and specialized labor, key components of societal complexity.

The PDF details how sedentary lifestyles, resulting from agriculture, led to village formation, then cities, and ultimately, state-level organization.

These complex structures facilitated technological innovation and political centralization, further solidifying Eurasian dominance, as Diamond meticulously explains.

Guns: A Symbol of Military Advantage

Diamond’s Guns, Germs, and Steel PDF highlights gunpowder technology’s spread, granting Eurasian societies a significant military edge during conquest and colonization.

Guns symbolize this advantage, facilitating dominance over populations lacking comparable weaponry, as detailed in the accessible PDF format.

The Spread of Gunpowder Technology

Jared Diamond’s Guns, Germs, and Steel, readily available as a PDF, details how gunpowder technology originated in Eurasia and rapidly disseminated across the continent.

This technological diffusion, explored within the PDF, wasn’t simply about invention; it hinged on existing trade routes and societal structures that facilitated its adoption and improvement.

The PDF emphasizes that access to this technology provided a decisive military advantage, enabling Eurasian powers to expand their influence and control globally, shaping historical outcomes.

Impact on Conquest and Colonization

Jared Diamond’s Guns, Germs, and Steel, accessible as a PDF, argues that Eurasian dominance in conquest and colonization wasn’t due to inherent superiority, but geographical advantages.

The PDF details how superior weaponry – “guns” – combined with immunity to diseases (“germs”) and advanced technology (“steel”) facilitated the subjugation of other populations.

This combination, thoroughly examined in the PDF, created a significant power imbalance, allowing for the relatively easy conquest and subsequent colonization of the Americas and other regions.

Environmental Factors and Continental Differences

Diamond’s PDF highlights how geographical and environmental factors shaped continental development, influencing agriculture and societal complexity, ultimately driving historical outcomes.

The book, available as a PDF, emphasizes climate’s role in agricultural success and resource availability’s impact on economic growth across different continents.

Climate and its Influence on Agriculture

Jared Diamond’s work, accessible as a PDF, meticulously details how climate profoundly impacted agricultural development across continents. Favorable climates, particularly the east-west axis, facilitated crop and livestock diffusion.

The PDF demonstrates that regions with suitable climates experienced food surpluses, supporting higher population densities and the rise of complex societies. Conversely, challenging climates hindered agricultural productivity, slowing development.

This climatic influence, as explained in the PDF, is a cornerstone of Diamond’s argument regarding Eurasian dominance, showcasing the power of environmental factors in shaping history.

Natural Resources and Economic Development

Jared Diamond’s Guns, Germs, and Steel, readily available as a PDF, highlights the crucial role of natural resources in fostering economic advancement. The availability of domesticable plants and animals, detailed in the PDF, provided a significant advantage.

Regions with abundant resources experienced agricultural surpluses, enabling specialization and technological innovation. Access to materials like metals, as outlined in the PDF, spurred weaponry development.

Diamond’s analysis, presented in the PDF, demonstrates how resource disparities contributed to divergent paths of economic and societal development globally.

Linguistic Evidence and Population Movements

Diamond’s Guns, Germs, and Steel PDF correlates language family spread with archaeological findings, tracing population movements and historical connections across continents.

Linguistic patterns, detailed in the PDF, offer insights into migration routes and the diffusion of agricultural practices and technologies.

Tracing Language Families

Jared Diamond’s work, accessible in PDF format, leverages linguistic analysis as crucial evidence for understanding population movements and historical relationships. The book meticulously examines how the distribution of language families—like Indo-European—correlates with the spread of agriculture and technology.

By tracing linguistic roots, Diamond reconstructs migration patterns, demonstrating how languages evolved and diversified alongside human dispersal. This approach, detailed within the PDF, provides a complementary perspective to archaeological and genetic data, strengthening his overall argument about Eurasian dominance.

Correlation with Archaeological Findings

Jared Diamond’s Guns, Germs, and Steel, readily available as a PDF, doesn’t rely solely on linguistics; it meticulously integrates archaeological evidence to support its claims. Excavated artifacts and settlement patterns, detailed in the PDF, reveal timelines of agricultural development and technological innovation.

These findings corroborate Diamond’s thesis regarding the geographical advantages of Eurasia, demonstrating earlier and more widespread adoption of farming and metallurgy. The PDF showcases how archaeological data validates the link between environmental factors and societal complexity.

Criticisms and Debates Surrounding the Theory

Diamond’s thesis, explored in the PDF, faces critique for potential oversimplification of complex historical processes, downplaying cultural and political influences on development.

Scholars debate the extent to which geography solely dictates societal trajectories, as detailed within the accessible PDF document.

Oversimplification of Complex Historical Processes

Critics argue that Jared Diamond’s Guns, Germs, and Steel, readily available as a PDF, potentially oversimplifies the intricate tapestry of human history, reducing diverse societal developments to primarily geographical and environmental determinants.

The PDF’s broad scope, while insightful, may inadvertently minimize the significant roles of individual agency, political structures, and unique cultural adaptations in shaping historical outcomes across different civilizations.

Some scholars contend that focusing heavily on macro-level factors overlooks the nuanced interplay of local conditions and deliberate human choices documented in the PDF.

The Role of Cultural and Political Factors

While Jared Diamond’s Guns, Germs, and Steel – accessible as a PDF – emphasizes geographical luck, critics highlight the crucial, often underestimated, influence of cultural and political dynamics on societal trajectories.

The PDF’s analysis, some argue, doesn’t fully account for how differing political systems, social hierarchies, and belief structures shaped responses to environmental opportunities and challenges.

Cultural innovations and political decisions, not solely geography, determined how societies utilized resources and developed technologies, as evidenced by historical records detailed within the PDF.

The PDF Availability and Access

Jared Diamond’s Guns, Germs, and Steel PDF is readily available through online repositories like the Internet Archive, offering convenient access;

Download options include PDF, EPUB, and DAISY formats, catering to diverse user needs and accessibility preferences, as noted online.

Online Sources for Downloading the PDF

Jared Diamond’s seminal work, Guns, Germs, and Steel, in PDF format, can be accessed through several online platforms. The Internet Archive hosts a downloadable version, offering both full-text and individual file access.

Furthermore, various repositories provide the PDF for users, including options tailored for those with print disabilities via DAISY format. ResearchGate also references the 1998 publication, aiding scholarly exploration of the book’s core arguments.

Internet Archive and Other Repositories

The Internet Archive provides comprehensive access to Guns, Germs, and Steel, offering the book in PDF, EPUB, and DAISY formats, catering to diverse user needs. It boasts over 290,000 views and 261 favorites, demonstrating its popularity.

Additional repositories also host the PDF, ensuring broad availability for research and study. These sources facilitate access to Jared Diamond’s influential work, supporting scholarly engagement with its complex arguments.

Diamond’s central argument, detailed in the accessible PDF, posits that geographical and environmental factors, not racial superiority, shaped societal development.

The book’s multidisciplinary approach integrates history, biology, and ecology to explain Eurasian dominance, challenging conventional historical narratives.

A Multidisciplinary Approach to History

Jared Diamond’s Guns, Germs, and Steel, readily available as a PDF, uniquely blends disciplines—history, biology, ecology, and linguistics—to re-evaluate human development.

This synthesis moves beyond traditional historical analysis, examining the impact of geography and environment on societal trajectories. The PDF reveals how factors like domesticable plants and animals, and disease transmission, profoundly influenced the fates of human societies.

It’s an ambitious attempt to understand historical inequalities through a scientific lens, offering a compelling alternative to culturally deterministic explanations.

Legacy and Impact of “Guns, Germs, and Steel”

Jared Diamond’s Guns, Germs, and Steel, widely accessible as a PDF, sparked significant debate and reshaped historical inquiry, prompting re-evaluation of long-held assumptions.

Its multidisciplinary approach influenced subsequent scholarship, encouraging consideration of environmental factors in understanding societal development. The book’s enduring legacy lies in its broad scope and accessible style, making complex ideas available to a wider audience.

The PDF continues to be a valuable resource for students and researchers alike.

tyson seasoned steakhouse pork griller steak oven instructions

Tyson Seasoned Steakhouse Pork Griller Steak: A Comprehensive Oven Cooking Guide

Today, December 13, 2025, discover effortless oven preparation for Tyson’s pre-seasoned pork. This guide delivers expert instructions, ensuring a flavorful and perfectly cooked steakhouse experience every time!

Understanding the Product

Tyson Seasoned Steakhouse Pork Griller Steak offers a convenient and flavorful meal solution, pre-seasoned for a delightful taste experience. These pork steaks are designed for easy cooking, particularly well-suited for oven preparation, grilling, or pan-searing. The seasoning blend aims to mimic the robust flavors of a classic steakhouse meal, eliminating the need for extensive marinade or rub application.

Understanding that color isn’t a reliable indicator of doneness is crucial; always prioritize achieving a safe internal temperature. The product is best when cooked to a minimum internal temperature of 145°F, followed by a 3-minute rest period. Proper refrigeration or freezing, before the “use by” date, is essential for maintaining freshness and food safety;

These steaks are a versatile option, pairing well with various side dishes like roasted vegetables, cornbread, or potatoes, making them a quick and satisfying dinner choice.

What is Tyson Seasoned Steakhouse Pork Griller Steak?

Tyson Seasoned Steakhouse Pork Griller Steak is a pre-seasoned pork cut designed to deliver a steakhouse-style flavor profile with the convenience of pork. It’s a readily available option for a quick and tasty meal, particularly suited for oven cooking, grilling, or pan-searing methods. The product aims to replicate the taste of a traditional steak, offering a flavorful alternative without the higher cost or preparation time.

These steaks are typically found in the refrigerated section of grocery stores and are best utilized before their “use by” date. Remember, achieving an internal temperature of 145°F, followed by a 3-minute rest, is vital for both flavor and food safety.

The seasoning is already incorporated, simplifying the cooking process and making it an ideal choice for busy weeknights. Enjoy with complementary sides like roasted vegetables or potatoes!

Key Features and Seasoning Profile

Tyson Seasoned Steakhouse Pork Griller Steak boasts several key features, primarily its convenience and pre-seasoned nature. This eliminates the need for marinating or extensive spice rubs, saving valuable time in the kitchen. The steak is designed for versatility, lending itself well to oven baking, searing, and grilling techniques.

The seasoning profile aims to mimic a classic steakhouse experience, featuring a blend of savory herbs and spices. While the exact composition is proprietary, expect notes of garlic, pepper, and potentially paprika. This robust seasoning penetrates the pork, creating a flavorful crust during cooking.

Remember to always ensure the internal temperature reaches 145°F for optimal safety and flavor. Proper refrigeration and adherence to the “use by” date are also crucial for maintaining quality.

Preparation Before Oven Cooking

Begin by safely thawing the Tyson pork steak. Prioritize food safety, preheat your oven, and prepare for a delicious meal with these essential steps!

Thawing the Pork Griller Steak

Proper thawing is crucial for even cooking and optimal flavor of your Tyson Seasoned Steakhouse Pork Griller Steak. The safest method is refrigerator thawing; place the frozen steak on a plate or in a container to catch any drips. Allow ample time – typically, this takes 24 to 48 hours, depending on the thickness of the steak.

For faster thawing, you can use the cold water method. Submerge the sealed steak in a bowl of cold water, changing the water every 30 minutes to maintain a consistently cold temperature. Never thaw at room temperature, as this can promote bacterial growth.

Once thawed, the steak should be cooked immediately. Do not refreeze a steak that has been thawed using the cold water method. Always prioritize food safety and ensure the steak is thoroughly cooked to an internal temperature of 145°F.

Essential Safety Precautions

Food safety is paramount when preparing Tyson Seasoned Steakhouse Pork Griller Steak. Always wash your hands thoroughly with soap and water before and after handling raw pork. Prevent cross-contamination by using separate cutting boards and utensils for raw meat and other foods.

Ensure the steak is cooked to a minimum internal temperature of 145°F, followed by a 3-minute rest, to eliminate harmful bacteria. Never consume undercooked pork. Keep refrigerated or frozen prior to use, adhering to the “best by” date on the packaging.

When thawing, always use the refrigerator or cold water method – never at room temperature. Properly dispose of any packaging materials and thoroughly clean all surfaces that have come into contact with raw pork. Prioritize hygiene for a safe and delicious meal.

Preheating the Oven

Proper oven preheating is crucial for even cooking of your Tyson Seasoned Steakhouse Pork Griller Steak. Begin by setting your oven to the recommended temperature – typically around 375°F to 400°F, depending on the desired cooking speed and steak thickness. Allow sufficient time for the oven to reach the set temperature, usually 15-20 minutes.

Using an oven thermometer is highly recommended to verify the accuracy of your oven’s temperature. An inaccurate temperature can significantly impact the final result. Ensure the oven rack is positioned in the center for optimal heat circulation.

For the searing and oven-finishing technique, preheating is even more vital to achieve a beautiful crust. A fully preheated oven guarantees consistent cooking and a tender, flavorful pork steak.

Oven Cooking Methods

Explore versatile oven techniques! Choose direct baking, or enhance flavor with a sear followed by oven finishing for a tender Tyson steak.

Direct Oven Baking Instructions

Direct oven baking offers a simple route to a delicious Tyson Seasoned Steakhouse Pork Griller Steak. Begin by preheating your oven to the recommended temperature – details are in the next section! Place the pork steak directly onto a baking sheet, ensuring it’s not overcrowded for even cooking.

For optimal results, consider lightly greasing the baking sheet to prevent sticking. Baking directly exposes the steak to consistent heat, allowing the seasoning to meld beautifully. Monitor closely, as cooking times vary based on thickness. Remember to utilize a meat thermometer to guarantee safe and flavorful results. This method is ideal for a hands-off approach, delivering a reliably tasty meal with minimal effort. It’s a fantastic option for busy weeknights!

Searing and Oven Finishing Technique

Elevate your Tyson Seasoned Steakhouse Pork Griller Steak with the searing and oven finishing technique! Begin by searing the steak in a hot skillet with a little oil – this creates a flavorful crust. After searing, transfer the skillet to the oven and continue cooking your pork for an additional 10-15 minutes.

This dual-method maximizes flavor and texture. Searing locks in juices, while oven finishing ensures even cooking throughout. Ensure the skillet is oven-safe before transferring! Monitor the internal temperature closely with a meat thermometer. This technique provides a restaurant-quality result, boasting a beautiful sear and tender, juicy interior. It’s a slightly more involved process, but the enhanced flavor is well worth the effort!

Using a Baking Rack for Optimal Results

For truly exceptional Tyson Seasoned Steakhouse Pork Griller Steak, consider utilizing a baking rack during oven cooking. Placing the steak on a rack within a baking sheet allows for 360-degree air circulation, promoting even cooking and a superior texture. This prevents the bottom from becoming soggy, resulting in a crispier exterior.

The elevated position also allows rendered fat to drip away, contributing to a leaner and more flavorful final product. Line the baking sheet below the rack with foil for easy cleanup. This method is particularly beneficial when baking without an initial sear. It’s a simple adjustment that significantly enhances the overall quality of your pork, delivering a more professional and satisfying result.

Cooking Time and Temperature

Tyson pork requires a recommended oven temperature, typically around 375°F. Cooking time varies based on steak thickness, ranging from 10-15 minutes for optimal results.

Recommended Oven Temperature

When oven cooking Tyson Seasoned Steakhouse Pork Griller Steak, maintaining the correct temperature is paramount for achieving a juicy and flavorful result. A consistent 375°F (190°C) is generally recommended as the ideal oven temperature. This allows the pork to cook evenly throughout, ensuring it reaches a safe internal temperature without drying out.

However, slight adjustments can be made based on your oven’s calibration and personal preference. If you prefer a more well-done steak, you might consider increasing the temperature to 400°F (204°C), but be sure to monitor the internal temperature closely to prevent overcooking; Conversely, for a slightly more tender result, a lower temperature of 350°F (177°C) can be used, though this will extend the cooking time.

Regardless of the chosen temperature, preheating the oven thoroughly is crucial. This ensures that the steak begins cooking immediately upon entering the oven, promoting even cooking and optimal texture. Always use an oven thermometer to verify the accuracy of your oven’s temperature setting.

Cooking Time Based on Steak Thickness

The cooking time for Tyson Seasoned Steakhouse Pork Griller Steak in the oven is directly correlated to its thickness. For steaks measuring approximately ½ inch thick, a cooking time of around 15-20 minutes is generally sufficient. Steaks that are ¾ inch to 1 inch thick will require a longer cooking time, typically ranging from 20-25 minutes.

It’s essential to remember that these are estimates, and actual cooking times may vary depending on your oven and the starting temperature of the steak. Always use a meat thermometer to verify doneness, rather than relying solely on time. If you are using the searing and oven finishing technique, remember the oven time is after the initial sear.

For thicker cuts exceeding 1 inch, consider extending the cooking time by an additional 5-10 minutes, checking the internal temperature frequently. Consistent monitoring is key to achieving perfectly cooked pork.

Internal Temperature Guidelines

Achieving the correct internal temperature is paramount for both flavor and food safety when cooking Tyson Seasoned Steakhouse Pork Griller Steak. The USDA recommends cooking pork to a minimum internal temperature of 145°F (63°C), followed by a 3-minute rest. This ensures any harmful bacteria are eliminated while maintaining juiciness.

Using a reliable meat thermometer is crucial; insert it into the thickest part of the steak, avoiding bone. While color can offer a visual cue, it’s not a dependable indicator of doneness. Relying solely on color can lead to undercooked or overcooked pork.

Remember, the temperature will continue to rise slightly during the resting period. Therefore, remove the steak from the oven when it reaches 143-144°F to allow for carryover cooking and achieve the optimal 145°F final temperature.

Ensuring Doneness and Safety

Prioritize food safety! Always verify the Tyson pork reaches 145°F with a thermometer, followed by a 3-minute rest, for a delicious and secure meal.

Using a Meat Thermometer

Achieving perfectly cooked Tyson Seasoned Steakhouse Pork Griller Steak relies heavily on accurate temperature monitoring. A meat thermometer is your most reliable tool, surpassing visual cues like color, which can be misleading. Insert the thermometer into the thickest part of the steak, avoiding bone, to obtain a precise reading.

Digital thermometers offer quick and easy-to-read results, while instant-read models provide near-instantaneous temperature checks. Regardless of the type, ensure the probe is clean before and after each use for optimal hygiene. Regularly calibrate your thermometer to maintain accuracy. Remember, the USDA recommends cooking pork to a minimum internal temperature of 145°F (63°C), followed by a 3-minute rest, to ensure safety and tenderness. Consistent monitoring guarantees a safe and flavorful dining experience.

The 145°F Rule and 3-Minute Rest

Food safety guidelines dictate that Tyson Seasoned Steakhouse Pork Griller Steak must reach an internal temperature of 145°F (63°C) to eliminate harmful bacteria. However, achieving this temperature is only part of the process. Crucially, allow the steak to rest for a full 3 minutes after removing it from the oven.

This resting period allows the juices to redistribute throughout the meat, resulting in a more tender and flavorful steak. During cooking, the heat forces juices towards the center; resting allows them to flow back into the muscle fibers. Tent the steak loosely with foil during the rest to maintain warmth without steaming. Ignoring the 3-minute rest can lead to a drier, less enjoyable eating experience. Prioritize both temperature and rest for optimal results!

Color as an Indicator of Doneness (and its limitations)

While observing the color of Tyson Seasoned Steakhouse Pork Griller Steak can seem helpful, relying solely on visual cues is unreliable and potentially unsafe. The pre-seasoning and inherent color of the pork can mask true doneness. A pink hue doesn’t always indicate undercooking, and a browned exterior doesn’t guarantee a safe internal temperature.

Color is not an accurate indicator of final cooked temperature. Always use a reliable meat thermometer to confirm the internal temperature has reached the recommended 145°F. This ensures the pork is safely cooked and eliminates the risk of foodborne illness. Trust the thermometer, not just your eyes, for consistently perfect and safe results with your pork griller steak.

Serving and Pairing Suggestions

Elevate your Tyson pork with roasted vegetables, cornbread, or potatoes! Pair with wine or your favorite beverage for a complete, delicious meal.

Recommended Side Dishes

Tyson Seasoned Steakhouse Pork Griller Steak pairs wonderfully with a variety of sides, creating a balanced and satisfying meal. For a classic comfort food experience, consider creamy mashed potatoes or fluffy, golden-brown roasted potatoes.

Roasted or grilled vegetables offer a healthy and flavorful complement; broccoli, asparagus, and bell peppers are excellent choices. A side of cornbread adds a touch of sweetness and texture, perfectly soaking up any savory juices.

Don’t overlook the simplicity of a fresh garden salad with a light vinaigrette. Macaroni and cheese, coleslaw, or even baked beans can also enhance the dining experience. Ultimately, the best side dish is one that complements your personal preferences and completes the meal!

Sauce and Seasoning Enhancements

While Tyson Seasoned Steakhouse Pork Griller Steak is pre-seasoned for delicious flavor, a complementary sauce can elevate your meal. A smoky barbecue sauce, a tangy honey mustard, or a creamy horseradish sauce all pair exceptionally well with pork.

For those who enjoy a bit of spice, consider a sriracha mayo or a chipotle aioli. A simple pan sauce, created from the drippings after cooking, adds richness and depth.

Enhance the seasoning further with a sprinkle of garlic powder, onion powder, or paprika after cooking. Fresh herbs like rosemary or thyme can also add a vibrant aroma and flavor. Remember to taste and adjust seasonings to your preference, creating a truly personalized dish!

Wine and Beverage Pairings

Tyson Seasoned Steakhouse Pork Griller Steak, with its savory and seasoned profile, pairs beautifully with a variety of beverages. For wine lovers, a medium-bodied red wine like Pinot Noir or Merlot complements the pork’s richness without overpowering it.

A dry rosé is also an excellent choice, offering a refreshing contrast to the savory flavors. If you prefer beer, a pale ale or a brown ale provides a balanced pairing. For non-alcoholic options, consider a sparkling cider or a crisp apple juice.

Iced tea, particularly a slightly sweetened variety, also works well. Ultimately, the best beverage pairing depends on your personal preference, but these suggestions offer a great starting point for enhancing your dining experience.

Storage and Handling

Tyson Pork Griller Steak requires refrigeration or freezing until use. Always adhere to the “use by” date for optimal freshness and food safety!

Refrigeration Guidelines

Tyson Seasoned Steakhouse Pork Griller Steak, once thawed, should be refrigerated immediately to maintain optimal quality and prevent bacterial growth. Store the pork in its original packaging, or transfer it to an airtight container or resealable plastic bag. This helps to prevent freezer burn and maintain the steak’s seasoned flavor.

Maintain a consistent refrigerator temperature of 40°F (4°C) or below. Consume the refrigerated pork within 1-2 days for the best taste and texture. Always check for any off-odors or discoloration before cooking; if present, discard the steak immediately. Proper refrigeration is crucial for food safety and ensures a delicious meal. Remember to keep the pork separate from other raw meats to avoid cross-contamination.

Regularly check your refrigerator’s temperature to ensure it’s functioning correctly. Following these guidelines will help you enjoy your Tyson pork safely and deliciously!

Freezing Instructions

To preserve Tyson Seasoned Steakhouse Pork Griller Steak for longer storage, freezing is an excellent option. For best results, wrap the steak tightly in freezer-safe plastic wrap, ensuring all air is removed. Then, place the wrapped steak inside a freezer-safe bag or container. This double-layer protection prevents freezer burn and maintains the steak’s quality.

Label the package with the date of freezing for easy tracking. Frozen pork can generally be stored for up to 4-6 months, although flavor and texture may begin to degrade after this period. When ready to use, thaw the steak in the refrigerator overnight for optimal safety and even cooking. Avoid thawing at room temperature.

Remember to use frozen pork before the “best by” date on the package. Proper freezing extends the shelf life and allows you to enjoy Tyson pork whenever you desire!

Best By Date and Food Safety

Understanding the “best by” date on your Tyson Seasoned Steakhouse Pork Griller Steak is crucial for optimal quality and safety. This date isn’t a safety deadline, but rather an indication of when the product is at its peak flavor and texture. Always prioritize safe food handling practices, regardless of the date.

Keep the pork refrigerated or frozen consistently until cooking. If frozen, use before the date printed on the package. Once thawed, cook within 1-2 days. Always ensure the internal temperature reaches a minimum of 145°F (63°C) as measured with a meat thermometer, followed by a 3-minute rest period.

Proper storage and cooking are vital to prevent foodborne illness. Discard any pork that has an unusual odor, color, or texture. Following these guidelines ensures a safe and delicious meal with Tyson pork!

crying in h mart pdf

Crying in H Mart PDF: A Comprehensive Overview (Updated 12/13/2025)

Today, December 13th, 2025, numerous online sources offer the “Crying in H Mart” memoir in PDF format, ranging from Issuu conversions to direct downloads.

However, accessing these PDFs carries potential risks, including malware or incomplete versions; legitimate sources like Kindle and ebook platforms are recommended for a secure experience.

“Crying in H Mart” is a profoundly moving memoir penned by Michelle Zauner, the musical force behind Japanese Breakfast, initially gaining prominence from her 2018 viral essay for The New Yorker. This deeply personal narrative explores the complex tapestry of Zauner’s Korean-American identity, intricately woven with the experience of losing her mother to cancer.

The book delves into the powerful connection between food, memory, and grief, centering around the significance of H Mart – a Korean supermarket chain – as a tangible link to her heritage and a space filled with poignant recollections of shared moments with her mother.

Readers are invited on a journey through Zauner’s recollections, navigating the raw emotions of loss, the challenges of cultural assimilation, and the enduring strength of the mother-daughter bond. The memoir isn’t simply a story of sadness; it’s a celebration of life, love, and the enduring power of cultural connection, readily available in PDF format for wider accessibility.

About Michelle Zauner and Japanese Breakfast

Michelle Zauner is a multifaceted artist, best known as the frontwoman of the indie-pop band Japanese Breakfast. Beyond her musical career, she’s a celebrated author, gaining initial recognition for her deeply personal essay, “Crying in H Mart,” published in The New Yorker, which served as the foundation for her acclaimed memoir.

Japanese Breakfast’s sound is characterized by its dreamy, atmospheric qualities, often exploring themes of identity, loss, and longing – mirroring the emotional depth found within Zauner’s writing. Her artistic expression seamlessly blends music and literature, offering a holistic view of her creative vision.

The widespread availability of “Crying in H Mart” in PDF format has further amplified Zauner’s reach, allowing a broader audience to connect with her story. Her ability to articulate complex emotions with vulnerability and honesty has resonated deeply with readers and listeners alike, solidifying her position as a prominent voice in contemporary art.

The Core Themes: Grief, Identity, and Family

“Crying in H Mart” profoundly explores the universal experience of grief, specifically the devastating loss of Zauner’s mother to cancer. The memoir doesn’t shy away from the raw, complex emotions associated with bereavement, detailing the pain, anger, and eventual acceptance.

Central to the narrative is the exploration of Korean-American identity. Zauner grapples with her heritage, feeling both connected to and distanced from her Korean roots, particularly as she navigates her mother’s illness and subsequent passing. The H Mart supermarket itself becomes a symbolic space representing this cultural connection.

The intricate mother-daughter relationship forms the emotional core of the book. Zauner portrays a dynamic marked by both love and conflict, revealing the complexities of familial bonds and the enduring impact of a mother’s influence. The PDF versions circulating allow wider access to these poignant themes.

Availability of the “Crying in H Mart” PDF

Numerous websites currently offer the “Crying in H Mart” memoir as a downloadable PDF, though caution is advised due to potential security risks.

Legitimate Sources for PDF Download

Obtaining a digital copy of Michelle Zauner’s “Crying in H Mart” through authorized channels ensures a safe and high-quality reading experience. While a direct, official PDF download from the author or publisher isn’t prominently advertised, several reputable platforms offer the memoir in compatible ebook formats.

Kindle is a primary option, allowing readers to purchase and download the book for use on Kindle devices, PCs, phones, or tablets. This provides access to features like bookmarks, note-taking, and highlighting. Furthermore, various ebook retailers, such as Google Play Books and Apple Books, also sell digital versions of the memoir.

Issuu, while hosting some versions, should be approached with caution as the legitimacy of files can vary. Prioritizing purchases from established ebook stores guarantees a legally obtained and properly formatted copy, supporting the author and publisher while avoiding potential malware risks associated with unofficial downloads.

Potential Risks of Unofficial PDF Downloads

Seeking “Crying in H Mart” PDFs from unverified sources online presents considerable risks to your digital security and reading experience. Numerous websites advertise free PDF downloads, but these often harbor malicious software, including viruses and malware, which can compromise your device and personal information.

Furthermore, these unofficial PDFs may be incomplete, poorly formatted, or contain errors, detracting from the intended reading experience. The quality can be significantly lower than a purchased ebook or physical copy. Downloading copyrighted material illegally also carries legal implications, potentially violating copyright laws.

Prioritizing legitimate sources – like Kindle, Google Play Books, or Apple Books – safeguards against these threats. While the allure of a free download is tempting, the potential consequences of compromised security and a substandard reading experience far outweigh the cost of a legally obtained copy.

Alternative Formats: Kindle and Ebook

Beyond the pursuit of a PDF, Michelle Zauner’s “Crying in H Mart” is readily available in convenient and secure digital formats. The Kindle edition, accessible through Amazon, allows readers to enjoy the memoir on a variety of devices – Kindle e-readers, smartphones, tablets, and computers.

Kindle offers features enhancing the reading experience, including adjustable font sizes, bookmarking, note-taking capabilities, and highlighting. Other ebook platforms, such as Google Play Books and Apple Books, also provide access to the memoir in compatible formats.

Choosing an ebook ensures a high-quality, legally obtained version, free from the risks associated with unofficial PDF downloads. These platforms offer a seamless and secure reading experience, preserving the integrity of Zauner’s powerful storytelling.

Key Elements of the Memoir

Zauner’s memoir profoundly explores grief, Korean-American identity, and the complex bond with her mother, all interwoven with the evocative symbolism of H Mart and food.

The Significance of H Mart

H Mart transcends being merely a grocery store; it embodies a crucial link to Michelle Zauner’s Korean heritage and her late mother’s presence. Within its aisles, she vividly recalls shared experiences, the comforting aromas, and the familiar sights that represent a profound connection to her identity.

The memoir frequently revisits H Mart, transforming it into a powerful motif symbolizing remembrance and the preservation of cultural traditions. Zauner’s emotional breakdowns within the store – the titular “crying in H Mart” – aren’t simply displays of grief, but rather poignant moments of confronting loss while surrounded by reminders of her mother and Korean culture.

The store becomes a space for Zauner to actively reconnect with her heritage through food, attempting to recreate her mother’s recipes and, in doing so, maintain a tangible link to her memory. It’s a place where she grapples with her Korean-American identity, navigating the complexities of belonging and the desire to honor her mother’s legacy.

Exploring Korean-American Identity

“Crying in H Mart” deeply explores the complexities of navigating a Korean-American identity, particularly through the lens of Zauner’s upbringing and her mother’s influence. The memoir details her experiences feeling caught between two cultures, often struggling to fully assimilate into American society while simultaneously feeling disconnected from her Korean heritage.

Zauner’s journey involves a poignant search for belonging and self-discovery, fueled by her mother’s passing and the subsequent need to reconnect with her roots. Food, specifically Korean cuisine, plays a central role in this exploration, serving as a tangible link to her ancestry and a means of preserving her mother’s memory.

The memoir doesn’t shy away from portraying the challenges of cultural expectations, the pressures of familial duty, and the internal conflicts that arise from straddling two distinct worlds. It’s a raw and honest portrayal of the Korean-American experience, resonating with readers who have grappled with similar issues of identity and belonging.

The Mother-Daughter Relationship

At the heart of “Crying in H Mart” lies a profoundly moving portrayal of the complex and often fraught relationship between Michelle Zauner and her mother. The memoir meticulously details their dynamic, showcasing both the deep love and the frequent clashes that characterized their bond.

Zauner recounts her mother’s strictness and high expectations, alongside moments of tenderness and unwavering support. The narrative explores how their relationship evolved over time, particularly as Zauner navigated adolescence and young adulthood, and how her mother’s illness dramatically reshaped their connection.

The book beautifully illustrates how food became a powerful expression of their love, with cooking and sharing meals serving as a means of communication and connection. Ultimately, the memoir is a testament to the enduring power of the mother-daughter bond, even in the face of loss and grief.

Critical Reception and Awards

“Crying in H Mart” garnered significant acclaim, beginning as a viral 2018 New Yorker essay, then becoming Northwestern’s 2023-24 One Book selection, and receiving widespread praise.

“Crying in H Mart” as a New Yorker Essay

The journey of Michelle Zauner’s memoir began with a deeply personal and poignant essay published in The New Yorker in 2018. This initial piece, sharing the same title, “Crying in H Mart,” served as the foundational narrative for the expanded memoir. The essay quickly resonated with readers, going viral and establishing Zauner’s evocative writing style and the universal themes of grief, identity, and familial bonds.

The original essay detailed Zauner’s experiences navigating her Korean-American identity, particularly in relation to her mother’s illness and eventual passing. It vividly portrayed the significance of H Mart, the Korean supermarket, as a space of cultural connection and a source of comfort during a time of profound loss. The essay’s success demonstrated a strong appetite for stories exploring these complex emotions and experiences, ultimately paving the way for the full-length memoir and its subsequent acclaim.

Many online sources referencing the PDF versions of the book acknowledge the essay’s origin, highlighting it as the catalyst for the broader exploration of Zauner’s life and grief.

One Book One Northwestern Selection

In the 2023-2024 academic year, Northwestern University selected “Crying in H Mart” for its prestigious “One Book One Northwestern” (OBON) program. This selection significantly amplified the memoir’s reach and sparked widespread discussion within the university community and beyond. OBON aims to foster dialogue and shared experiences through a common reading, and Zauner’s memoir proved to be a particularly resonant choice.

The program’s selection facilitated numerous events, including author talks, panel discussions, and workshops, all centered around the core themes of the book: family, grief, and identity. This initiative encouraged students, faculty, and staff to engage with Zauner’s story on a deeper level, exploring the complexities of cultural heritage and the universal experience of loss.

References to the OBON selection frequently appear alongside mentions of PDF availability online, indicating the book’s increased visibility and demand, potentially driving searches for accessible formats.

Praise and Recognition for the Memoir

“Crying in H Mart” garnered substantial critical acclaim following its publication, building upon the popularity of Michelle Zauner’s original 2018 essay in The New Yorker. This initial essay, sharing the memoir’s title, resonated deeply with readers, establishing Zauner as a compelling voice exploring themes of grief and cultural identity.

The memoir itself received widespread praise for its raw emotional honesty, lyrical prose, and poignant exploration of the mother-daughter relationship. Reviewers consistently highlighted Zauner’s ability to connect with readers on a deeply personal level, making the book a cultural touchstone.

The book’s success is reflected in the numerous online mentions alongside PDF searches, suggesting a desire to access and share this critically acclaimed work. The positive reception undoubtedly contributes to the demand for readily available formats, including digital PDFs.

Content and Structure of the Book

Zauner’s memoir intricately details her profound grief journey, utilizing food as a central, recurring motif and exploring the powerful role of memory and nostalgia.

Detailed Exploration of Zauner’s Grief Process

Michelle Zauner’s Crying in H Mart offers a raw and unflinching exploration of her grief following her mother’s cancer diagnosis and subsequent passing. The memoir doesn’t shy away from the complexities of this loss, detailing the initial shock, the grueling realities of caregiving, and the overwhelming emptiness that followed;

The narrative meticulously charts Zauner’s emotional landscape, moving through stages of denial, anger, bargaining, depression, and ultimately, a fragile acceptance. She vividly portrays the disorientation and the feeling of being untethered from her identity as her mother’s health declined.

Importantly, the book doesn’t present grief as a linear process; rather, it’s depicted as cyclical and unpredictable, with waves of sorrow resurfacing unexpectedly. Zauner’s honesty about her struggles – the moments of resentment, the guilt, and the sheer exhaustion – resonates deeply with readers who have experienced similar losses. The PDF versions available aim to preserve this emotional intensity.

Food as a Central Motif

Throughout Crying in H Mart, food transcends mere sustenance, becoming a powerful symbol of connection, memory, and cultural identity. Zauner intricately weaves descriptions of Korean dishes – from meticulously prepared miyeok guk (seaweed soup) to the comforting familiarity of kimchi – into the narrative, linking them directly to her mother and their shared heritage.

These culinary recollections aren’t simply about taste; they represent a tangible link to her mother’s love and a way to preserve her memory. The act of cooking and sharing Korean food becomes a ritualistic attempt to reclaim a part of herself that feels lost after her mother’s death.

H Mart itself, the Korean supermarket, serves as a sensory portal to her past, evoking powerful emotions and a sense of belonging. The PDF versions of the memoir strive to convey the evocative power of these food-related passages, highlighting their central role in Zauner’s story.

The Role of Memory and Nostalgia

Zauner’s memoir is deeply rooted in the exploration of memory, both its comforting embrace and its painful elusiveness. Crying in H Mart isn’t a linear recounting of events, but rather a fragmented journey through recollections triggered by smells, tastes, and places – particularly, the bustling aisles of H Mart.

Nostalgia permeates the narrative, as Zauner revisits cherished moments with her mother, attempting to reconstruct a past that feels increasingly distant. The PDF format aims to preserve the emotional weight of these memories, allowing readers to experience the bittersweet ache of longing.

The memoir demonstrates how memory isn’t a perfect record, but a subjective and evolving construct, shaped by grief and the passage of time. Accessing the book in PDF form allows for repeated revisits to these poignant recollections.

Where to Find More Information

Explore Michelle Zauner’s official website for updates, and discover insightful book reviews and articles online; social media platforms host vibrant discussions about the PDF.

Michelle Zauner’s Official Website

Michelle Zauner’s official website serves as a central hub for information regarding her multifaceted career, encompassing both her musical endeavors as Japanese Breakfast and her literary work, including “Crying in H Mart.” While a direct PDF download isn’t typically offered on the site, it provides crucial links and updates related to the book’s availability across various platforms.

Visitors can find details about upcoming events, such as book signings or speaking engagements, where physical copies of the memoir are often available. The website also features a press section with links to reviews and articles discussing “Crying in H Mart,” offering valuable insights into the book’s themes and critical reception. Furthermore, it’s a reliable source for confirming legitimate retailers selling the ebook or Kindle versions, steering readers away from potentially risky unofficial PDF sources.

Keep checking for news regarding potential digital promotions or exclusive content related to the memoir, as Zauner frequently updates her website with the latest information for her fans and readers. It’s the most trustworthy place to stay informed about all things “Crying in H Mart.”

Book Reviews and Articles

Numerous book reviews and articles extensively cover Michelle Zauner’s “Crying in H Mart,” offering critical perspectives and deeper analyses of the memoir’s poignant themes. These resources often discuss the book’s exploration of grief, Korean-American identity, and the complex mother-daughter relationship at its core. While these sources won’t directly provide a PDF download, they offer valuable context for understanding the book’s significance.

Many articles detail the memoir’s origins as a viral 2018 New Yorker essay, tracing its evolution into a full-length book. Reviews frequently highlight Zauner’s evocative prose and her ability to connect with readers on a deeply emotional level. They also mention its selection as the 2023-24 “One Book One Northwestern” choice, further solidifying its cultural impact.

Searching online for these reviews can help readers determine if the book aligns with their interests before seeking a copy, whether in physical, ebook, or – cautiously – PDF format.

Social Media Discussions

Social media platforms are brimming with discussions surrounding Michelle Zauner’s “Crying in H Mart,” offering a diverse range of opinions and personal connections to the memoir. While direct PDF links are often flagged and removed due to copyright concerns, conversations frequently revolve around finding legitimate access points, like Kindle or ebook retailers.

Users share their emotional responses to the book, particularly relating to themes of grief, cultural identity, and familial bonds. Many discuss the impact of Zauner’s writing style and the evocative power of her descriptions of food and memory. Be cautious when encountering links promising free PDF downloads, as these often lead to unsafe websites.

Engaging in these online communities can provide valuable insights and recommendations, but always prioritize legal and secure methods for obtaining the book. Discussions also highlight the memoir’s broader cultural relevance and its resonance with a wide audience.

graco extend to fit car seat manual

Graco Extend2Fit Car Seat Manual: A Comprehensive Guide

This guide provides detailed instructions for the Graco Extend2Fit, covering installation, safety features, and maintenance, referencing the official PDF manual for assistance.

The Graco Extend2Fit is an all-in-one car seat designed for extended rear-facing use, offering a safer and more comfortable ride for your child. This convertible seat transitions from rear-facing harness (4-40 lbs), to forward-facing harness (22-65 lbs), and finally to a highback booster (40-100 lbs).

Its key feature is the Extend2Fit feature, which allows for five additional inches of legroom, enabling children to remain rear-facing longer – a recommendation from safety experts. Understanding the Graco Extend2Fit manual is crucial for proper installation and usage. Accessing the PDF version ensures you have the latest safety guidelines and instructions readily available. Proper use maximizes the car seat’s protective capabilities, keeping your little one secure on every journey.

Understanding the Extend2Fit System

The Extend2Fit system centers around maximizing rear-facing time, a critical safety factor for young children. The innovative leg rest extension provides up to 5 inches of extra space, allowing for comfortable rear-facing use even as your child grows. This feature, detailed in the Graco Extend2Fit manual, is key to understanding the seat’s benefits.

Beyond the leg rest, the system incorporates a robust harness and multiple recline positions for optimal fit and comfort. The PDF manual illustrates how these components work together to provide superior protection. Familiarizing yourself with the system’s nuances, as outlined in the user guide, ensures correct installation and usage, ultimately enhancing your child’s safety during travel.

Installation & Setup

Proper installation is crucial for safety; this section details rear-facing and forward-facing procedures, alongside recline adjustments, referencing the Graco manual.

Rear-Facing Installation Guide

Securely installing the Graco Extend2Fit rear-facing is paramount for infant safety. Begin by locating the lower anchor connectors or utilizing the vehicle’s seatbelt. Always consult your vehicle’s owner’s manual for specific instructions regarding LATCH system usage and weight limits. Ensure the car seat is at the correct recline angle, indicated by the Extend2Fit’s built-in indicator.

Thread the lower anchor straps or seatbelt through the designated belt path. Tighten the straps firmly, eliminating any slack. Verify the car seat doesn’t move more than one inch side-to-side or front-to-back when tested at the belt path. Refer to the Graco manual (PDF) for detailed diagrams illustrating proper installation techniques. Double-check all connections before each journey, ensuring a snug and secure fit for your child’s protection.

Forward-Facing Installation Guide

Transitioning to forward-facing requires careful attention to the Graco Extend2Fit’s installation. Utilize either the lower anchor connectors or the vehicle’s seatbelt, always referencing your vehicle’s manual for weight and LATCH system limitations. Ensure the top tether strap is connected to the designated anchor point in your vehicle – this significantly reduces head excursion in a crash.

Thread the belt through the correct path, as illustrated in the Graco manual (PDF). Tighten the belt or lower anchors, removing all slack. Confirm the car seat doesn’t exceed the allowable movement (one inch side-to-side or front-to-back). Verify the top tether is taut. Regularly inspect the installation to ensure continued security as your child grows. A properly installed forward-facing seat is crucial for optimal protection.

Proper Recline Adjustment

Achieving the correct recline is vital for both rear-facing and forward-facing positions with the Graco Extend2Fit. The manual (PDF) details specific recline indicators for each stage. For rear-facing infants, a more reclined position is necessary to ensure proper airway alignment. As your child grows, adjust the recline to a more upright position.

Forward-facing requires a more upright recline, but still within the manufacturer’s specified range. Utilize the recline level indicator on the car seat’s base. Always double-check that the recline is securely locked into position after adjustment. Incorrect recline can compromise safety. Refer to the diagrams in the Graco user manual for visual guidance and ensure the seat remains stable.

Safety Features & Usage

The Graco Extend2Fit prioritizes child safety with features like a 5-point harness, side-impact testing, and adjustable headrest – detailed in the manual.

5-Point Harness System Explained

The Graco Extend2Fit’s 5-point harness is a crucial safety component, designed to secure your child effectively during travel. This system features two shoulder straps, two hip straps, and a crotch strap, all working together to distribute crash forces across the strongest parts of the body.

Proper adjustment is paramount. The harness straps should lie flat and snug against your child’s body, with no slack. Refer to the manual for precise guidance on tightening and loosening the harness. Ensure the chest clip is positioned at armpit level. Regularly check the harness for wear and tear, and always replace it if damaged. The manual provides detailed diagrams illustrating correct harness usage and adjustment techniques, ensuring optimal protection for your little one.

Adjusting the Headrest & Harness

The Graco Extend2Fit features an easily adjustable headrest and harness system, accommodating your growing child. To adjust the headrest, locate the adjustment lever – the manual provides a clear diagram of its location. Raise or lower the headrest as needed, ensuring it sits comfortably above your child’s shoulders.

Simultaneously, the harness height should be adjusted to match the headrest position. The harness straps thread through slots in the headrest; readjust them to the appropriate height. Always confirm a snug fit – you shouldn’t be able to pinch any slack at the shoulder. The manual emphasizes the importance of regular adjustments as your child grows, maintaining optimal safety and comfort throughout their use of the car seat.

Side Impact Tested Engineering

Graco’s Extend2Fit car seat incorporates robust side impact testing and engineering to provide enhanced protection. The car seat’s shell is designed with specific energy-absorbing foam layers, strategically placed to shield your child during a side impact collision.

The manual details how these features work in conjunction with the steel-reinforced frame to distribute impact forces away from the child. Graco subjects the Extend2Fit to rigorous testing procedures exceeding many standard safety requirements. These tests simulate real-world crash scenarios, ensuring the car seat performs reliably. Refer to the manual’s safety section for detailed information regarding side impact protection and proper installation for maximum effectiveness.

Manual Specifics & Troubleshooting

The Graco Extend2Fit manual (PDF format) offers diagrams, FAQs, and solutions for common installation issues, ensuring correct and safe car seat usage.

Locating the Graco Extend2Fit Manual (PDF)

Finding your Graco Extend2Fit car seat manual is crucial for proper installation and safe usage. Graco provides readily accessible PDF versions of their manuals directly on their website. A quick online search using terms like “Graco Extend2Fit manual PDF” will lead you to the official Graco support page.

Alternatively, many retailers that sell the Extend2Fit also offer links to the manual on their product pages. Be sure to verify that the PDF you download corresponds to your specific model year, as features and instructions can vary. User manuals are available for various Graco models, including the 4Ever Extend2Fit, offering detailed guidance and troubleshooting assistance. Having the manual ensures you can confidently address any questions or concerns regarding your car seat.

Decoding Manual Diagrams

Graco Extend2Fit manuals utilize detailed diagrams to illustrate installation steps and component functions. These visuals are key to understanding the car seat’s features. Pay close attention to the labeled parts, especially when navigating the rear-facing and forward-facing installation processes. Arrows indicate direction, and highlighted sections emphasize critical connection points.

Manual diagrams clearly show how the 5-point harness should be threaded and adjusted, as well as proper headrest positioning. Understanding these illustrations is vital for ensuring a secure and correct installation. Don’t hesitate to cross-reference the diagrams with the written instructions for clarity. Troubleshooting sections often include diagrams to help identify common installation errors.

Common Installation Errors & Solutions

Incorrect belt path threading is a frequent error; always verify the belt follows the manual’s diagram for rear-facing or forward-facing installation. Insufficient recline can also occur, especially during rear-facing use – ensure the correct recline indicator is visible. A loose installation is dangerous; double-check the tightness by attempting to move the seat beyond one inch side-to-side at the belt path.

Harness strap twisting hinders proper impact absorption; untwist and ensure smooth operation. If the headrest isn’t adjusted correctly, the 5-point harness may be positioned incorrectly. Refer to the Graco Extend2Fit manual for specific solutions and always re-check your work!

Extend2Fit Model Variations

Graco Extend2Fit models differ in fabrics, colors, and included features, but share core safety standards and installation methods detailed in the manual;

Differences Between Extend2Fit Models

Several Graco Extend2Fit models exist, each offering slight variations to cater to diverse preferences and budgets. While the fundamental safety features and installation procedures—outlined in the official Graco manual—remain consistent across all versions, key distinctions lie in the fabric choices and color options. Some models feature premium, plush fabrics for enhanced comfort, while others utilize more standard materials.

Additionally, certain Extend2Fit iterations may include extra padding or accessories, such as cup holders or specific base designs. The 4Ever Extend2Fit, for example, is a popular all-in-one option. It’s crucial to consult the specific user manual (PDF) accompanying your particular model to understand its unique features and ensure correct usage. These differences don’t impact safety when installed and used correctly according to the Graco guidelines.

Compatibility with Vehicle Types

Graco Extend2Fit car seats are designed for broad vehicle compatibility, but successful installation hinges on your car’s specific features. The manual emphasizes checking your vehicle’s owner’s manual for proper car seat installation guidelines and LATCH weight limits. While most vehicles accommodate the Extend2Fit, some may present challenges due to seat shape or limited space.

Vehicles with deeply contoured seats or short seat tracks might require alternative installation methods, such as using the vehicle’s seat belt instead of the LATCH system. Always refer to the Graco Extend2Fit manual (PDF) for detailed instructions and compatibility information. Proper recline adjustment, as detailed in the manual, is also crucial for a secure fit in various vehicle types.

Maintenance & Care

The Graco Extend2Fit manual details cleaning the cover, inspecting for wear, and understanding expiration dates – vital for continued safety and proper function.

Cleaning the Car Seat Cover

The Graco Extend2Fit manual provides specific instructions for cleaning the car seat cover, ensuring both hygiene and fabric integrity. Generally, the cover is removable and machine washable, using a mild detergent and cold water. Always check the manual for specific washing instructions, as some components may require hand washing or air drying.

Avoid using harsh chemicals, bleach, or abrasive cleaners, as these can damage the fabric and potentially compromise the car seat’s safety features. After washing, ensure the cover is completely dry before reinstalling it on the car seat. Regularly cleaning the cover helps maintain a safe and comfortable environment for your child, removing spills, crumbs, and other debris. Refer to the PDF manual for detailed guidance and warnings.

Inspecting for Wear and Tear

The Graco Extend2Fit manual emphasizes regular inspection for wear and tear to ensure continued safety. Carefully examine the harness straps for fraying, cuts, or damage. Check the buckle for proper function and any signs of cracking. Inspect the car seat shell for cracks or damage, particularly after any impact, even minor ones.

Pay close attention to the LATCH connectors and tether straps, ensuring they are secure and undamaged. The manual details what constitutes unacceptable wear and tear, potentially requiring car seat replacement. Consistent inspection, as outlined in the PDF manual, is crucial for identifying potential hazards and maintaining optimal protection for your child. Do not use a car seat showing signs of significant damage.

Expiration Dates & Replacement

The Graco Extend2Fit car seat manual clearly states that all car seats have expiration dates, typically 6-10 years from the date of manufacture. This is due to plastic degradation and potential wear on safety components over time. Locate the manufacture date sticker on the car seat itself – this determines the expiration date.

Do not continue using the car seat after its expiration date. Even if it appears undamaged, the materials may have weakened. The manual also outlines scenarios requiring immediate replacement, such as after a moderate to severe car accident. Always refer to the PDF manual for specific guidance. Replacing the seat ensures your child’s continued safety.

Additional Resources

Graco’s customer support and FAQs offer further assistance, alongside details on related car seat models, and the downloadable Extend2Fit manual (PDF).

Graco Customer Support Contact Information

For direct assistance with your Graco Extend2Fit car seat, Graco offers multiple avenues for support. You can reach their customer service team via phone at 1-800-345-4109, available Monday through Friday. Alternatively, explore their comprehensive online help center at GracoBaby.com, featuring FAQs, troubleshooting guides, and video tutorials specifically addressing installation and usage concerns.

Live chat support is also frequently available on their website for immediate assistance. When contacting support, have your car seat model number and date of manufacture readily available to expedite the process; Graco emphasizes safety and is dedicated to providing clear guidance to ensure proper car seat installation and usage, referencing the official Extend2Fit manual when needed.

Frequently Asked Questions (FAQ)

Q: Where can I find the Extend2Fit manual? A: The official Graco Extend2Fit manual is available as a PDF download on the GracoBaby.com website. Q: Can I use this seat in my vehicle? A: Check your vehicle’s owner’s manual for car seat compatibility. Q: How do I know when to adjust the harness? A: Adjust the harness straps so they are snug and at or below your child’s shoulders.

Q: What does “rear-facing longer” mean? A: The Extend2Fit allows children to rear-face longer, maximizing safety. Q: What if I can’t install the seat securely? A: Review the manual and contact Graco customer support for assistance. Proper installation is crucial for safety.

Related Graco Car Seat Models

Considering alternatives? The Graco 4Ever DLX is a popular all-in-one option, similar to the Extend2Fit, offering extended rear-facing capability and converting to a booster. The Graco My Size 65 is another convertible seat, known for its compact design, suitable for smaller vehicles. For infants, the Graco SnugRide series provides secure and comfortable travel from birth.

Looking for specific features? Explore the Graco Nautilus for a focus on comfort and growth, or the Graco Tranzitions for a budget-friendly convertible option. Always consult each car seat’s manual for proper installation and usage guidelines. Visit GracoBaby.com to compare models and find the best fit for your child and vehicle.

national instructional coaches day

National Instructional Coaches Day: A Comprehensive Overview

October 6th is officially designated as National Instructional Coaches Day, a time to acknowledge the vital role these professionals play within educational institutions. This annual celebration
recognizes their dedication to fostering teacher growth and ultimately, student success, aligning with the beginning of the academic year.

The Date and Its Significance

October 6th has emerged as the nationally recognized date for celebrating Instructional Coaches Day, a deliberate choice rooted in its proximity to the commencement of the school year. This timing is particularly significant as it allows for a focused acknowledgment of coaches’ contributions right as educators are actively implementing new strategies and navigating the challenges of a fresh academic cycle.

The selection of October 6th isn’t arbitrary; it’s designed to coincide with a period of heightened professional activity and need for support within schools. Instructional coaches are most impactful when engaged early in the year, assisting teachers with planning, curriculum development, and the integration of innovative teaching methods. By dedicating a specific day to their appreciation, schools can reinforce the value placed on their expertise and collaborative spirit.

Furthermore, aligning the day with National Tutor Appreciation Week (October 6-10) highlights the broader spectrum of support professionals dedicated to student achievement. This creates a synergistic effect, emphasizing the collective effort required to cultivate a thriving learning environment. The date serves as a powerful reminder of the crucial role instructional coaches play in shaping effective classroom practices and driving positive educational outcomes.

Historical Context of the Day

The establishment of National Instructional Coaches Day is a relatively recent development, reflecting the growing recognition of the instructional coaching profession’s importance within the educational landscape. While the precise origins are somewhat diffuse, the day gained momentum through grassroots efforts by educators and organizations seeking to formally acknowledge the contributions of these often-unsung heroes.

Historically, the role of instructional coaching evolved from mentorship programs and professional development initiatives. As schools increasingly focused on data-driven instruction and personalized learning, the need for dedicated coaches to support teachers became more apparent. These coaches provided targeted assistance, helping educators refine their skills and implement best practices.

The formalization of a national day of recognition stemmed from a desire to elevate the profession and advocate for increased investment in instructional coaching programs. Organizations like The Donovan Group played a key role in promoting the date, solidifying October 6th as the official day to celebrate these vital educators. This recognition acknowledges the shift towards collaborative professional learning and the crucial role coaches play in fostering continuous improvement within schools.

Why Celebrate Instructional Coaches?

Celebrating instructional coaches is paramount because they are instrumental in driving positive change within schools and enhancing the overall quality of education. They don’t simply dictate; they collaborate, offering support and guidance to teachers as they navigate the complexities of modern pedagogy and diverse student needs.

Instructional coaches foster a culture of continuous improvement, encouraging educators to experiment with fresh strategies and reflect critically on their practice. They act as a sounding board, providing constructive feedback and helping teachers overcome challenges. This support system is especially crucial in today’s demanding educational environment.

Recognizing their contributions on October 6th acknowledges the significant impact they have on teacher development and, consequently, student achievement. It’s a chance to show appreciation for their dedication, expertise, and unwavering commitment to fostering a thriving learning community. Celebrating them reinforces the value of collaborative professionalism and highlights the importance of investing in their ongoing growth and support.

The Role of an Instructional Coach

The role of an instructional coach is multifaceted, extending far beyond traditional mentorship. They function as dedicated partners to teachers, working alongside them to refine their skills and enhance classroom practices. Unlike evaluators, coaches focus on growth, providing non-judgmental support and collaborative problem-solving.

Instructional coaches facilitate professional learning, introducing innovative strategies and resources tailored to individual teacher needs and school-wide goals. They model effective teaching techniques, conduct co-observations, and offer personalized feedback to promote continuous improvement. Their expertise spans curriculum development, assessment practices, and classroom management.

Crucially, they empower teachers to become reflective practitioners, encouraging self-assessment and a commitment to lifelong learning. They champion a collaborative environment where educators feel comfortable taking risks and experimenting with new approaches. Recognizing October 6th highlights this vital role in shaping a more effective and engaging learning experience for all students;

Key Responsibilities and Functions

Instructional coaches shoulder a diverse set of responsibilities centered around enhancing teaching quality. A primary function involves providing individualized coaching sessions, focusing on specific teacher goals and classroom challenges. This includes co-planning lessons, observing instruction, and offering constructive feedback aligned with best practices.

They also facilitate professional development workshops and learning communities, disseminating research-based strategies and fostering collaborative learning among educators. Analyzing student data to inform instructional decisions is another key responsibility, helping teachers identify areas for improvement and tailor their approaches.

Furthermore, coaches assist with curriculum alignment, resource selection, and the integration of technology into the classroom. They act as a bridge between school leadership and teachers, communicating initiatives and supporting their implementation. Celebrating them on October 6th acknowledges their dedication to these crucial functions, ultimately impacting student achievement and fostering a positive school culture.

Impact on Teacher Development

Instructional coaches profoundly impact teacher development by fostering a culture of continuous improvement. They provide a safe and supportive environment for educators to experiment with new strategies, reflect on their practice, and address areas for growth. Through individualized coaching, teachers receive targeted support tailored to their specific needs and goals.

This personalized approach empowers teachers to take ownership of their professional learning and refine their instructional skills. Coaches help educators navigate challenges, overcome obstacles, and build confidence in their abilities. They also facilitate access to relevant professional development opportunities and resources.

Recognizing their contributions on October 6th highlights how coaches help teachers stay current with best practices, integrate innovative technologies, and ultimately become more effective educators. This ongoing support translates into improved classroom instruction and enhanced student outcomes, demonstrating the lasting impact of instructional coaching.

Benefits for Students

The benefits of instructional coaching extend far beyond teacher development, directly impacting student success. When teachers are well-supported and continuously improving their practice – a key focus celebrated on October 6th – students reap the rewards of enhanced instruction. Improved teaching leads to increased student engagement, deeper understanding of concepts, and better academic performance.

Instructional coaches help teachers implement evidence-based strategies that cater to diverse learning needs, ensuring all students have opportunities to thrive. This includes supporting differentiated instruction, personalized learning approaches, and effective classroom management techniques. A positive classroom environment fostered by confident and skilled teachers creates a more conducive learning space.

Ultimately, recognizing instructional coaches acknowledges their indirect, yet powerful, contribution to student achievement. By empowering teachers, coaches contribute to a ripple effect of positive change, benefiting students both academically and emotionally, and preparing them for future success.

Improving Classroom Practices

A core function of instructional coaches, highlighted during the annual recognition on October 6th, is the systematic improvement of classroom practices. Coaches work collaboratively with teachers, observing lessons, providing constructive feedback, and co-planning engaging learning experiences. This isn’t about evaluation; it’s about partnership and professional growth.

Coaches introduce teachers to innovative pedagogical strategies, research-backed methods, and effective uses of technology to enhance instruction. They facilitate the implementation of best practices, helping teachers refine their techniques and address specific challenges within their classrooms. This often involves modeling lessons, providing resources, and offering ongoing support.

The focus is on creating a dynamic learning environment where students are actively involved and achieving their full potential. By fostering a culture of continuous improvement, instructional coaches empower teachers to become reflective practitioners, constantly seeking ways to refine their craft and positively impact student learning outcomes.

Data-Driven Instruction and Coaching

Recognizing October 6th as National Instructional Coaches Day underscores the increasing importance of data in modern education. Instructional coaches play a pivotal role in helping teachers utilize data effectively to inform their instructional decisions and personalize learning for students.

Coaches assist teachers in analyzing various data sources – formative assessments, standardized test scores, classroom observations, and student work – to identify trends, pinpoint areas of strength and weakness, and tailor instruction accordingly. This isn’t simply about numbers; it’s about understanding what the data reveals about student learning.

They guide teachers in setting measurable learning goals, monitoring student progress, and adjusting strategies based on evidence. Coaches also support the use of data to differentiate instruction, providing targeted interventions for struggling learners and enrichment opportunities for advanced students. This collaborative, data-informed approach ensures that all students receive the support they need to succeed, fostering a culture of continuous improvement and accountability.

Ways to Show Appreciation

Celebrating instructional coaches on October 6th – National Instructional Coaches Day – requires thoughtful gestures that acknowledge their dedication. Simple, yet meaningful, expressions of gratitude can significantly impact morale and reinforce the value of their contributions.

School-wide initiatives, like a dedicated shout-out during morning announcements or a collaborative “thank you” card signed by all staff, demonstrate collective appreciation. Personalized notes from administrators, colleagues, and even students expressing specific examples of how the coach’s support made a difference are incredibly impactful.

Small gifts, such as a gift card to a favorite coffee shop or bookstore, or a classroom supply they frequently use, show consideration. Consider organizing a catered lunch or breakfast for the coaching team. Publicly recognizing their accomplishments and sharing success stories highlights their positive influence. Ultimately, acknowledging their tireless efforts and commitment to teacher growth is the most valuable way to show appreciation.

School-Wide Recognition Ideas

To truly honor instructional coaches on October 6th, National Instructional Coaches Day, schools can implement impactful, visible recognition programs. A school-wide bulletin board dedicated to celebrating their contributions, featuring photos and testimonials from teachers they’ve supported, creates a lasting tribute.

Organize a “Coaches’ Spotlight” during a staff meeting, allowing coaches to share successful strategies or impactful coaching moments. A school newsletter feature highlighting their work and expertise demonstrates institutional appreciation. Consider a school-wide “dress-down” day with proceeds donated to a professional development fund for the coaching staff.

A collaborative art project, where students and staff contribute to a mural or banner thanking the coaches, fosters a sense of community. Publicly displaying positive data reflecting improvements linked to coaching initiatives showcases their effectiveness. Finally, a small reception or celebratory breakfast provides a dedicated space for acknowledging their hard work and dedication.

Personalized Gestures of Thanks

Beyond school-wide events on October 6th, National Instructional Coaches Day, personalized gestures demonstrate genuine appreciation for instructional coaches. Handwritten thank-you notes from teachers detailing specific instances of support and impact are incredibly meaningful. A small, thoughtful gift tailored to the coach’s interests – a book, a gift card to their favorite coffee shop, or a plant – shows you’ve considered them as individuals.

Organize a “gratitude chain” where teachers write positive messages on linked paper strips, creating a visual representation of appreciation. A personalized video montage featuring staff members sharing their thanks offers a heartfelt tribute. Consider creating a “Coaches’ Comfort Basket” filled with snacks, self-care items, and encouraging notes.

Offering to cover a coaching-related task or providing dedicated planning time allows them to recharge. A simple, sincere verbal expression of gratitude, acknowledging their dedication and positive influence, can go a long way in making them feel valued.

National vs. Local Celebrations

While October 6th marks the nationally recognized National Instructional Coaches Day, the extent of celebration often varies between school districts and individual schools. A national day provides awareness and a framework for recognition, but impactful celebrations are frequently driven at the local level.

National celebrations often involve social media campaigns using dedicated hashtags to share appreciation and highlight the profession. Local celebrations, however, allow for customized events that reflect the unique culture and needs of the school community. These can range from school-wide assemblies and catered lunches to personalized thank-you notes and small gifts.

Districts might issue proclamations recognizing the contributions of instructional coaches, while schools may organize peer-to-peer appreciation activities. The key is to blend national recognition with locally tailored expressions of gratitude, ensuring coaches feel genuinely valued for their specific contributions within their school environment.

Resources for Celebrating

Numerous online resources can assist in planning a meaningful National Instructional Coaches Day celebration. Bravoboard offers pre-designed messages and platforms for public acknowledgement, facilitating easy expression of gratitude from teachers and administrators. School district websites, like the School District of Lancaster, often share ideas and examples of how they’ve honored their instructional coaches.

Social media platforms, particularly Twitter and Facebook, are valuable for sharing appreciation posts and connecting with other educators celebrating the day. Websites dedicated to education events, such as The Donovan Group, compile key dates and celebrations, providing a central hub for information.

Furthermore, consider utilizing internal communication channels – newsletters, staff meetings – to promote the day and encourage participation. Don’t overlook simple, free resources like printable thank-you cards or digital templates for creating personalized messages. A little creativity and readily available tools can go a long way!

Future Trends in Instructional Coaching

As education evolves, the role of the instructional coach is poised for significant transformation. A growing emphasis on personalized learning will necessitate coaches skilled in facilitating differentiated instruction and leveraging educational technology effectively. Expect increased demand for expertise in data analysis, enabling coaches to guide teachers in utilizing student data to inform instructional decisions.

Furthermore, coaching will likely become more focused on supporting teacher well-being and addressing issues of equity and inclusion. Mental health awareness and culturally responsive teaching practices will be central to professional development initiatives. The integration of artificial intelligence (AI) tools may also reshape coaching, offering personalized support and resources for both coaches and teachers.

Ultimately, the future of instructional coaching hinges on adaptability and a commitment to continuous learning, ensuring coaches remain valuable partners in fostering a dynamic and equitable educational landscape. Recognizing this evolution is key to celebrating National Instructional Coaches Day and supporting their ongoing growth.

shelterlogic shed in a box instructions

ShelterLogic Shed-in-a-Box Instructions: A Comprehensive Guide

Welcome! This guide provides detailed steps for assembling your ShelterLogic Shed-in-a-Box. It covers everything from unpacking components to final cover securing, ensuring a sturdy and protected storage solution.

Successful assembly relies on carefully following these instructions, potentially with a partner, and understanding the importance of proper bracing and tensioning for weather resistance.

Understanding the ShelterLogic Shed-in-a-Box

The ShelterLogic Shed-in-a-Box represents a convenient and cost-effective storage solution, particularly valuable when space is limited. It’s designed for straightforward assembly, offering a temporary or semi-permanent shelter for garden equipment, tools, or recreational vehicles like UTVs.

Unlike traditional permanent structures, the Shed-in-a-Box utilizes a frame typically constructed from galvanized steel, covered by a heavy-duty polyethylene fabric. This design prioritizes portability and ease of installation, often achievable with minimal tools and, ideally, two people. However, online resources highlight potential challenges with the provided instructions, sometimes requiring adaptation or supplemental guidance.

It’s crucial to understand that while robust, the Shed-in-a-Box isn’t intended to withstand extreme weather conditions without proper anchoring and maintenance. ShelterLogic explicitly states they aren’t responsible for shelters blown away, emphasizing the need for proactive securing measures. Consider this when choosing a location and preparing for seasonal changes.

What is Included in the Box? ― Component Checklist

Before beginning assembly, carefully inventory all components. A typical ShelterLogic Shed-in-a-Box includes: Frame Rails (various lengths forming the base), Upright Posts (corner and intermediate supports), Frame Connectors (for joining rails), Base Supports (for added stability), and Bracing Components (diagonal supports for reinforcement).

Crucially, the package should contain the Cover – a heavy-duty polyethylene tarp. Also included are Bungee Balls and/or Straps for securing the cover to the frame. Verify the quantity of each item against the parts list included in your specific model’s documentation.

Important Note: Missing parts are a potential issue. If anything is absent, immediately contact ShelterLogic customer support. Do not proceed with assembly until all components are accounted for. A thorough check now prevents frustration and delays later in the process. Retain the packaging and documentation for potential warranty claims or part replacements.

Tools Required for Assembly

Successful ShelterLogic Shed-in-a-Box assembly requires a few essential tools. A Rubber Mallet is highly recommended for gently connecting frame components without causing damage. A Wrench Set (adjustable or socket set) is necessary for tightening bolts and connectors. While not always mandatory, a Power Drill with appropriate bits can significantly speed up the process, particularly for securing the cover.

A Measuring Tape is crucial for ensuring accurate frame alignment, especially on uneven ground. Gloves will protect your hands during handling. A Ladder may be needed for reaching higher frame sections, particularly for larger shed models.

Finally, a Utility Knife or scissors will be useful for opening packaging and potentially trimming excess cover material. Having these tools readily available before you start will streamline the assembly and minimize interruptions. Remember to prioritize safety when using power tools!

Safety Precautions Before You Begin

Prioritize safety throughout the ShelterLogic Shed-in-a-Box assembly process. Always work in a clear, spacious area free from obstructions. Wear safety glasses to protect your eyes from debris, and work gloves to prevent hand injuries. If using power tools, adhere to all manufacturer’s safety guidelines.

Be mindful of overhead power lines when assembling the frame, especially with taller models. Two-person assembly is strongly recommended, as some components can be heavy or awkward to handle alone.

ShelterLogic explicitly states they are not responsible for shelters blown away, so secure the structure properly. During cover installation, avoid working in high winds. Finally, read the entire instruction manual before starting to understand potential hazards and assembly steps.

Step-by-Step Assembly Instructions

Follow these steps carefully! Begin with frame connector installation, progressing through base and main frame construction, bracing, and finally, secure cover attachment for a robust shed.

Step 1: Frame Connector Installation

Begin the assembly process by attaching the frame connectors to the base rails. These connectors are crucial for establishing a solid foundation for your ShelterLogic shed. Ensure proper alignment; typically, these connectors slide onto the ends of the rails and are secured with screws or bolts – verify your kit’s specific hardware.

Pay close attention to orientation! The connectors often have a specific direction, indicated by markings or pre-drilled holes. Incorrect installation at this stage can lead to instability later. Tighten all fasteners firmly, but avoid over-tightening, which could strip the threads or damage the rails.

Double-check each connection before moving forward. A wobbly base will compromise the entire structure. Refer to the diagram in your instruction manual for visual guidance. This initial step is fundamental to a successful and durable shed assembly.

Step 2: Base Frame Assembly ― Connecting the Rails

With the frame connectors installed, proceed to connect the base rails to form the rectangular foundation of your shed. Align the rails carefully, ensuring the connectors interlock securely. Typically, this involves inserting the rails into the connectors and then fastening them with provided screws or pins.

Squareness is paramount! Before fully tightening, measure diagonally across the frame in both directions. These measurements should be equal. Adjust the frame until it’s perfectly square; this prevents racking and ensures the shed sits level. Use a carpenter’s square for precise alignment.

Once square, firmly tighten all connecting hardware. A robust base frame is essential for overall stability. Regularly check connections throughout the assembly process to prevent loosening. A solid base will withstand the weight of the cover and any stored items.

Step 3: Main Frame Construction ― Upright Post Attachment

Now, elevate the structure! Carefully attach the upright posts to the assembled base frame. These posts provide the shed’s height and vertical support. Align each post with the designated corner connectors on the base, ensuring a flush and secure fit.

Securely fasten each post using the provided bolts, screws, or pins. Tighten these fasteners progressively, alternating between posts to distribute the stress evenly. Avoid over-tightening initially, allowing for minor adjustments as you attach subsequent posts.

Verify vertical alignment with a level as you install each post. Plumb posts are crucial for a stable and square shed. Once all posts are in place and roughly aligned, go back and fully tighten all connections. This step establishes the core structural integrity of the shed.

Step 4: Base Support Installation ⎯ Ensuring Stability

Reinforce the foundation! Installing base supports significantly enhances the shed’s stability, particularly against wind and uneven ground. Locate the provided base support beams – these typically run horizontally between the upright posts, near the ground.

Attach these supports to the upright posts using the designated connectors and hardware. Ensure the supports are level and securely fastened. Proper alignment is key to preventing wobbling or shifting. Again, progressive tightening is recommended, alternating between connection points;

These supports act as a crucial secondary frame, distributing weight and resisting lateral forces. Double-check all connections for tightness and stability. A well-supported base is fundamental to the shed’s longevity and resistance to the elements, preventing potential collapse.

Step 5: Frame Bracing ⎯ Adding Structural Integrity

Enhance resilience! Frame bracing is critical for resisting wind loads and maintaining the shed’s shape. Locate the diagonal bracing components – these are usually metal or reinforced plastic bars.

Attach these braces to the upright posts and frame rails, forming triangular supports. These triangles dramatically increase the frame’s rigidity. Use the provided hardware, ensuring a snug fit at each connection point. Progressive tightening, alternating between fasteners, is recommended for even distribution of stress.

Proper bracing prevents racking (sideways movement) and collapse, especially in windy conditions. ShelterLogic emphasizes this step, noting that failure to adequately brace the frame can void warranty claims. Inspect all braces for secure attachment and adjust as needed for optimal stability.

Cover Installation and Securing

Protect your belongings! This section details cover placement, utilizing bungee balls and straps for a tight, weather-resistant fit. Careful tensioning is key for longevity.

Step 6: Unpacking and Preparing the Cover

Carefully unpack the cover from its packaging, taking note of the orientation – typically indicated by labels or markings. Lay the cover out on a clean, flat surface, ideally on a tarp to prevent any potential damage or dirt accumulation. Inspect the cover thoroughly for any tears, punctures, or manufacturing defects before attempting installation.

Familiarize yourself with the attachment points – these are usually reinforced loops or grommets around the perimeter. Locate all bungee balls and straps included in the kit. It’s beneficial to pre-attach some bungee balls to the cover’s loops before lifting it onto the frame, especially if working alone. This simplifies the securing process. Ensure the cover is fully extended and free of wrinkles before proceeding to the next step. Remember, a smooth, wrinkle-free cover contributes to better water runoff and overall durability.

Step 7: Cover Placement ― Aligning with the Frame

Carefully lift the prepared cover and position it over the assembled frame. Align the cover’s edges with the frame’s perimeter, ensuring an equal overhang on all sides. This equal distribution is crucial for proper tensioning and weather protection. Pay close attention to any designated front or back orientation, often indicated by a door opening or specific cover markings.

If working alone, consider using ladders or step stools to safely maneuver the cover onto the frame, especially for larger shed models. Take your time and avoid stretching or pulling the cover excessively during placement, as this could damage the material or the frame. Once positioned, visually inspect the alignment from all angles to confirm it’s centered and properly oriented before proceeding to secure it.

Step 8: Securing the Cover ⎯ Bungee Balls and Straps

Begin securing the cover using the provided bungee balls and straps. Start at the corners, attaching the bungee balls to the frame’s corner connectors and the cover’s grommets or designated attachment points. Work your way around the perimeter, spacing the bungee balls evenly – typically every 2-3 feet – to distribute tension uniformly.

Utilize the straps for additional reinforcement, particularly along the sides and roof. Thread the straps through the cover’s grommets and around the frame members, tightening them securely. Avoid over-tightening, which could tear the cover. Regularly check that the bungee balls and straps are firmly attached and haven’t loosened during the process. This step is vital for preventing the cover from shifting or blowing off in windy conditions.

Step 9: Tensioning the Cover ⎯ Achieving a Tight Fit

Proper tensioning is crucial for a weather-resistant shelter. After securing with bungee balls and straps, inspect the cover for any slack or wrinkles. Gently pull on the cover at various points, adjusting the bungee ball and strap positions to eliminate these imperfections. The goal is a smooth, taut surface that minimizes wind resistance and prevents water pooling.

Ensure even tension across the entire cover. Avoid concentrating tension in one area, as this could strain the fabric or frame. Re-tighten straps as needed. A well-tensioned cover will significantly improve the shed’s stability and longevity. Regularly check tension, especially after periods of heavy wind or rain, and readjust as necessary to maintain a secure fit.

Advanced Assembly Considerations

Beyond basic setup, address uneven ground with leveling, consider one-person assembly techniques, and explore modifications to tailor the shed to your specific storage needs.

Dealing with Uneven Ground ⎯ Leveling the Base

Uneven terrain presents a significant challenge during ShelterLogic shed assembly. A level base is crucial for structural integrity and prevents stress on the frame, potentially leading to collapse, especially during inclement weather. Begin by identifying the lowest point of the intended shed location.

Utilize shims – wooden or composite wedges – under the base rails to compensate for ground irregularities. Carefully measure and adjust shims until the frame is perfectly level in all directions, using a spirit level. For substantial slopes, consider digging out high spots or building up low areas with compacted gravel before frame installation.

Ensure shims are securely positioned and won’t shift over time. Regularly check the level after assembly and make adjustments as needed. Ignoring this step can compromise the shed’s stability and void any warranty claims. Proper leveling is a foundational element for a long-lasting ShelterLogic structure.

Assembly with One Person ⎯ Tips and Tricks

Assembling a ShelterLogic shed solo requires patience and strategic planning. While the instructions often recommend two people, it’s achievable alone with a few adjustments. Begin by fully unpacking and organizing all components, keeping hardware readily accessible. Utilize ratchet straps to temporarily hold frame sections together, freeing up your hands.

Focus on building the base frame first on a flat surface, then carefully lifting and positioning it. Leverage gravity whenever possible – partially assemble sections on the ground before lifting them into place. A ladder can be invaluable for reaching higher points during cover installation, but prioritize safety!

Break down the assembly into smaller, manageable steps. Don’t rush, and frequently review the instructions. Consider using clamps to secure pieces while you move to another task. Remember, taking breaks is crucial to avoid fatigue and maintain focus during this potentially challenging process.

Modifying the Shed for Specific Needs

ShelterLogic sheds offer adaptability beyond their basic structure. For enhanced ventilation, consider carefully cutting and covering small openings in the cover, ensuring structural integrity isn’t compromised. Adding shelving units is a common modification; secure them firmly to the frame using appropriate brackets and fasteners.

If using the shed for equipment with exhaust, ensure adequate ventilation to prevent carbon monoxide buildup – this may require more substantial modifications and professional consultation. Reinforcing the frame with additional supports can be beneficial for heavier loads or areas with significant snowfall.

Remember that any modifications may void the warranty, so proceed cautiously. Prioritize safety and structural stability when making alterations. Always use weather-resistant materials for any additions to maintain the shed’s protective qualities. Careful planning and execution are key to a successful modification.

Maintenance and Long-Term Care

Prolong your shed’s life with regular cover cleaning and frame rust prevention. Winterizing involves removing snow and ensuring the cover remains taut for lasting protection.

Cover Care and Cleaning

Maintaining your ShelterLogic shed cover is crucial for longevity and performance. Regularly inspect the cover for tears, punctures, or excessive wear, addressing any damage promptly to prevent further deterioration. Cleaning should be performed periodically, ideally in the spring and fall, using mild soap and water.

Avoid harsh chemicals or abrasive cleaners, as these can damage the cover’s coating. A soft brush or sponge is recommended for scrubbing, followed by a thorough rinse with clean water. Ensure the cover is completely dry before re-securing it to the frame.

During periods of heavy snowfall, regularly remove accumulated snow from the cover to prevent excessive weight and potential collapse. Consider applying a waterproof sealant periodically to enhance water resistance and protect against UV damage. Proper cover care significantly extends the life of your ShelterLogic shed.

Frame Maintenance ― Preventing Rust

Protecting the steel frame of your ShelterLogic shed from rust is vital for its structural integrity. The frame typically features a protective coating, but regular maintenance is still necessary, especially in humid or coastal environments. Annually inspect all frame components for any signs of rust or corrosion.

If rust is detected, immediately remove it using a wire brush or sandpaper, then clean the area thoroughly. Apply a rust-inhibiting primer followed by a coat of exterior-grade paint specifically designed for metal. This creates a barrier against moisture and prevents further corrosion.

Avoid storing the shed in direct contact with the ground; use a gravel base or wooden pallets to promote airflow. Regularly check and tighten all bolts and connections to prevent loosening and potential stress points that could lead to rust formation. Consistent frame maintenance ensures a long-lasting, stable structure.

Winterizing Your ShelterLogic Shed

Preparing your ShelterLogic shed for winter is crucial to prevent damage from snow, ice, and strong winds. Begin by thoroughly inspecting the cover for any tears or weaknesses and repair them promptly. Reinforce the frame bracing, ensuring all connections are tight and secure.

Consider removing items from the shed that are susceptible to cold damage. Regularly clear accumulated snow from the roof to prevent excessive weight buildup, which could compromise the frame’s structural integrity. A soft-bristled broom is ideal for this task – avoid using sharp tools.

Check the bungee balls and straps securing the cover, replacing any that are worn or damaged. In areas with heavy snowfall, additional support poles may be beneficial. Properly winterizing your shed extends its lifespan and protects your stored belongings throughout the colder months.

Troubleshooting Common Issues

Facing problems? This section addresses missing parts, frame instability, cover damage, and warranty details. Solutions and resources are provided for a smooth experience.

Dealing with Missing Parts

Discovering a missing component can halt your assembly process. Don’t panic! First, carefully re-check the packaging and all included boxes – sometimes smaller parts are tucked away. Next, consult the component checklist (found earlier in this guide) to confirm exactly what’s absent.

If a part is genuinely missing, contact ShelterLogic customer support immediately. Have your proof of purchase and the part number (if available from the manual) ready. They typically offer replacements free of charge, but processing times can vary;

Temporary Solutions: While awaiting a replacement, assess if a similar item from a hardware store can temporarily fill the gap, ensuring it doesn’t compromise structural integrity. Never attempt to modify existing parts to substitute for missing ones. Document everything with photos for potential warranty claims.

Addressing Frame Instability

A wobbly or unstable frame is a serious concern. Immediately stop assembly and reassess the base. Ensure the ground is as level as possible – even slight inclines can cause issues (see section on leveling). Double-check that all frame connectors are securely locked into place, and that no bolts are missing or loose.

Reinforcement is key. Verify that base supports are correctly installed and providing adequate support. Consider adding extra bracing, particularly if the shed is in a windy area. Diagonal bracing can significantly improve stability.

If instability persists, carefully disassemble the affected section and rebuild it, paying close attention to alignment. Do not attempt to force connections. Contact ShelterLogic support if you suspect a bent or damaged frame component – using a compromised part will worsen the problem.

Cover Damage and Repair Options

Minor tears and punctures in the cover can often be repaired using a heavy-duty tarp repair kit, readily available at most hardware stores. Clean the area thoroughly before applying the patch, ensuring a strong bond. For larger rips, consider reinforcing the patch with an additional layer of tarp material on the underside.

Significant damage, such as large holes or extensive tearing, may necessitate a full cover replacement. ShelterLogic offers replacement covers specifically designed for their Shed-in-a-Box models. Check their website or contact customer support for availability and ordering information.

Preventative maintenance is crucial. Regularly inspect the cover for wear and tear, and promptly address any issues. Removing the cover before severe weather events can also help prevent damage. Remember, the cover is your primary defense against the elements!

ShelterLogic Warranty Information

ShelterLogic products, including the Shed-in-a-Box, typically come with a limited warranty against manufacturing defects. The specific duration and coverage details vary depending on the model and purchase date, so retaining your proof of purchase is essential.

Warranty coverage generally includes the frame and cover, but often excludes damage caused by improper installation, extreme weather events (like high winds or heavy snow), or normal wear and tear. It’s crucial to follow the assembly instructions carefully to maintain warranty validity.

To file a warranty claim, contact ShelterLogic directly through their website or customer service line. You will likely need to provide your proof of purchase, photos of the damage, and a description of the issue. Review the full warranty details on their official website for complete terms and conditions.