red baron mini pizza cooking instructions
Red Baron Mini Pizza Cooking Instructions: A Comprehensive Guide
Embark on a delightful culinary journey! This guide provides detailed instructions for perfectly cooked Red Baron Mini Pizzas, ensuring a crispy crust and flavorful experience every time.
Understanding Red Baron Mini Pizzas
Red Baron Mini Pizzas are a convenient and popular frozen food choice, offering a quick and easy meal or snack option. These individual-sized pizzas are designed for simplicity, requiring minimal preparation and cooking time. They typically feature a pre-made crust topped with tomato sauce, mozzarella cheese, and various toppings, catering to diverse tastes.
Understanding the composition of these mini pizzas is key to achieving optimal cooking results. The pre-baked crust requires careful attention to avoid becoming overly crispy or burnt. The cheese blend melts readily, so monitoring the cooking process is crucial to prevent excessive bubbling or separation. Red Baron prioritizes delivering a consistent and satisfying pizza experience with each bite, making them a household favorite.
Types of Red Baron Mini Pizzas Available
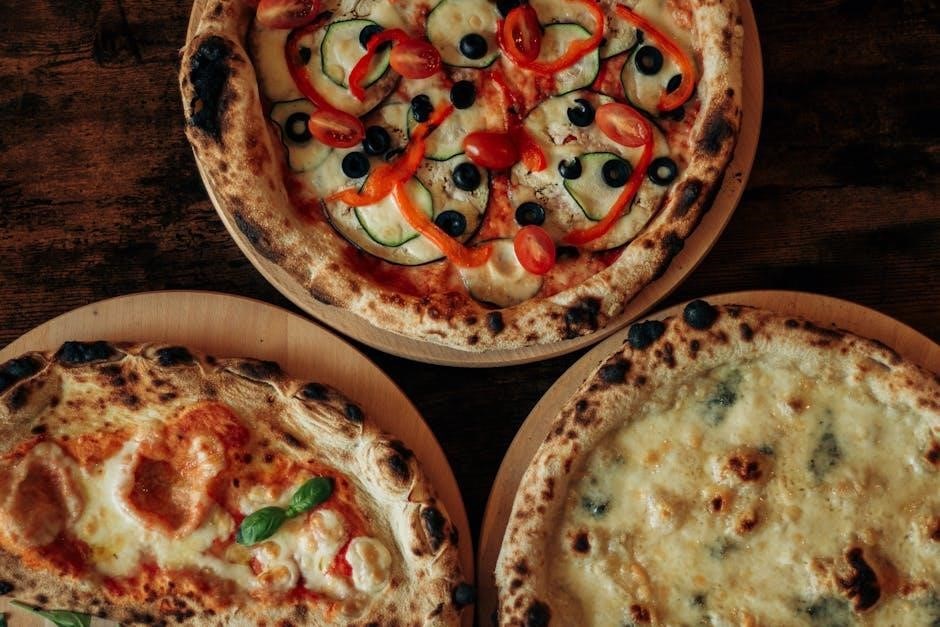
Red Baron Mini Pizzas boast a diverse range of flavors to satisfy every palate. Classic Pepperoni remains a perennial favorite, delivering a traditional pizza experience. For cheese lovers, the Four Cheese variety offers a rich and creamy indulgence. Those seeking a bolder taste can explore options like Supreme, loaded with pepperoni, sausage, vegetables, and more.
Beyond these staples, Red Baron frequently introduces limited-edition and seasonal flavors, keeping the selection fresh and exciting. Variations featuring different cheese blends, sauce types, or unique topping combinations are common. Understanding the specific ingredients in each type is helpful, as cooking times may slightly vary based on topping density and moisture content, ensuring a perfectly cooked mini pizza every time;
Nutritional Information for Red Baron Mini Pizzas
Understanding the nutritional content of Red Baron Mini Pizzas is essential for balanced eating. Each mini pizza typically contains around 220-280 calories, depending on the variety and toppings. Fat content ranges from 8-12 grams, with saturated fat contributing approximately 3-5 grams. Sodium levels are generally between 350-450mg per pizza, so moderation is key.
Protein content is around 8-10 grams, offering a small protein boost. Carbohydrates typically fall within the 25-35 gram range. It’s important to consult the specific packaging for precise nutritional details, as values can differ between flavors. This information allows for informed portion control and integration into a healthy diet alongside other food choices.
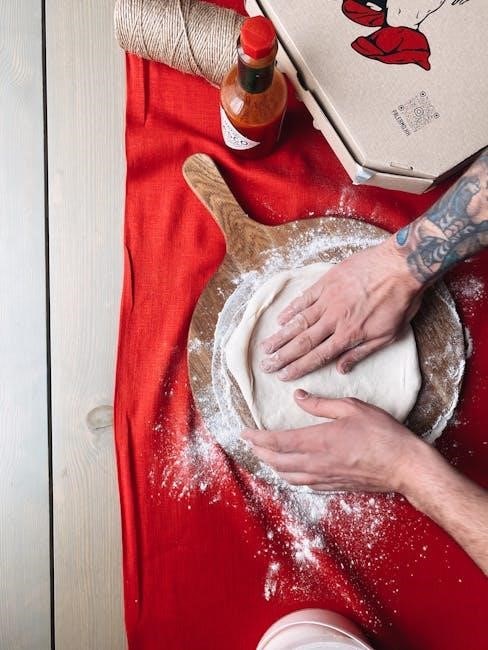
Preparing to Cook Your Red Baron Mini Pizza
Get ready for pizza perfection! Ensure a seamless cooking experience by gathering your supplies and prepping for optimal results with these simple steps.
Oven Temperature and Preheating
Achieving the ideal bake hinges on precise temperature control. For Red Baron Mini Pizzas, a conventional oven should be preheated to 375°F (190°C). Preheating is absolutely crucial; it ensures even cooking and a delightfully crispy crust. Allow approximately 10-15 minutes for your oven to reach the desired temperature. Do not attempt to cook the pizzas in a cold oven, as this will result in an undercooked and potentially soggy final product.
Using an oven thermometer is highly recommended to verify the accuracy of your oven’s temperature setting. Variations can occur, and a precise temperature guarantees consistent results. Remember, a properly preheated oven is the foundation for a truly satisfying Red Baron Mini Pizza experience!
Necessary Cooking Utensils
Preparing for pizza perfection requires minimal, yet essential, tools. You’ll need a baking sheet – a standard size will comfortably accommodate several Red Baron Mini Pizzas. Alternatively, a pizza stone can elevate the crust’s crispiness, though it’s not mandatory. Oven mitts are absolutely vital for safely handling the hot baking sheet or pizza stone. A pizza cutter or a sharp knife is needed for easy slicing and serving.
A spatula can be helpful for gently transferring the pizzas if needed. While not strictly required, parchment paper placed under the pizzas can prevent sticking and simplify cleanup. Ensure all utensils are clean and dry before use for optimal results and food safety.
Checking the Expiration Date
Prioritizing freshness is key to enjoying Red Baron Mini Pizzas at their best. Before you even preheat the oven, locate the “Best By” or expiration date printed on the pizza’s packaging. Consuming the pizza past this date doesn’t necessarily mean it’s unsafe, but the quality – particularly the texture and flavor – may diminish.
Look for any signs of damage to the packaging, such as tears or punctures, which could compromise the pizza’s freshness. A properly stored, unopened pizza within its expiration date should offer a delightful experience. Always err on the side of caution; if you’re unsure, it’s best to discard it.
Cooking Methods: Detailed Instructions
Unlock pizza perfection! We’ll explore three popular cooking methods – conventional oven, toaster oven, and air fryer – each offering unique results for your Red Baron Mini Pizzas.
Conventional Oven Cooking Instructions
Achieve classic oven-baked goodness! This method delivers a consistently cooked pizza with a delightfully crispy crust. Begin by preheating your oven to 375°F (190°C). Ensure the oven rack is positioned in the center for even heat distribution. Carefully remove the Red Baron Mini Pizza from its packaging and place it directly onto a baking sheet – no parchment paper is needed.
Bake for 12-15 minutes, or until the cheese is melted and bubbly, and the crust is golden brown. Cooking time may vary slightly depending on your oven’s calibration. For optimal results, rotate the baking sheet halfway through the cooking process to ensure uniform browning. Once cooked, carefully remove the pizza from the oven and let it cool for a minute or two before enjoying. This allows the cheese to set slightly, preventing messy bites!
Step-by-Step Oven Cooking Guide
Let’s bake the perfect mini pizza! Step 1: Preheat oven to 375°F (190°C). Step 2: Remove pizza from packaging. Step 3: Place pizza directly onto a baking sheet. Avoid using parchment paper for optimal crust crispness. Step 4: Bake for 12-15 minutes. Monitor closely, as ovens vary.
Step 5: Rotate the baking sheet halfway through for even cooking. This ensures consistent browning across the entire pizza. Step 6: Check for melted, bubbly cheese and a golden-brown crust. Step 7: Carefully remove from oven using oven mitts. Step 8: Let cool for 1-2 minutes before serving. Enjoy your perfectly baked Red Baron Mini Pizza!
Toaster Oven Cooking Instructions
Craving a quick mini pizza fix? The toaster oven is your friend! Step 1: Preheat toaster oven to 375°F (190°C). Ensure sufficient clearance above the pizza. Step 2: Place the mini pizza directly on the toaster oven rack or a small baking pan. Step 3: Bake for 8-12 minutes.
Step 4: Keep a close watch, as toaster ovens cook faster. Rotate halfway through for even heating. Step 5: Look for melted cheese and a golden-brown crust. Step 6: Carefully remove with tongs or oven mitts. Step 7: Let cool briefly before enjoying. Toaster ovens deliver a surprisingly crispy result for a speedy snack!
Optimizing Toaster Oven Results
Maximize your mini pizza perfection! For an extra crispy crust, lightly brush the rack with oil before placing the pizza. This prevents sticking and promotes even browning. If your toaster oven has a “bake” setting, use it; otherwise, a lower “toast” setting can work, extending cooking time slightly.
Monitoring is key: Toaster ovens vary, so check frequently after 8 minutes. If the cheese browns too quickly, lower the temperature slightly. A small piece of aluminum foil under the pizza can help catch any drips. Remember, smaller toaster ovens may require shorter cooking times. Enjoy a perfectly toasted Red Baron Mini Pizza!
Air Fryer Cooking Instructions
Achieve crispy perfection with air frying! Preheat your air fryer to 350°F (175°C) for optimal results. Place the Red Baron Mini Pizza directly on the air fryer basket – parchment paper isn’t usually needed, but can prevent sticking. Cook for approximately 6-8 minutes, checking halfway through.
For even cooking: Gently shake the basket halfway to ensure uniform browning. Air fryers cook quickly, so watch closely to prevent burning. The crust should be golden brown and the cheese melted and bubbly. Enjoy a quick and delightfully crispy Red Baron Mini Pizza, perfectly cooked in minutes!
Achieving Crispy Crust in an Air Fryer
Maximize crispiness with these tips! Ensure the air fryer basket isn’t overcrowded; cook pizzas in batches for best results. A slightly preheated air fryer (350°F/175°C) is crucial for a quick, even cook. Avoid using oil sprays, as they can sometimes affect the air fryer’s non-stick coating.
For extra crunch: During the last minute of cooking, increase the temperature to 375°F (190°C) – monitor closely to prevent burning. Shaking the basket halfway through ensures all sides get exposed to the hot air, promoting even crisping. Enjoy a delightfully crunchy Red Baron Mini Pizza, thanks to the power of air frying!
Troubleshooting Common Cooking Issues
Don’t despair! This section addresses frequent problems like undercooked or burnt pizzas, and toppings slipping, offering quick fixes for pizza perfection.
Pizza is Undercooked
Identifying an Undercooked Pizza: If your Red Baron Mini Pizza emerges from the oven with a pale crust and cheese that hasn’t fully melted and bubbled, it’s likely undercooked. The center may appear doughy, and the overall texture will be soft rather than crispy.

Solutions: First, ensure your oven reached the correct preheated temperature. If it didn’t, increase the cooking time by 2-3 minutes. If the oven temperature was accurate, simply return the pizza to the oven for additional cooking. Place it directly on the oven rack or baking sheet. Check it every minute to prevent overcooking. For smaller mini pizzas, a slightly longer cook time is often necessary to ensure thorough heating. Consider slightly raising the oven rack for more direct heat.
Prevention: Avoid overcrowding the oven, as this can lower the temperature and hinder even cooking.
Pizza is Overcooked/Burnt
Recognizing an Overcooked Pizza: An overcooked Red Baron Mini Pizza will exhibit a dark, hard crust, potentially with burnt edges. The cheese may appear browned and brittle, and the toppings could be dried out or even scorched. A burnt smell is a clear indicator of overcooking.
Remedial Actions: Unfortunately, a severely burnt pizza is often beyond saving. However, if only the edges are slightly burnt, carefully trim those portions away with a pizza cutter or knife. If the entire pizza is just overcooked but not burnt, you might try adding a tiny sprinkle of water to rehydrate it slightly, but results will vary.
Preventative Measures: Closely monitor the pizza during the final minutes of cooking. Reduce the oven temperature slightly if you notice it browning too quickly. Avoid leaving the pizza unattended, especially in toaster ovens or air fryers.
Toppings are Sliding Off
Identifying the Issue: If your Red Baron Mini Pizza’s toppings are sliding off during cooking, it usually indicates insufficient adhesion. This can happen if the pizza wasn’t frozen properly initially, or if there’s excessive moisture beneath the toppings. A greasy pizza base can also contribute to this problem;
Corrective Steps: Carefully reposition the toppings while the pizza is still hot, gently pressing them back into the cheese. If the issue is severe, consider placing the pizza back in the oven for a minute or two to help the cheese re-melt and secure the toppings.
Preventative Strategies: Ensure the pizza remains frozen until cooking. Avoid adding extra oily toppings. Placing parchment paper under the pizza can help absorb excess moisture and provide better grip.
Enhancing Your Red Baron Mini Pizza Experience
Elevate your pizza night! Explore creative additions like extra cheese, fresh herbs, or flavorful dipping sauces for a truly customized and satisfying meal.
Adding Extra Toppings
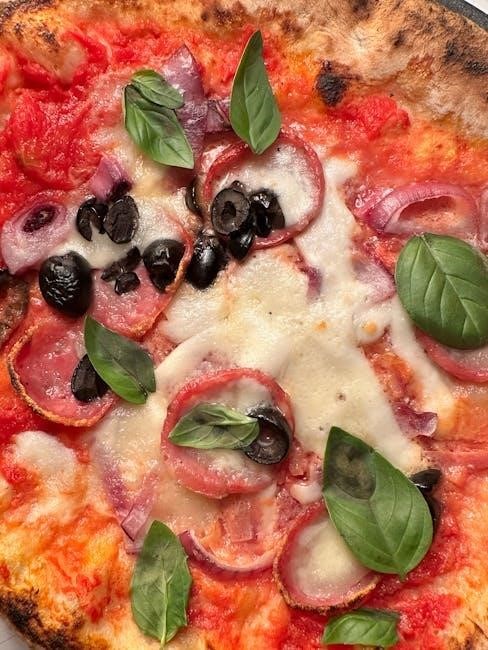
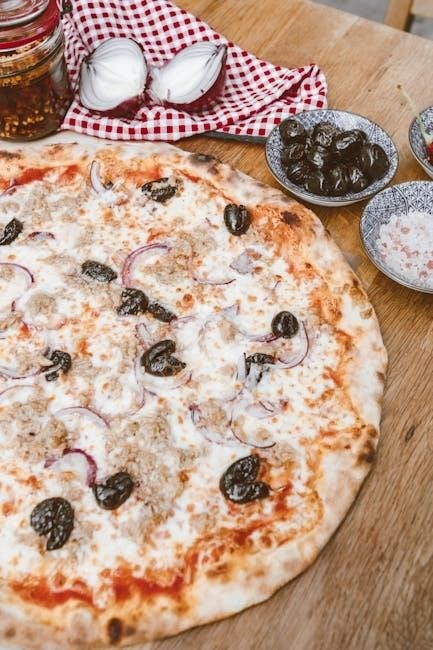
Unleash your inner chef! Red Baron Mini Pizzas are a fantastic base for culinary creativity. Feel free to personalize your pizza with a variety of delicious toppings before cooking. Consider adding a sprinkle of your favorite shredded cheese – mozzarella, cheddar, or a blend – for an extra gooey experience.
For a burst of flavor, incorporate thinly sliced pepperoni, cooked sausage crumbles, or diced ham. Fresh vegetables like sliced mushrooms, bell peppers, or onions can also elevate the taste. A scattering of black olives or a pinch of red pepper flakes adds a delightful kick. Remember to avoid overloading the pizza, as this can lead to uneven cooking and soggy results. A light touch ensures a perfectly balanced and flavorful mini pizza!
Dipping Sauces Recommendations
Elevate your pizza experience! While Red Baron Mini Pizzas are delicious on their own, a complementary dipping sauce can take them to the next level. For a classic pairing, try marinara sauce – its tangy sweetness perfectly complements the pizza’s flavors. Ranch dressing is another popular choice, offering a creamy and herbaceous counterpoint.
If you prefer a spicier kick, consider a sriracha mayo or a garlic aioli. For a Mediterranean twist, hummus provides a creamy and flavorful dip. Don’t underestimate the simplicity of a good quality olive oil with a sprinkle of Italian herbs. Experiment with different sauces to discover your perfect match! A small bowl of your chosen sauce alongside your mini pizza creates a truly satisfying snack.
Serving Suggestions & Side Dishes
Complete your meal! Red Baron Mini Pizzas are fantastic as a quick snack, lunch, or part of a larger spread. For a light meal, pair them with a fresh garden salad – the crisp greens and vibrant vegetables offer a delightful contrast to the pizza’s richness. A side of steamed or roasted vegetables, like broccoli or carrots, adds a healthy boost.
For a more substantial meal, consider serving them alongside chicken tenders or mozzarella sticks. A simple fruit salad provides a sweet and refreshing finish. Don’t forget a cool beverage! Soda, iced tea, or even a sparkling water with a slice of lemon are excellent choices. Creating a fun pizza night with friends and family is always a great idea!
Safety Precautions When Cooking
Prioritize safety! Always use oven mitts when handling hot pizzas and cookware. Supervise children closely, and ensure proper ventilation during cooking for a safe experience.
Oven Safety Guidelines
Maintaining a safe oven environment is paramount. Before preheating, ensure the oven rack is securely positioned. Always use oven mitts or pot holders when inserting or removing the Red Baron Mini Pizzas, as surfaces become extremely hot.
Never leave a preheating or operating oven unattended; Keep flammable materials, such as dish towels and paper products, well clear of the oven’s vicinity. Regularly inspect the oven door seal for damage, as a compromised seal can lead to heat loss and potential safety hazards.
If you detect any unusual smells or smoke emanating from the oven, immediately turn it off and unplug it; Avoid using abrasive cleaners on the oven’s interior, as they can damage the surface. Finally, allow the oven to cool completely before attempting any cleaning or maintenance.
Handling Hot Pizzas
Exercise extreme caution when handling freshly baked Red Baron Mini Pizzas! The pizza and its baking sheet will be intensely hot immediately after removal from the oven, posing a burn risk. Always utilize oven mitts or heat-resistant gloves to protect your hands.
Carefully lift the pizza using the baking sheet or a pizza cutter, avoiding direct contact with the hot surface. Place the cooked pizza on a heat-safe cutting board or surface to prevent damage to countertops. Allow the pizza to cool slightly before cutting and serving, minimizing the risk of burns to your mouth.
Supervise children closely when hot pizza is present. Remind everyone to exercise caution and avoid touching the hot pizza or baking sheet. Proper handling ensures a safe and enjoyable pizza experience.
Storage of Leftover Pizza
Proper storage is key to enjoying leftover Red Baron Mini Pizza! Allow the pizza to cool completely before storing it to prevent condensation buildup, which can lead to a soggy crust. Once cooled, place individual slices in an airtight container or tightly wrap them in plastic wrap or aluminum foil.
Refrigerate leftover pizza promptly, ideally within two hours of cooking, to maintain freshness and prevent bacterial growth. Properly stored, leftover pizza can be safely enjoyed for up to 3-4 days. For longer storage, consider freezing – wrap slices individually and store in a freezer-safe bag for up to two months.
Reheat pizza in the oven or toaster oven for best results, restoring some of its original crispness.
Red Baron Pizza Company Information
Discover the story behind your favorite mini pizzas! Red Baron, a trusted name in frozen pizza, consistently delivers quality and convenience to households nationwide.
Company History and Background
Red Baron’s journey began in 1977, born from the innovation of Donatos Pizzeria, a family-owned business in Columbus, Ohio. Initially, the Red Baron line focused on larger, traditional pizzas, quickly gaining popularity for its commitment to quality ingredients and a satisfying taste. Recognizing a growing demand for convenient, smaller portions, the Red Baron Mini Pizza was introduced, becoming a beloved snack and meal option for individuals and families.
Over the decades, Red Baron has remained dedicated to evolving with consumer preferences, continually refining its recipes and expanding its product offerings. The brand is now owned by Schwan’s Company, a leading food manufacturer, allowing for broader distribution and continued investment in innovation. Red Baron’s enduring success stems from its consistent focus on delivering a delicious, affordable, and easy-to-prepare pizza experience.
Other Red Baron Pizza Products
Beyond the beloved Mini Pizza, Red Baron boasts a diverse portfolio catering to various pizza preferences. The Classic Red Baron pizzas are available in numerous sizes and crust styles, including Original, Thin & Crispy, and Pan Crust, offering a traditional pizza experience. For those seeking bolder flavors, Red Baron offers Specialty Pizzas featuring premium toppings like pepperoni, sausage, and supreme vegetable combinations.
Red Baron also provides convenient options like the Big Daddy Pizza, designed for larger gatherings, and frozen pizza rolls for quick snacking. Recently, the brand has expanded into stuffed crust varieties, adding an extra layer of cheesy goodness. Red Baron consistently strives to provide quality and variety, ensuring there’s a pizza option for every craving and occasion, complementing their popular mini pizzas.
Contacting Red Baron Customer Support
Need assistance with your Red Baron Mini Pizzas? Nestlé, the parent company of Red Baron, offers several avenues for customer support. You can reach them through their consumer engagement portal on the Nestlé website, typically featuring FAQs and a contact form for specific inquiries. For immediate assistance, a dedicated phone line is available during business hours, allowing direct communication with a customer service representative.
Social media channels, like Facebook and Twitter, also provide a platform for reaching out with questions or concerns. When contacting support, having the product’s UPC code and purchase date readily available can expedite the process. Red Baron values customer feedback and aims to resolve issues efficiently, ensuring a positive pizza experience for everyone.