stretches for si joint pain pdf

PDF

stretches for si joint pain pdf

Understanding SI Joint Pain & Effective Stretches

Sacroiliac (SI) joint pain relief often involves targeted stretches, readily available in PDF guides. These exercises aim to restore mobility and reduce discomfort.

Common stretches include knee-to-chest poses, piriformis stretches, and hamstring lengthening. Proper form, as detailed in downloadable resources, is crucial for effectiveness.

PDFs frequently emphasize warm-up exercises before stretching, alongside guidance on frequency and listening to your body’s signals for optimal results.

What is the Sacroiliac (SI) Joint?

The sacroiliac (SI) joint is a crucial connector, linking the sacrum – the triangular bone at the base of your spine – to the iliac bones of your pelvis. Unlike many joints, it possesses limited motion, primarily functioning to transfer forces from your upper body to your lower limbs and vice versa. This stability is vital for walking, standing, and maintaining overall balance.

However, this joint can become a source of significant pain when dysfunction occurs. SI joint pain isn’t always straightforward to diagnose, as it can mimic other conditions like lower back pain or sciatica. Understanding its anatomy and function is the first step towards effective management, often involving targeted stretches detailed in resources like downloadable PDFs.

These PDFs often highlight the joint’s role in shock absorption and weight distribution. The SI joint is reinforced by strong ligaments, but these can become strained or inflamed, leading to pain. Proper stretching, as outlined in these guides, aims to restore optimal movement and reduce irritation within the joint.

Causes of SI Joint Dysfunction

Several factors can contribute to SI joint dysfunction, leading to pain and discomfort. These range from traumatic injuries, such as falls or car accidents, to repetitive stress and biomechanical imbalances. Pregnancy is a common cause, as hormonal changes loosen ligaments, increasing joint instability.

Leg length discrepancies, scoliosis, and arthritis can also place undue stress on the SI joint. Even seemingly minor postural issues can contribute over time. Many individuals find relief through specific stretches, often detailed in readily available PDF guides focusing on SI joint pain.

These PDFs frequently emphasize that identifying the root cause is key, but stretching can address the symptoms. Hypermobility or hypomobility of the joint – too much or too little movement – are both potential issues. Targeted exercises, as illustrated in these resources, aim to restore proper joint mechanics and alleviate pain, promoting stability and function.

Symptoms of SI Joint Pain

SI joint pain often manifests as a dull, aching discomfort in the lower back and buttocks, potentially radiating down the legs – mimicking sciatica; Pain can be localized to one side of the lower back, but sometimes presents bilaterally. It’s frequently aggravated by prolonged sitting, standing, or walking, and can worsen with activities like climbing stairs.

Individuals may experience stiffness in the lower back and hips, making it difficult to bend or twist. Some report a feeling of instability in the pelvis. Many find detailed guidance on alleviating these symptoms within PDF resources dedicated to stretches for SI joint pain.

These PDFs often highlight that symptoms can fluctuate, with periods of intense pain followed by relative calm. Accurate diagnosis is crucial, as SI joint pain can be mistaken for other conditions. Stretches, when performed correctly as demonstrated in these guides, can help manage pain and improve function.

Stretches for SI Joint Pain Relief

PDF guides detail stretches like knee-to-chest and piriformis exercises, crucial for SI joint pain. These targeted movements aim to restore pelvic alignment and reduce discomfort.

Warm-up Exercises Before Stretching

Prior to initiating SI joint stretches, a thorough warm-up is paramount. Many “stretches for SI joint pain PDF” resources emphasize this crucial step, as it prepares the muscles and joints for more intensive movements, minimizing the risk of injury.

Effective warm-up exercises include gentle pelvic tilts – slowly rocking the pelvis forward and backward – to increase awareness and mobility in the SI joint region. Gluteal squeezes, contracting the buttock muscles, also help activate supporting muscles.

Light cardio, such as walking in place or marching, for 5-10 minutes can elevate heart rate and improve blood flow to the lower back and hips. Dynamic stretches, like leg swings (forward, backward, and sideways), further enhance flexibility.

These preparatory exercises should be performed slowly and controlled, focusing on gentle movements rather than forceful stretching. A proper warm-up ensures muscles are pliable and receptive to the benefits of the subsequent stretches detailed in SI joint pain PDF guides.

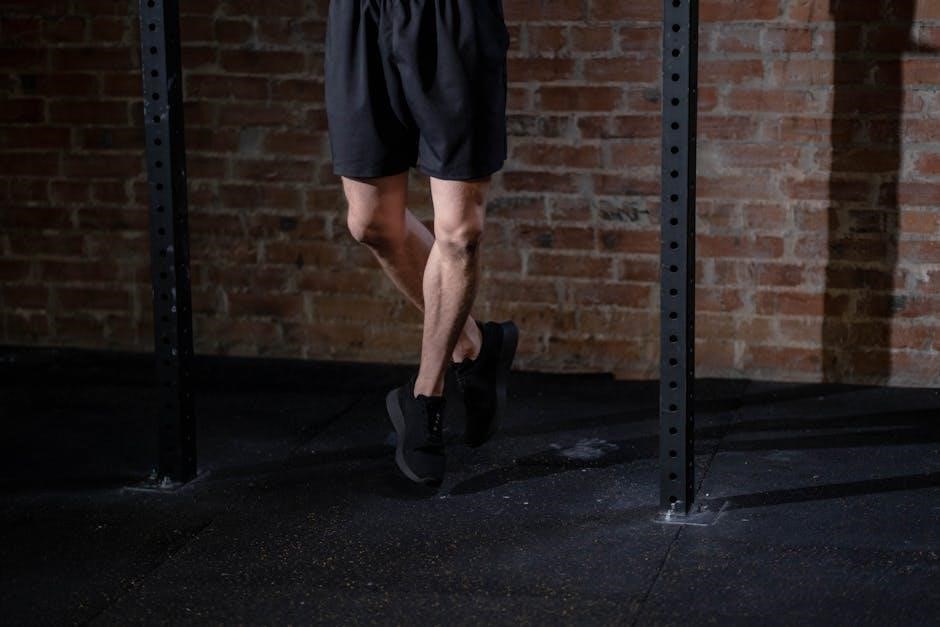
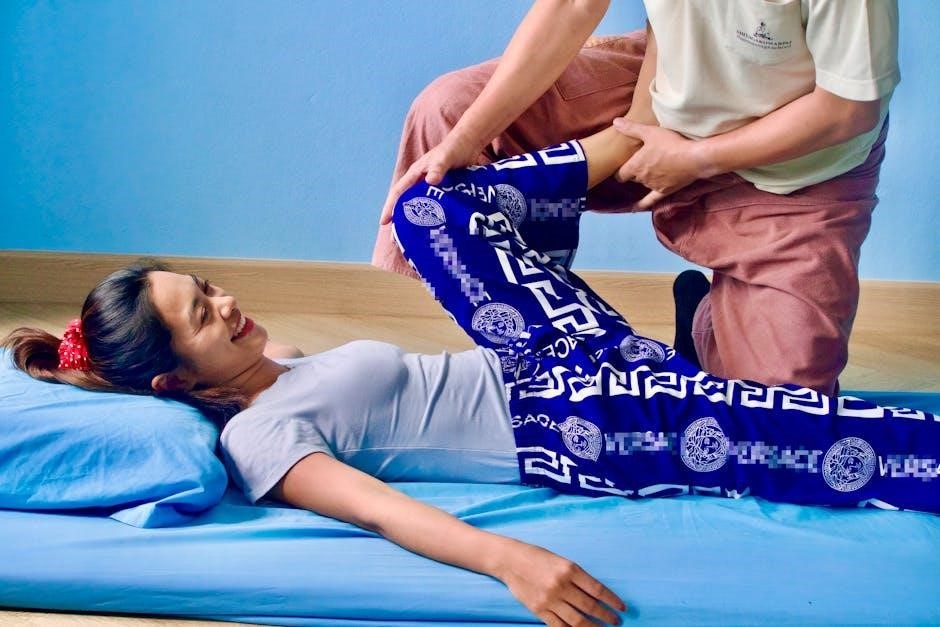
Knee-to-Chest Stretch

The knee-to-chest stretch is a foundational exercise frequently detailed in “stretches for SI joint pain PDF” guides, renowned for its gentle effectiveness in relieving lower back and SI joint discomfort. This stretch targets the glutes, hamstrings, and lower back muscles, promoting relaxation and improved flexibility.

To perform the stretch, lie flat on your back with knees bent and feet flat on the floor. Gently pull one knee towards your chest, clasping your hands behind your thigh or over your shin. Hold the stretch for 20-30 seconds, breathing deeply.

Repeat on the other side. For a deeper stretch, you can simultaneously pull both knees to your chest. PDF resources often advise maintaining a neutral spine, avoiding excessive rounding of the back.

This stretch helps decompress the SI joint and alleviate muscle tension, contributing to pain reduction. It’s a simple yet powerful tool for managing SI joint dysfunction, as consistently highlighted in relevant PDF materials.

Piriformis Stretch (Seated & Supine)

“Stretches for SI joint pain PDF” resources consistently emphasize the piriformis stretch, recognizing its crucial role in addressing SI joint dysfunction. The piriformis muscle, located deep in the buttock, can compress the sciatic nerve when tight, contributing to lower back and leg pain. Two variations – seated and supine – are commonly illustrated.

For the seated piriformis stretch, sit with your back straight and cross one ankle over the opposite knee. Gently lean forward, keeping your back straight, until you feel a stretch in your buttock. Hold for 20-30 seconds.

The supine version involves lying on your back with knees bent. Cross one ankle over the opposite knee, then gently pull the uncrossed thigh towards your chest.

PDF guides often advise avoiding bouncing and focusing on a slow, controlled stretch. Both variations effectively target the piriformis, relieving pressure on the sciatic nerve and easing SI joint discomfort, making them staples in SI joint pain management programs.

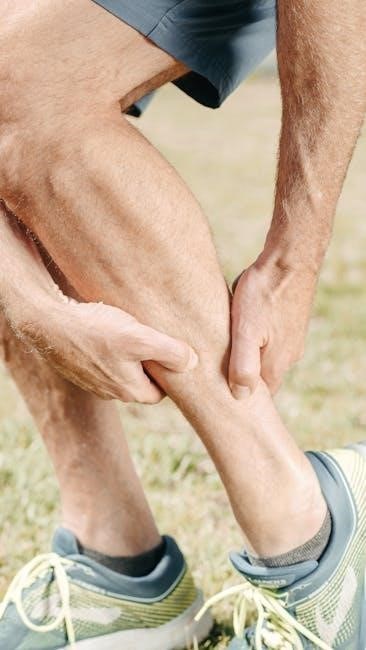
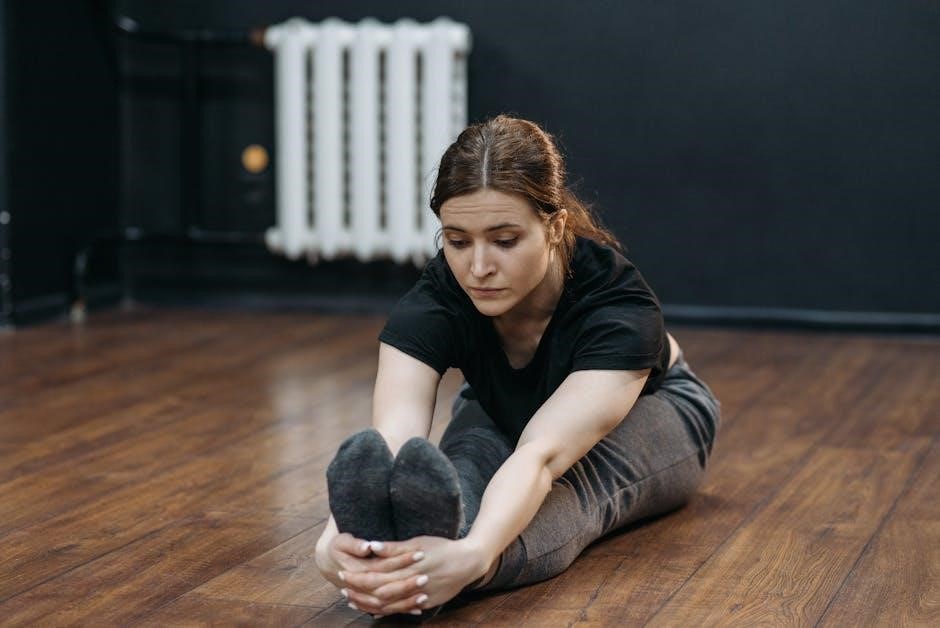
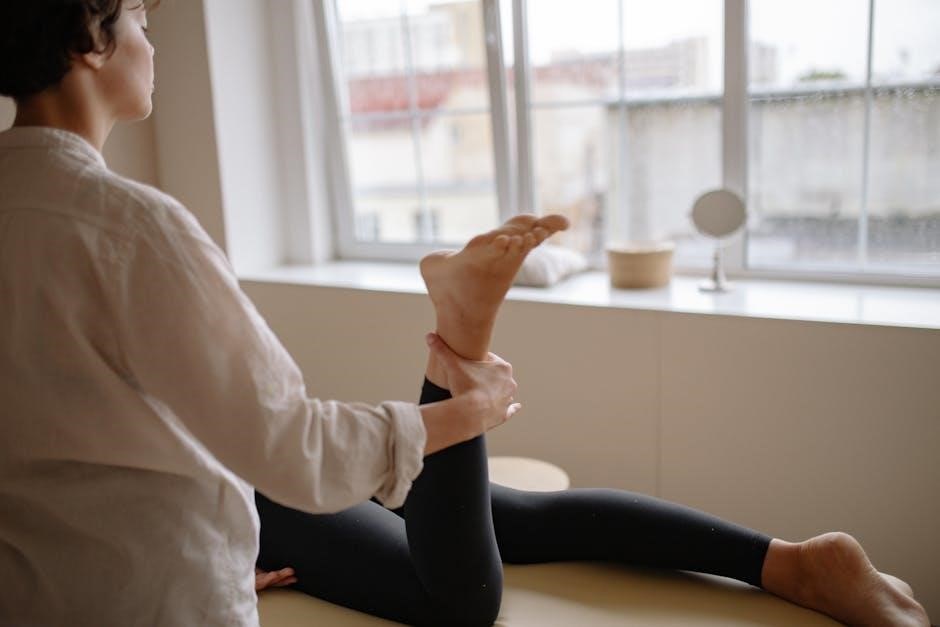
Hamstring Stretches (Standing & Lying)

“Stretches for SI joint pain PDF” guides frequently include hamstring stretches, acknowledging the connection between hamstring tightness and SI joint dysfunction. Tight hamstrings can pull on the pelvis, increasing stress on the SI joint and exacerbating pain. Both standing and lying variations are commonly detailed.

The standing hamstring stretch involves placing one leg straight out in front of you, keeping it slightly bent to avoid locking the knee. Hinge at the hips, keeping your back straight, until you feel a stretch in the back of your thigh. Hold for 20-30 seconds.

For the lying hamstring stretch, lie on your back and loop a towel or strap around one foot. Gently pull the leg straight up, keeping the knee slightly bent, until you feel a stretch.

PDFs emphasize maintaining a neutral spine and avoiding rounding the back during these stretches. Regularly performing these stretches can improve flexibility, reduce pelvic tilt, and alleviate SI joint pain.

Hip Flexor Stretch

“Stretches for SI joint pain PDF” resources consistently highlight the importance of hip flexor stretches, as tight hip flexors can contribute to anterior pelvic tilt, placing strain on the sacroiliac joint. Releasing tension in these muscles can help restore proper pelvic alignment and reduce discomfort.

A common hip flexor stretch is the kneeling lunge stretch. Kneel on one knee, with the other foot flat on the floor in front of you, forming a 90-degree angle. Gently lean forward, keeping your back straight, until you feel a stretch in the front of your hip.

PDF guides often advise against overextending and emphasize maintaining a neutral spine throughout the stretch. Another variation involves performing the stretch standing, gently pulling the knee towards your chest.

Regularly incorporating hip flexor stretches into your routine, as detailed in these PDFs, can improve flexibility, correct postural imbalances, and contribute to long-term SI joint pain relief.

Glute Bridge Exercise

“Stretches for SI joint pain PDF” materials frequently recommend the glute bridge exercise, not strictly a stretch, but a strengthening exercise crucial for SI joint stability. Weak gluteal muscles can contribute to instability and pain in the sacroiliac joint, making this exercise a vital component of a rehabilitation program.

To perform a glute bridge, lie on your back with knees bent and feet flat on the floor. Engage your core and glutes, then lift your hips off the floor, creating a straight line from your shoulders to your knees.

PDF guides emphasize squeezing the glutes at the top of the movement and maintaining a controlled descent. Variations include adding a resistance band around the knees or performing single-leg glute bridges for increased challenge.

Consistent glute bridge practice, as outlined in these resources, strengthens the muscles supporting the SI joint, improving stability and reducing pain over time.

Advanced Stretching Techniques

“Stretches for SI joint pain PDF” resources often include pelvic tilts, cat-cow, and child’s pose. These techniques enhance mobility and stability, requiring careful execution.

Spinal twists are also featured, but modifications are key to avoid aggravating the SI joint.

Pelvic Tilts

Pelvic tilts are a foundational exercise frequently detailed in “stretches for SI joint pain PDF” guides. This gentle movement improves awareness and control of the pelvic region, crucial for SI joint stability. To perform a pelvic tilt, lie on your back with knees bent and feet flat on the floor.

Engage your abdominal muscles and gently flatten your lower back against the floor, tilting your pelvis upward. Hold for a few seconds, then relax and allow a small natural arch to return to your lower back.

Repeat this motion slowly and controlled, focusing on isolating the pelvic movement. Many PDFs recommend 10-15 repetitions, performed 2-3 times daily.

Proper form is paramount; avoid using your glutes or straining your back. Pelvic tilts help restore neutral pelvic alignment, reducing stress on the SI joint and alleviating pain. They are often recommended as a starting point before progressing to more complex stretches.

Consistent practice can significantly improve core stability and overall SI joint function, as outlined in comprehensive PDF resources.

Cat-Cow Stretch

The Cat-Cow stretch, a cornerstone of many “stretches for SI joint pain PDF” resources, promotes spinal mobility and gently mobilizes the SI joints. Begin on your hands and knees, ensuring your hands are shoulder-width apart and knees are hip-width apart. Maintain a neutral spine.

For the “Cat” pose, exhale and round your spine towards the ceiling, tucking your chin to your chest and drawing your abdominal muscles inward. Imagine pulling your belly button towards your spine.

Then, transition to the “Cow” pose by inhaling and arching your back, dropping your belly towards the floor, and lifting your chest and tailbone towards the ceiling.

Continue alternating between these two poses slowly and rhythmically, coordinating your breath with each movement. PDFs often suggest 10-15 repetitions. This stretch improves flexibility and reduces stiffness in the lower back and SI joints.

Focus on smooth, controlled movements, avoiding any sharp or jerky motions. It’s a gentle yet effective way to enhance spinal health and alleviate SI joint discomfort.

Child’s Pose

Frequently featured in “stretches for SI joint pain PDF” guides, Child’s Pose offers a gentle stretch for the lower back, hips, and thighs, promoting relaxation and relieving tension around the SI joints. Begin on your hands and knees, then sit back on your heels, keeping your knees hip-width apart or wider if more comfortable.

Fold forward, resting your torso between your thighs, and extend your arms forward, palms facing down. Alternatively, you can rest your arms alongside your body, palms facing up.

Allow your forehead to rest on the floor, or use a block or pillow for support if needed. Breathe deeply and relax into the stretch, feeling a gentle lengthening in your lower back.

Hold the pose for 30 seconds to several minutes, focusing on releasing tension in your lower back and hips; PDFs often recommend variations, such as extended Child’s Pose with arms reaching forward.

This restorative pose is excellent for calming the nervous system and providing relief from SI joint pain, making it a valuable addition to any stretching routine.

Spinal Twists (Seated & Supine)

“Stretches for SI joint pain PDF” resources commonly include spinal twists, both seated and supine, to improve spinal mobility and alleviate SI joint discomfort. Seated twists involve sitting with legs extended, bending one knee and crossing it over the other, then twisting your torso towards the bent knee, using your opposite arm for leverage.

Supine twists are performed lying on your back with knees bent, gently dropping both knees to one side while keeping your shoulders flat on the floor. These twists gently mobilize the spine, promoting better alignment and reducing stiffness.

PDF guides emphasize performing these twists gently, avoiding any forceful movements that could aggravate the SI joint. Focus on maintaining a neutral spine and breathing deeply throughout the stretch.

Hold each twist for 20-30 seconds, repeating 2-3 times on each side. Modifications, like using a pillow under your knees, are often suggested for comfort.

Spinal twists can help release tension in the lower back and hips, contributing to overall SI joint pain relief and improved flexibility.

Stretches to Avoid with SI Joint Pain

“Stretches for SI joint pain PDF” guides advise against deep backbends and high-impact exercises. Aggressive twisting motions can also exacerbate pain; prioritize gentle movements instead.

Deep Back Bends

Many “stretches for SI joint pain PDF” resources strongly caution against deep back bends. These movements, such as full wheel pose or extensive backward arching, place significant stress directly on the sacroiliac joints. This increased pressure can inflame the joint and surrounding ligaments, intensifying existing pain or even triggering new episodes of dysfunction.

The instability inherent in deep backbends challenges the SI joint’s primary function – providing a stable connection between the spine and pelvis. Individuals with SI joint issues often experience hypermobility or instability, making them particularly vulnerable to aggravation from these stretches.

Instead of deep backbends, PDFs recommend gentler spinal mobility exercises. Cat-cow stretches, performed with controlled movements and a limited range of motion, can promote flexibility without overstressing the SI joint. Focus on maintaining a neutral spine and avoiding any forceful extension. Prioritizing controlled, smaller movements is key to safe and effective stretching.

High-Impact Exercises

“Stretches for SI joint pain PDF” guides consistently advise against high-impact exercises. Activities like running, jumping, and plyometrics transmit significant force through the body, directly impacting the sacroiliac joints. This jarring motion can exacerbate inflammation and instability, worsening pain and hindering the healing process.

The SI joint’s role in shock absorption is compromised when already dysfunctional. High-impact movements overwhelm its capacity to effectively distribute force, leading to increased stress and potential damage. Individuals experiencing SI joint pain often benefit from low-impact alternatives.

PDF resources suggest substituting high-impact activities with options like swimming, walking, or cycling. These exercises provide cardiovascular benefits without placing excessive strain on the SI joint. Gradual progression and proper form are crucial when reintroducing activity. Prioritizing controlled movements and listening to your body’s signals is paramount for safe rehabilitation.

Twisting Movements (Aggressive)

“Stretches for SI joint pain PDF” materials universally caution against aggressive twisting motions. Rapid or forceful rotations of the torso place undue stress on the sacroiliac joints, potentially aggravating existing dysfunction. These movements can disrupt the joint’s alignment and contribute to increased pain and inflammation.

The SI joint’s limited range of motion makes it particularly vulnerable to injury from excessive twisting. Unlike the spine, it’s not designed for significant rotational forces. Overstretching or forcing a twist beyond a comfortable range can strain ligaments and surrounding muscles.

PDF guides recommend modified twisting exercises with a focus on controlled movements and limited range. Gentle spinal twists, performed slowly and with awareness, may be beneficial for some individuals. However, avoiding quick, jerky, or deep twisting motions is crucial; Prioritizing stability and listening to your body’s feedback is essential for safe and effective rehabilitation.

Integrating Stretches into a Routine

“Stretches for SI joint pain PDF” guides suggest consistent, gentle integration. Frequency varies, but daily short sessions are often recommended. Listen to your body carefully!

Frequency and Duration

PDF resources detailing stretches for SI joint pain commonly advise a gradual approach to integration. Initially, performing these stretches 2-3 times daily for 10-15 minutes each session is often suggested. However, individual needs vary significantly, and it’s crucial to adjust based on your body’s response.

Consistency is key; short, frequent sessions are generally more beneficial than infrequent, lengthy ones. Avoid pushing yourself beyond a comfortable range of motion. A slight stretch should be felt, but never pain. As your flexibility improves and pain subsides, you can gradually increase the duration to 20-30 minutes or add additional repetitions.

“Stretches for SI joint pain PDF” guides often emphasize the importance of listening to your body. If a stretch exacerbates your pain, stop immediately and modify the exercise or consult with a healthcare professional. Remember, the goal is to alleviate discomfort, not to intensify it. Regularity, combined with mindful attention to your body’s signals, will yield the best results.

Listening to Your Body

“Stretches for SI joint pain PDF” guides consistently highlight the paramount importance of bodily awareness. Pain is a signal, and ignoring it can hinder recovery and potentially worsen your condition. A gentle stretching sensation is acceptable, but sharp, radiating, or increasing pain necessitates immediate cessation.

Each individual’s pain tolerance and joint mobility differ. What works for one person may not be suitable for another. Avoid comparing your progress to others and focus solely on your own experience. Modify stretches as needed to accommodate your limitations, reducing the range of motion or holding the pose for a shorter duration.

Pay attention to subtle cues beyond just pain – feelings of instability, clicking, or locking in the SI joint should also prompt you to stop. Rest when needed, and don’t push through discomfort. Prioritizing mindful movement and respecting your body’s boundaries is crucial for safe and effective pain management.

Combining Stretches with Other Therapies

“Stretches for SI joint pain PDF” resources often emphasize a holistic approach to treatment, advocating for combining stretching routines with other therapeutic interventions. Stretching alone may provide temporary relief, but addressing underlying muscle imbalances and joint dysfunction is key for long-term improvement.

Consider integrating stretches with physical therapy, which can provide personalized exercise programs and manual techniques to restore proper joint mechanics. Core strengthening exercises, frequently recommended alongside SI joint stretches, enhance stability and support the pelvis.

Other complementary therapies include massage, chiropractic care, and acupuncture. These modalities can help release muscle tension, improve circulation, and reduce inflammation. PDF guides may suggest incorporating heat or ice therapy before or after stretching to further alleviate pain and promote healing. A multi-faceted approach yields the best outcomes.

Additional Considerations

“Stretches for SI joint pain PDF” guides highlight core strength’s importance, alongside proper posture. Seek professional help if pain persists or worsens despite consistent stretching efforts.

Importance of Core Strength

Many “stretches for SI joint pain PDF” resources emphasize that a strong core is fundamental to SI joint stability. The core muscles – encompassing abdominals, back muscles, and pelvic floor – act as a natural brace, supporting the pelvis and reducing stress on the SI joints.

Weak core muscles can contribute to imbalances, leading to increased movement and strain in the SI joint, exacerbating pain. Strengthening these muscles helps control pelvic motion and maintain proper alignment during daily activities and exercise.

PDF guides often include core-strengthening exercises like planks, bird-dogs, and abdominal draws, alongside the stretches themselves. Integrating these exercises into a routine is crucial for long-term relief and prevention of recurrence. A holistic approach, combining stretching and core work, yields the most significant and lasting benefits for SI joint dysfunction.

Remember to engage your core throughout all stretches to maximize their effectiveness and protect your lower back.

Proper Posture and Body Mechanics

“Stretches for SI joint pain PDF” guides frequently highlight the critical role of posture and body mechanics in managing and preventing SI joint dysfunction. Maintaining neutral spinal alignment minimizes stress on the SI joints during everyday movements.

Poor posture – such as slouching or excessive arching of the back – can disrupt pelvic alignment, increasing strain on the SI joints and contributing to pain. Proper body mechanics involve using your muscles efficiently when lifting, bending, and twisting, avoiding excessive strain.

PDF resources often provide illustrations and instructions on correct lifting techniques, emphasizing bending at the knees and keeping your back straight. Awareness of posture throughout the day is key; setting reminders to check your alignment can be beneficial. Combining stretches with conscious postural correction and mindful movement patterns maximizes relief and promotes long-term joint health.

Consider ergonomic adjustments to your workspace to support good posture.

When to Seek Professional Help

While “stretches for SI joint pain PDF” resources offer valuable self-management tools, professional evaluation is crucial in certain situations. If pain is severe, unrelenting, or accompanied by neurological symptoms like numbness, tingling, or weakness in the legs, consult a healthcare provider immediately.

Stretches may not be sufficient if the SI joint dysfunction is caused by a significant injury, such as a fall or car accident. A physical therapist or chiropractor can accurately diagnose the underlying cause of your pain and develop a personalized treatment plan.

If self-treatment with stretches doesn’t provide noticeable improvement within a few weeks, or if your pain worsens, seek professional guidance. They can rule out other potential causes of back pain and determine if more advanced interventions, like injections or manual therapy, are necessary. Don’t hesitate to seek help – early intervention can prevent chronic pain.

singer 201 manual

Singer 201 Manual: A Comprehensive Guide

This guide details the iconic Singer 201 sewing machine, offering insights into its history, operation, maintenance, and resources for continued support and enjoyment․

The Singer 201, a cornerstone of sewing history, represents a pivotal moment in domestic technology․ Introduced during a period of burgeoning homecraft and industrial innovation, this machine quickly became a household name, celebrated for its robust construction and reliable performance․ It’s a testament to Singer’s legacy, established since 1851 with the first practical sewing machine․

This manual aims to provide a comprehensive understanding of the Singer 201, catering to both novice and experienced sewing enthusiasts․ Whether you’ve recently acquired a vintage model or are a long-time owner, this guide will unlock the full potential of this remarkable machine․ We’ll explore its unique features, delve into detailed setup instructions, and offer practical advice on maintenance and troubleshooting․

The Singer 201 isn’t merely a sewing machine; it’s a piece of history, embodying a tradition of quality and craftsmanship that continues to inspire today․

Historical Context of the Singer 201

The Singer 201 emerged during a transformative era, following Singer’s groundbreaking 1851 introduction of the first practical sewing machine․ This innovation revolutionized garment production, shifting it from laborious hand-sewing to efficient machine-based methods․ The 201, building upon this foundation, represented a further refinement of Singer’s engineering prowess, becoming widely known and trusted globally․

Its popularity coincided with the rise of home economics and the increasing accessibility of manufactured goods․ The machine empowered individuals to create and repair clothing independently, fostering self-sufficiency and creativity․ Singer’s 170+ years of experience were embodied in the 201’s design, prioritizing durability and ease of use․

Understanding this historical context illuminates the Singer 201’s significance – it wasn’t just a machine, but a symbol of progress and empowerment in a rapidly changing world․

Key Features and Specifications

The Singer 201 is celebrated for its robust, all-metal construction, ensuring longevity and reliable performance․ It’s a free-arm machine, facilitating easier sewing of cuffs, collars, and other cylindrical items․ The machine boasts a range of stitch options, including straight and zigzag stitches, offering versatility for various projects․

Key specifications include adjustable stitch length and width, allowing for customization based on fabric and desired aesthetic․ It utilizes a standard 15×1 needle system, making needles readily available․ The machine’s bobbin is top-loading for convenient threading․

Its simple, mechanical operation makes it ideal for both beginners and experienced sewers, offering a tactile and responsive sewing experience․ The Singer 201’s enduring appeal stems from its blend of functionality and durability․

Setting Up Your Singer 201

Proper setup is crucial for optimal performance․ This section guides you through threading, bobbin winding, and needle installation for seamless sewing experiences․

Threading the Machine

Correct threading is fundamental to successful sewing with your Singer 201․ Begin by ensuring the machine is turned off and the presser foot is raised․ Place the spool of thread on the spool pin, securing it with a spool cap․ Guide the thread through the first thread guide, typically located on the top of the machine․

Next, lead the thread down and around the tension discs – this is vital for proper stitch formation․ Continue threading through the take-up lever, ensuring it’s in its highest position․ From there, guide the thread through the wire guide and finally, thread it through the eye of the needle, from front to back․

A helpful tip: always pull a few inches of thread through the needle before beginning to sew․ Double-check that the thread is correctly seated in all guides and the tension discs for smooth operation․ Incorrect threading can lead to skipped stitches or thread breakage․

Winding the Bobbin

Properly winding the bobbin is crucial for consistent stitch quality on your Singer 201․ First, place an empty bobbin onto the bobbin winder spindle․ Attach the thread spool to the spool pin, securing it with a cap․ Guide the thread from the spool, through the thread guide, and then wrap it several times around the bobbin by hand․

Engage the bobbin winder by sliding it to the right․ Press the foot pedal gently to start the winding process․ The machine will automatically stop when the bobbin is full․ Important: Do not overfill the bobbin, as this can cause issues with tension․

Once full, disengage the bobbin winder and remove the bobbin․ Trim the thread end and insert the bobbin into the bobbin case, ensuring it rotates freely․ Consistent bobbin winding ensures even stitches and prevents thread nests․

Installing the Needle

Correct needle installation is vital for safe and effective sewing with your Singer 201․ Always ensure the machine is turned off before changing the needle․ Loosen the needle clamp screw using the screwdriver․ Insert the new needle, with the flat side facing the back of the machine․

Push the needle up as far as it will go, then tighten the needle clamp screw securely․ Important: Use the correct needle type and size for your fabric․ A universal needle is suitable for most fabrics, but specialized needles are needed for knits, denim, or leather;

A bent or damaged needle can cause skipped stitches, fabric damage, and even machine malfunction․ Regularly inspect your needle and replace it when necessary․ Proper installation prevents breakage and ensures smooth operation․

Basic Sewing Operations

Mastering fundamental techniques unlocks the Singer 201’s potential․ This section covers straight and zigzag stitching, alongside adjustments for stitch length and width․

Straight Stitching

The foundation of most sewing projects, the straight stitch on the Singer 201 is remarkably consistent and reliable․ Begin by ensuring your machine is correctly threaded and the bobbin is wound properly – refer to the dedicated sections for detailed instructions․ Select the straight stitch setting on your machine; typically, this is the default position․

Practice on scrap fabric first! Adjust the stitch length using the corresponding dial․ A shorter stitch length (around 2․5mm) is ideal for delicate fabrics or curves, providing greater control and preventing puckering․ A longer stitch length (around 3․0-3․5mm) is suitable for heavier fabrics or when speed is desired․

Gently guide the fabric under the presser foot, maintaining a consistent speed․ Avoid pulling or pushing the fabric, allowing the machine to feed it through․ Use the presser foot as a guide, keeping the edge of the fabric aligned with the desired seam allowance․ For a neat finish, backstitch at the beginning and end of each seam to secure the stitches․ Consistent practice will yield beautifully straight and even seams․

Zigzag Stitching

The Singer 201’s zigzag stitch offers versatility beyond simple seams, enabling decorative effects and reinforcing edges․ To engage this function, select the zigzag stitch setting on the machine․ The stitch width and length are independently adjustable using dedicated dials․ Begin with a medium width (around 2․0mm) and length (around 2․5mm) for general use, and experiment from there․

Zigzag stitching is excellent for finishing raw edges to prevent fraying, particularly on knit fabrics․ It’s also ideal for creating decorative embellishments, such as scallops or floral patterns․ Adjust the width to create wider or narrower zigzag lines․ A narrower zigzag is useful for applying trims or elastic․

Practice on scrap fabric to understand the effect of different width and length combinations․ Maintain a consistent fabric feed, similar to straight stitching․ Remember to backstitch at the beginning and end of each zigzag seam for secure finishing․ Explore creative possibilities with this adaptable stitch!

Adjusting Stitch Length and Width

Precise stitch control is key with the Singer 201․ Stitch length, governing the distance between stitches, is adjusted via a dedicated dial, typically marked with numerical values․ Lower numbers create shorter stitches – ideal for delicate fabrics or increased seam strength․ Higher numbers yield longer stitches, suitable for basting or heavier materials․

Stitch width, applicable to zigzag and decorative stitches, controls the breadth of the stitch․ A separate dial manages this parameter․ Wider settings produce broader stitches, useful for decorative effects or securing stretchy fabrics․ Narrower settings are effective for reinforcing edges or applying trims․

Always test adjustments on scrap fabric before sewing your project․ Observe how different settings impact fabric appearance and seam integrity․ Gradual adjustments are recommended for optimal results․ Remember that fabric type influences the ideal stitch length and width – experiment to find the perfect combination!

Advanced Techniques

Unlock the Singer 201’s full potential with buttonholes, zipper insertion, and free-motion sewing – expanding your creative capabilities and project possibilities․

Buttonhole Sewing

Creating buttonholes on the Singer 201 requires a bit of practice, but yields professional-looking results․ Begin by attaching the buttonhole foot, ensuring it clicks securely into place․ Select the buttonhole stitch setting on your machine – consult your manual for the correct dial position, as it varies slightly depending on the desired buttonhole size․

Place your fabric under the presser foot, aligning the starting point with the marked location for your buttonhole․ Gently lower the presser foot and begin sewing slowly and steadily․ The Singer 201 will automatically stitch the outline of the buttonhole․

Once the outline is complete, carefully lift the presser foot and rotate the fabric 90 degrees․ Lower the presser foot again and continue sewing to create the buttonhole bars․ Repeat this process for each bar, ensuring consistent spacing․ Finally, reinforce the ends of the buttonhole with a few backstitches․ Always test on a scrap fabric first to perfect your technique!

Zipper Insertion

Inserting a zipper with the Singer 201 involves a specialized zipper foot, crucial for sewing close to the zipper teeth․ Attach the foot, positioning the zipper face down against your fabric, with the zipper teeth aligned with the edge of the fabric․ Select a straight stitch and adjust the stitch length to a medium setting for optimal hold․

Begin sewing along one side of the zipper tape, staying consistently close to the teeth․ Backstitch at the beginning and end to secure the seam․ Repeat this process on the other side of the zipper tape, ensuring both sides are evenly stitched․

For an invisible zipper, utilize the invisible zipper foot and follow the specific instructions in your manual․ Carefully guide the fabric, keeping the zipper coils hidden within the seam allowance․ Practice on scrap fabric to master the technique before working on your final project․ A steady hand is key for a professional finish!

Free Motion Sewing

Unleash your creativity with free motion sewing on the Singer 201! This technique requires disengaging the feed dogs – typically done via a lever at the back of the machine – allowing you to move the fabric freely under the needle․ Attach a darning foot, designed for unrestricted movement․

Lower the presser foot and set the stitch length to zero․ Begin by slowly turning the handwheel, guiding the fabric with both hands to create desired designs․ Practice consistent speed and pressure for smooth lines․ Experiment with different threads and fabrics to achieve unique textures․

Free motion is ideal for quilting, embroidery, and decorative stitching․ It takes practice to coordinate fabric movement with the needle, but the results are incredibly rewarding․ Remember to raise the presser foot when stopping to reposition the fabric, preventing unwanted stitches!

Maintenance and Troubleshooting

Regular cleaning and oiling ensure optimal performance․ Address common issues like thread breakage or skipped stitches with our guide for a lasting Singer 201․

Cleaning and Oiling

Maintaining your Singer 201 through regular cleaning and oiling is crucial for its longevity and smooth operation․ Dust, lint, and old oil can accumulate within the machine, hindering its performance and potentially causing damage․ Begin by disconnecting the power source․ Use a soft brush, like a paintbrush, to gently remove lint from the bobbin area, feed dogs, and around the needle plate․

For more stubborn debris, a lint roller can be helpful․ Avoid using compressed air, as it can push dust further into the machine․ After cleaning, apply a few drops of Singer oil to the designated oiling points – typically indicated in your machine’s diagram․ These points usually include the bobbin race, shuttle hook, and any moving parts․

Wipe away any excess oil with a clean cloth․ Avoid over-oiling, as this can attract more dust․ A well-maintained Singer 201 will provide years of reliable service with consistent care․

Common Problems and Solutions

Even with diligent care, your Singer 201 may encounter occasional issues․ A common problem is thread bunching, often caused by improper threading or incorrect tension․ Re-thread the machine carefully, ensuring the thread is seated correctly in all guides and the tension dial is appropriately adjusted for your fabric․

Skipped stitches can indicate a dull or incorrectly inserted needle․ Replace the needle with a new one of the correct type and size, and verify it’s firmly secured․ If the machine is making excessive noise, it may require oiling (see the Cleaning and Oiling section)․

Fabric feeding issues often stem from a clogged bobbin area or incorrect presser foot pressure․ Clean the bobbin case thoroughly and adjust the presser foot pressure as needed․ If problems persist, consult the full manual or seek assistance from a qualified sewing machine technician․

Finding Replacement Parts

Maintaining a Singer 201 often requires sourcing replacement parts over time․ Fortunately, many options exist for keeping your machine running smoothly․ The Singer Official Website is a primary source, offering a selection of genuine parts, though availability for vintage models like the 201 can vary․

Online marketplaces, such as eBay and Etsy, are excellent resources for finding original Singer 201 parts, often sold by dedicated collectors and repair specialists․ Specialized sewing machine parts retailers also carry a range of components, including needles, bobbins, belts, and more․

When ordering parts, always verify compatibility with your specific Singer 201 model number․ Providing the machine’s serial number can help ensure you receive the correct replacement․ Consider joining online forums and communities (see Resources and Support) for advice on locating hard-to-find parts․

Resources and Support

Numerous online platforms and the official Singer website provide valuable assistance, manuals, and community forums for Singer 201 owners seeking guidance․

Singer Official Website

The Singer Official Website (www․singer․com) serves as a primary hub for all things Singer, including comprehensive resources specifically for vintage machines like the 201․ Here, you can often find digitized versions of original manuals, though availability can vary․ Beyond manuals, the website offers frequently asked questions (FAQs) addressing common issues, troubleshooting tips, and parts diagrams to aid in repairs․

A dedicated section focuses on machine support, allowing users to search for information based on model number․ While the 201 is an older model, Singer frequently maintains a database of parts and accessories that may still be available for purchase․ The website also features a contact form for direct assistance from Singer’s customer support team, though response times may differ․ Furthermore, Singer’s official site often showcases helpful sewing tutorials and project ideas, enhancing your overall sewing experience with your classic Singer 201․

Online Forums and Communities

Numerous online forums and communities are dedicated to vintage sewing machines, particularly the Singer 201, offering a wealth of knowledge from experienced users and collectors․ Websites like SewingOnline and Vintage Sewing Machine Forums host active discussions where you can ask questions, share tips, and find solutions to specific problems․

These platforms often feature detailed threads on 201 restoration, maintenance, and repair, complete with photos and videos․ Members frequently share scanned copies of manuals, parts lists, and troubleshooting guides not readily available elsewhere․ Engaging with these communities provides access to a collaborative environment where you can learn from others’ experiences and contribute your own․ Facebook groups dedicated to vintage Singers are also incredibly valuable, fostering a sense of community and providing quick access to expert advice․ These resources are invaluable for Singer 201 owners․

Manual Download Locations

Finding a digital copy of the Singer 201 manual is often easier than locating a physical one․ Several websites specialize in vintage sewing machine manuals, offering free downloads in PDF format․ ISMACS (International Sewing Machine Collectors’ Society) is a premier resource, hosting a vast archive of manuals, including those for the Singer 201․

Additionally, sites like ManualsLib and SewingMachineManuals․com frequently contain scanned versions of the original Singer 201 instruction books․ A quick internet search for “Singer 201 manual PDF” will yield numerous results, but always exercise caution when downloading from unfamiliar sources to avoid malware․ Archive․org is another excellent resource for historical documents, potentially housing digitized copies of the manual․ Ensure the downloaded manual corresponds to your machine’s specific serial number for accurate information․ These digital resources provide convenient access to essential operating instructions․

PDF

preschool classroom management strategies pdf

Preschool classroom management is crucial for creating a thriving learning environment; effective strategies, like positive reinforcement and clear expectations, are key to success.

Establishing routines, minimizing downtime, and fostering positive relationships are vital components of a well-managed preschool;

Numerous resources, including PDF guides, offer practical tips for teachers seeking to enhance their classroom management skills and create a safe space.

The Importance of Effective Management

Effective preschool classroom management isn’t simply about control; it’s about fostering a supportive and stimulating environment where young children can thrive academically, socially, and emotionally. PDF guides highlight that proactive strategies, like well-planned transitions and engaging activities, minimize disruptive behaviors.

Without effective management, classrooms can become chaotic, hindering learning and increasing teacher stress. Consistent rules, positive reinforcement, and understanding the reasons behind challenging behaviors are essential. A well-managed classroom maximizes learning time, builds children’s self-esteem, and cultivates a love for learning. Resources emphasize that a calm, predictable environment allows preschoolers to feel safe and secure, enabling them to explore and grow.

Defining a Positive Preschool Environment

A positive preschool environment, as detailed in many preschool classroom management strategies PDF guides, is characterized by warmth, respect, and a sense of community. It’s a space where children feel safe to explore, take risks, and express themselves freely. This involves intentional teacher-child interactions, fostering positive relationships, and creating a welcoming atmosphere.

Such an environment prioritizes social-emotional development alongside academic learning. It’s built on clear expectations, consistent routines, and a focus on reinforcing positive behaviors. A positive environment minimizes disruptive behaviors and maximizes engagement, allowing children to flourish and develop a lifelong love of learning.

Creating a Well-Organized Classroom

Preschool classroom management strategies PDF resources emphasize a thoughtfully designed space; optimal layouts, accessible materials, and defined learning centers promote independence and engagement.

Optimal Classroom Layout for Preschoolers

Preschool classroom management strategies PDF guides consistently highlight the importance of a well-planned physical space. An optimal layout prioritizes clear pathways for movement, minimizing congestion and potential conflicts.

Designated learning centers – such as blocks, dramatic play, art, and literacy areas – should be clearly defined and easily accessible. Visibility is key; teachers need a clear line of sight to all areas to supervise effectively.

Consider creating cozy, quiet spaces for children needing a break. Flexible furniture arrangements allow for varied activities and group sizes, supporting diverse learning styles and promoting a positive classroom atmosphere.

Managing Classroom Supplies and Materials

Preschool classroom management strategies PDF resources emphasize organized materials as foundational for a smooth learning environment. Clearly labeled bins, shelves, and drawers empower children to independently access and return supplies, fostering responsibility.

Limit the quantity of materials available at any given time; too many choices can be overwhelming. Rotate supplies regularly to maintain interest and reduce clutter. A designated space for “unfinished” projects prevents loss and encourages continuation.

Establish routines for material cleanup, making it a collaborative effort and reinforcing organizational skills.

Designated Learning Centers

Preschool classroom management strategies PDF guides consistently highlight learning centers as vital for independent exploration and skill development. Clearly defined centers – art, blocks, dramatic play, literacy – minimize distractions and promote focused engagement.

Establish clear expectations for each center, including the number of children allowed and appropriate material usage. Rotate center themes and materials regularly to maintain interest and cater to diverse learning styles.

Centers should be easily accessible and visually appealing, encouraging children to self-select activities and fostering a sense of ownership.

Establishing Clear Expectations and Rules

Preschool classroom management strategies PDF resources emphasize simple, understandable rules; consistency is key to minimizing conflicts and providing children with necessary tools.

Developing Simple and Understandable Rules

Preschool classroom management strategies PDF guides consistently highlight the importance of concise rules. These should be positively stated – focusing on what to do rather than what not to do. For example, instead of “No running,” use “Walk inside.”

Rules must align with developmental stages; preschoolers thrive with limited, easily grasped directives. Visual aids, like picture cards, reinforce understanding. Regularly revisit these rules with the children, prompting discussion and ensuring comprehension. Keep language age-appropriate and avoid complex phrasing. A small set of well-understood rules fosters a predictable and secure environment.

Posting and Reviewing Rules Regularly

Preschool classroom management strategies PDF resources emphasize that simply having rules isn’t enough. They must be prominently displayed at the children’s eye level, utilizing both words and corresponding visuals. Regularly reviewing these rules – daily is ideal – reinforces expectations and promotes consistency.

Make rule review interactive. Engage children by asking them to explain the rules in their own words or role-play appropriate behaviors. This fosters ownership and understanding. Consistent visual reminders and frequent discussions minimize confusion and support a positive classroom climate, as detailed in many available guides.

Consistent Enforcement of Rules

Preschool classroom management strategies PDF guides consistently highlight the importance of unwavering consistency. Rules are ineffective if applied selectively or ignored occasionally. Children thrive on predictability; inconsistent enforcement creates confusion and undermines trust.

This doesn’t mean rigidity, but rather a fair and equitable application of expectations for all children. Respond to rule violations calmly and predictably, utilizing pre-determined consequences. Resources suggest documenting rule enforcement to ensure fairness and identify patterns. Consistent follow-through demonstrates respect and reinforces the value of established boundaries.

Positive Reinforcement Strategies

Positive reinforcement, detailed in preschool classroom management strategies PDF guides, focuses on rewarding desired behaviors, encouraging repetition and fostering a positive atmosphere.

Praise, encouragement, and reward systems are effective tools for motivating young learners and building self-esteem.

Using Praise and Encouragement

Praise and encouragement are foundational elements of effective preschool classroom management, as outlined in numerous PDF guides. Specific, descriptive praise – noting what a child did well, rather than simply saying “good job” – is significantly more impactful.

Encouragement focuses on effort and perseverance, fostering a growth mindset. For example, “I noticed how hard you worked on that puzzle!” builds resilience. These strategies, detailed in resources, help children develop self-confidence and intrinsic motivation. Consistent, genuine praise and encouragement create a positive learning environment where children feel valued and supported, leading to fewer behavioral challenges and increased engagement.

Reward Systems for Good Behavior

Reward systems, detailed in many preschool classroom management strategies PDF guides, can effectively reinforce positive behaviors. These systems shouldn’t focus solely on material rewards, but also include privileges like choosing a story or being line leader.

Simple sticker charts or punch cards can visually track progress towards a goal. It’s crucial to phase out tangible rewards over time, shifting towards intrinsic motivation. PDF resources emphasize that rewards should be age-appropriate and aligned with classroom rules. Consistency is key; rewards should be delivered promptly and predictably when desired behaviors are exhibited.

Token Economy Systems

Token economy systems, often outlined in preschool classroom management strategies PDF documents, involve earning tokens for positive behaviors, which can then be exchanged for desired rewards. These tokens act as secondary reinforcers, bridging the gap to larger, more motivating prizes.

PDF guides suggest starting with easily achievable goals to build confidence. Rewards should be varied and appealing to the children. Careful planning is essential to determine token value and reward costs. This system promotes responsibility and self-regulation, teaching children to work towards goals and make choices.

Addressing Challenging Behaviors

Preschool classroom management strategies PDF resources emphasize understanding behavior triggers, utilizing redirection, and employing time-out appropriately to address difficult situations effectively.

Understanding the Reasons Behind Behavior

Preschool classroom management strategies PDF guides consistently highlight the importance of investigating the why behind challenging behaviors. Often, actions aren’t simply defiance, but communication of unmet needs.

Consider factors like developmental stage, sensory sensitivities, or recent life changes impacting the child. Is the behavior attention-seeking, a response to frustration, or a result of difficulty with transitions?

Observing patterns, documenting incidents, and collaborating with parents or specialists can reveal underlying causes. Addressing these root issues, rather than solely focusing on suppression, fosters positive behavioral change and builds stronger teacher-child relationships.

Redirection Techniques

Preschool classroom management strategies PDF resources frequently emphasize redirection as a primary intervention. This involves gently guiding a child away from an undesirable activity and towards a more appropriate one, without drawing excessive attention to the misbehavior.

Effective redirection requires understanding a child’s interests. Offer an alternative activity that’s equally engaging, or reframe the current situation with a positive spin.

For example, if a child is hitting, redirect them to pounding playdough. Avoid simply saying “no”; instead, offer a choice. Redirection preserves dignity and teaches self-regulation.

Time-Out Procedures (Appropriate Use)

Preschool classroom management strategies PDF guides suggest time-out should be a last resort, used sparingly and appropriately. It’s not punitive, but a chance for the child to regain self-control in a designated, safe space.

Time-out duration should be brief – generally one minute per year of age. Explain why the time-out is happening, using simple language. The space should be calm, not isolating or frightening.

After time-out, focus on positive reconnection and problem-solving. Avoid lengthy discussions during the time-out itself; address the behavior afterward.

Proactive Strategies for Prevention

Proactive preschool classroom management, detailed in PDF guides, emphasizes planned transitions, engaging activities, and class jobs to minimize disruptive behaviors effectively.

Planned Transitions Between Activities

Smooth transitions are foundational to effective preschool classroom management, as outlined in many PDF resources. Abrupt shifts can trigger challenging behaviors; therefore, preparation is key.

Utilize visual schedules and verbal cues to signal upcoming changes. Incorporate songs, chants, or a simple countdown to prepare children mentally. Give advance warning – “Five more minutes until cleanup!” – allowing time for completion.

Turn transitions into learning opportunities. For example, have children hop like bunnies to the next center. A well-planned transition minimizes downtime and maximizes engagement, preventing potential disruptions.

Incorporating Fun, Short Break Activities

Many preschool classroom management strategies PDF guides emphasize the importance of brief, engaging breaks. Young children have limited attention spans; regular pauses prevent restlessness and behavioral issues.

These “brain breaks” don’t require extensive preparation. Simple options include a quick song with actions, a silly dance party, or a short game like “Simon Says.” Keep them under five minutes to maintain momentum.

Strategic breaks refocus attention and release energy, leading to improved participation and a calmer classroom atmosphere. These moments of fun contribute to a positive learning environment.

Class Jobs and Responsibilities

Preschool classroom management strategies PDF resources frequently highlight the benefits of assigning class jobs. These small responsibilities foster a sense of ownership and belonging within the classroom community.

Jobs should be age-appropriate and rotated regularly – examples include line leader, door holder, or supply helper. Visual charts with pictures can aid children in remembering their tasks.

Participating in classroom upkeep builds self-esteem and encourages cooperation. These tasks also subtly reinforce responsibility and contribute to a more organized and collaborative learning environment.

Building Positive Relationships

Preschool classroom management strategies PDF emphasize strong teacher-child bonds and a sense of community; positive interactions are foundational for success.

Prioritizing genuine connections and open communication fosters trust and supports children’s social-emotional growth.

Teacher-Child Interactions

Preschool classroom management strategies PDF resources consistently highlight the significance of positive, responsive teacher-child interactions. These interactions aren’t merely about being friendly; they are the cornerstone of a secure and nurturing learning environment.

Effective teachers actively listen, validate children’s feelings, and engage in playful, reciprocal exchanges. Modeling respectful communication and demonstrating genuine interest in each child’s unique perspective builds trust and encourages social-emotional development.

Such interactions proactively prevent challenging behaviors and foster a sense of belonging, ultimately contributing to a more manageable and joyful classroom experience for everyone involved. Consistent, positive engagement is key.

Creating a Sense of Community

Preschool classroom management strategies PDF guides emphasize building a strong classroom community as a preventative measure against behavioral issues. A sense of belonging fosters cooperation and reduces disruptions.

Activities promoting collaboration, such as group projects and shared story time, help children develop empathy and respect for one another. Establishing classroom routines and traditions provides predictability and security.

Teachers can facilitate this by encouraging children to share their experiences, celebrate diversity, and actively participate in creating a positive and inclusive atmosphere where every child feels valued and supported.

Parent Communication and Collaboration

Preschool classroom management strategies PDF resources consistently highlight the importance of strong parent-teacher partnerships. Regular communication keeps parents informed about their child’s progress and any behavioral concerns.

Sharing positive observations alongside areas for growth fosters a collaborative approach to addressing challenges. Utilizing various communication methods – newsletters, emails, parent-teacher conferences – ensures accessibility.

When parents and teachers work together, consistency between home and school strengthens positive behavior support and creates a unified approach to classroom management, benefiting the child’s overall development.

Specific Techniques for Common Issues

Preschool classroom management strategies PDF guides detail techniques for aggression, disruption, and emotional regulation, emphasizing redirection and positive reinforcement for effective solutions.

Managing Disruptive Behavior

Preschool classroom management strategies PDF resources consistently highlight proactive approaches to disruptive behavior. These emphasize understanding the function of the behavior – is it attention-seeking, a result of frustration, or sensory overload?

Techniques include redirection to a calming activity, offering choices to regain a sense of control, and utilizing visual cues to remind children of expectations.

Consistent, calm responses are vital; avoid escalating the situation. Many guides suggest pre-teaching expected behaviors and practicing them through role-playing. Positive reinforcement for appropriate behavior is also crucial, shifting focus away from the disruption itself.

Dealing with Aggression

Preschool classroom management strategies PDF documents stress immediate intervention when aggression occurs. Prioritize safety – separate the children involved calmly and quickly. Focus on acknowledging feelings; for example, “You seem very angry right now.”

Avoid labeling children as “bad” and instead address the behavior as unacceptable. Many resources advocate teaching alternative ways to express frustration, like using words or squeezing a stress ball.

Consistent consequences, coupled with teaching empathy and problem-solving skills, are key. Understanding the root cause – is it imitation, frustration, or a need for control? – informs the response.

Supporting Children with Emotional Regulation

Preschool classroom management strategies PDF guides emphasize proactively building emotional literacy. Teach children to identify and name their feelings using visual aids like emotion charts. Model healthy emotional expression yourself – “I’m feeling frustrated, so I’m going to take a deep breath.”

Create a “calm down corner” equipped with soothing tools like books, stuffed animals, and sensory bottles. Encourage children to use these resources when overwhelmed.

Positive reinforcement for demonstrating self-control is vital. Remember, emotional regulation is a developmental skill requiring patience and consistent support.

Utilizing Visual Aids

Visual aids, detailed in preschool classroom management strategies PDF resources, enhance understanding and predictability; schedules, rule reminders, and picture cards are invaluable tools.

Visual Schedules

Visual schedules are a cornerstone of effective preschool classroom management, frequently detailed in preschool classroom management strategies PDF guides. These schedules, utilizing pictures or symbols, clearly illustrate the sequence of daily activities, reducing anxiety and promoting independence.

Children thrive on predictability, and visual schedules provide exactly that. They empower young learners to anticipate transitions, understand expectations, and self-manage their time. Implementing visual schedules minimizes disruptive behaviors stemming from uncertainty and fosters a sense of control. Resources emphasize tailoring schedules to individual needs and regularly reviewing them with the class.

Visual Reminders of Rules

Visual reminders of rules are a powerful component of preschool classroom management, often highlighted in preschool classroom management strategies PDF resources. Instead of lengthy verbal reprimands, these visual cues – pictures depicting expected behaviors like “walking feet” or “quiet voices” – serve as gentle, consistent prompts.

Strategically placed throughout the classroom, they reinforce expectations without interrupting learning. These visuals are particularly beneficial for younger children or those with language delays. Guides suggest involving children in creating the rule visuals, fostering ownership and understanding. Consistent reference to these reminders promotes a positive and predictable environment.

Picture Cards for Communication

Picture cards for communication are frequently recommended within preschool classroom management strategies PDF guides as a tool to support diverse learners and minimize behavioral challenges. These cards visually represent common requests, feelings, or activities, enabling children to express themselves even with limited verbal skills.

They can facilitate smoother transitions, reduce frustration, and empower children to participate more fully in the classroom. Utilizing picture cards promotes independence and reduces reliance on teacher intervention. Resources emphasize tailoring the cards to individual needs and regularly updating them as children’s language develops.

The Role of Curriculum in Management

Curriculum significantly impacts preschool classroom management; engaging, age-appropriate activities minimize downtime and disruptive behaviors, as detailed in PDF guides.

Differentiated instruction caters to individual needs, fostering participation and reducing frustration.

Engaging and Age-Appropriate Activities

Engaging activities are foundational to effective preschool classroom management, directly impacting children’s behavior and participation. A well-planned curriculum, often detailed in preschool classroom management strategies PDF resources, should prioritize hands-on learning experiences tailored to developmental stages.

Activities must capture children’s attention, fostering intrinsic motivation and reducing opportunities for disruptive behavior. Think sensory play, dramatic centers, and art projects. These activities should be short enough to maintain focus, with clear beginnings and ends. When children are actively involved and stimulated, the need for constant redirection diminishes, creating a more peaceful and productive learning environment.

Minimizing Downtime

Downtime in a preschool classroom can quickly lead to restlessness and challenging behaviors; therefore, proactively minimizing these periods is crucial. Many preschool classroom management strategies PDF guides emphasize the importance of seamless transitions and having “filler” activities prepared.

These could include quick songs, fingerplays, or simple movement games. A well-structured schedule with clearly defined activity sequences helps prevent idle moments. Furthermore, preparing materials in advance ensures a smooth flow between lessons. Reducing waiting times and keeping children consistently engaged significantly contributes to a calmer, more manageable classroom environment.

Differentiated Instruction

Differentiated instruction is a cornerstone of effective preschool classroom management, often highlighted in preschool classroom management strategies PDF resources. Recognizing that children develop at varying paces, tailoring activities to individual needs minimizes frustration and behavioral issues.

This involves providing different levels of support, modifying tasks, or offering alternative activity choices. When children are appropriately challenged – neither overwhelmed nor bored – they are more likely to remain engaged and exhibit positive behaviors. Addressing diverse learning styles proactively reduces disruptions and fosters a more inclusive classroom.

Self-Care for Preschool Teachers

Preschool classroom management strategies PDF guides emphasize teacher well-being; managing stress, seeking support, and prioritizing professional development are vital for sustained effectiveness.

Managing Stress and Burnout

Preschool classroom management strategies PDF resources often highlight the critical need for teacher self-care. The demands of early childhood education can lead to significant stress and burnout.

Prioritizing personal well-being isn’t selfish; it’s essential for providing quality care. Strategies include setting boundaries, practicing mindfulness, and engaging in hobbies outside of work.

Seeking support from colleagues, mentors, or therapists can provide valuable coping mechanisms. Remember, a stressed teacher cannot effectively implement even the best classroom management techniques. Proactive self-care is paramount for longevity and joy in the profession.

Seeking Support from Colleagues

Preschool classroom management strategies PDF guides frequently emphasize the power of collaboration. Feeling isolated is a common contributor to teacher burnout, making peer support invaluable.

Regularly connecting with colleagues allows for sharing of successful techniques, brainstorming solutions to challenging behaviors, and simply venting frustrations.

Establishing a mentorship relationship with an experienced teacher can provide guidance and encouragement. Participating in professional learning communities fosters a sense of belonging and shared responsibility. Remember, you are not alone in navigating the complexities of preschool classroom management!

Professional Development Opportunities

Many preschool classroom management strategies PDF resources highlight the importance of ongoing learning. Workshops, conferences, and online courses offer valuable insights into current best practices.

Seek out training focused on positive behavior support, trauma-informed care, and child development; These opportunities equip teachers with the tools to address diverse needs effectively.

Consider pursuing certifications or advanced degrees in early childhood education. Staying current with research and innovative techniques not only enhances your skills but also demonstrates a commitment to providing high-quality care and education.

yamaha receiver manual rx-v377

Yamaha Receiver Manual RX-V377: A Comprehensive Guide

Yamaha offers diverse motor products – motorcycles, ATVs, boats, and more – showcasing innovation and reliability. Explore the 2025 motorcycle lineup, including the updated MT-07.

The Yamaha RX-V377 is a 5.1-channel AV receiver designed to deliver a compelling home theater experience. Yamaha’s commitment to innovation shines through its diverse product range, encompassing motorcycles, ATVs, boats, and power products. This receiver serves as a central hub for audio and video, connecting various sources to your display and speakers.

Yamaha’s 2025 motorcycle lineup, featuring the all-new MT-07, exemplifies their dedication to cutting-edge engineering and performance. Similarly, the RX-V377 aims to provide superior connectivity and sound quality. It supports key technologies like HDMI with Audio Return Channel (ARC) and offers network connectivity for streaming music services. Whether you’re a seasoned audiophile or new to home theater, the RX-V377 offers a user-friendly experience.

Key Features and Specifications

The RX-V377 boasts 5.1-channel surround sound, delivering immersive audio experiences. It features HDMI connectivity with ARC/CEC capabilities, simplifying control and audio return. Network connectivity via Wi-Fi or Ethernet enables streaming from services like Spotify and Pandora, mirroring Yamaha’s broader connectivity focus across its product lines – from motorcycles to boats.

Key specifications include support for various audio formats and a power output suitable for most home theater setups. Yamaha’s dedication to quality extends to its accessories, like the 12-Spoke J-Series Alloy Wheel and Kenda10 series options. The receiver’s design prioritizes ease of use, aligning with Yamaha’s “One to One Service” philosophy. It’s a versatile component for both music and movie enthusiasts.

Unboxing and Initial Setup

Upon unboxing your Yamaha RX-V377, carefully inspect all components – receiver, remote, cables, and documentation. Begin by placing the receiver in a well-ventilated area, ensuring adequate space around it for cooling. Connect the power cord and, if utilizing a wired connection, the Ethernet cable.

Initial setup involves connecting a display via HDMI. The receiver will guide you through on-screen prompts for speaker configuration and network settings. Yamaha’s commitment to user experience, similar to their motorcycle and boat offerings, aims for straightforward operation. Ensure all connections are secure before powering on. Explore Yamaha’s official website for additional support and resources, mirroring their comprehensive customer support network.

Connecting Speakers to the RX-V377

Speaker connection to the RX-V377 utilizes color-coded terminals, matching speaker wires to corresponding outputs – front left/right, center, surround left/right, and subwoofer. Ensure the receiver is powered off during connections. Yamaha, known for precision in products like their motorcycles and ATVs, extends this to receiver terminals.

Use appropriate gauge speaker wire for optimal sound quality. Securely attach the wires, noting polarity (+/-). Double-check all connections before powering on. The receiver supports various speaker configurations, detailed in the manual. Like Yamaha’s robust network of sales and service, proper speaker setup is crucial for a premium audio experience. Refer to the manual for impedance guidelines.

Speaker Configuration Options (5.1, 7.1)

The RX-V377 supports both 5.1 and 7.1 speaker configurations, offering immersive surround sound experiences. A 5.1 setup includes front left/right, center, surround left/right, and a subwoofer – a foundational home theater experience. Expanding to 7.1 adds rear surround speakers for enhanced spatial audio, mirroring Yamaha’s comprehensive product range, from motorcycles to audio systems.

Configuration is managed through the receiver’s on-screen display. Select the appropriate setup based on your speaker arrangement. Yamaha’s commitment to quality, evident in their ATVs and boats, translates to flexible audio options. Proper configuration optimizes soundstage and clarity. Experiment with settings to find the best fit for your room and listening preferences.

Speaker Impedance and Compatibility

The RX-V377 is designed to work with a wide range of speaker impedances, typically accepting 6-16 ohm speakers. However, always verify your speaker’s specifications before connecting them to avoid damage to the receiver or speakers. Yamaha, known for its reliable motorcycles and power products, prioritizes compatibility.

Using speakers with incorrect impedance can lead to distorted sound or overheating. The receiver’s manual details specific impedance guidelines. Ensure your speaker wiring is secure and of appropriate gauge. Like Yamaha’s attention to detail in their boat manufacturing, proper connection is crucial; Prioritize safety and consult the manual for optimal performance and longevity of your audio system.

Connecting Audio and Video Sources

The RX-V377 receiver offers versatile connectivity for various audio and video sources. Utilizing HDMI, optical, coaxial, and even a phono input for turntables, it caters to diverse entertainment setups. Yamaha, renowned for its motorcycles and marine products, emphasizes seamless integration.

HDMI connections deliver both high-definition video and audio, while optical and coaxial inputs support digital audio signals. The phono input allows connection of traditional vinyl record players. Ensure proper cable connections for optimal signal transfer. Like the robust build of Yamaha ATVs, reliable connections are key. Refer to the receiver’s manual for specific input assignments and configurations to unlock the full potential of your home theater system.

HDMI Connections and ARC/CEC

The RX-V377 features multiple HDMI inputs to connect Blu-ray players, gaming consoles, and streaming devices. Utilizing HDMI ensures high-quality video and audio transmission. ARC (Audio Return Channel) simplifies setup by sending audio from your TV back to the receiver through a single HDMI cable, mirroring Yamaha’s integrated systems in their motorcycles and boats.

CEC (Consumer Electronics Control) allows control of connected devices using the receiver’s remote. This streamlines operation, similar to the unified control systems found in Yamaha’s power products. Ensure HDMI cables are securely connected and compatible with HDCP for optimal performance. Explore the receiver’s settings to enable ARC/CEC functionality for a simplified and integrated home entertainment experience.

Optical and Coaxial Digital Audio Inputs

The RX-V377 provides optical and coaxial digital audio inputs for connecting devices lacking HDMI, such as older CD players or DVD players. These connections transmit high-quality digital audio signals, ensuring clear and accurate sound reproduction. Optical connections use fiber optic cables, while coaxial connections utilize standard RCA cables, mirroring the diverse connectivity options found across Yamaha’s product range – from motorcycles to audio systems.

These inputs are ideal for situations where HDMI isn’t available or practical. Ensure proper cable connections and select the corresponding input source on the receiver. These digital audio inputs offer a reliable alternative for enjoying your favorite audio content, providing a robust connection similar to Yamaha’s commitment to reliability in all their products.

Phono Input for Turntables

The RX-V377 features a dedicated phono input, specifically designed for connecting turntables. This input accommodates the low-level signal produced by vinyl records and includes the necessary equalization to ensure optimal sound quality. Yamaha’s dedication to audio fidelity extends to supporting traditional audio sources, much like their commitment to diverse motor products – motorcycles, ATVs, and boats.

To connect a turntable, use RCA cables to link the turntable’s output to the phono input on the receiver. Select the “Phono” input source on the receiver. This allows you to rediscover your vinyl collection with enhanced clarity and warmth. Yamaha’s inclusion of a phono input demonstrates their understanding of audiophile needs, mirroring their attention to detail in engineering all their products.

Remote Control Functions and Operation

The RX-V377’s remote control provides comprehensive control over all receiver functions. Essential buttons include power, volume adjustment, input selection, and surround sound mode control. Navigation is straightforward, allowing easy access to settings and features. Like Yamaha’s diverse product range – encompassing motorcycles, ATVs, and marine products – the remote is designed for user-friendly operation.

Beyond basic controls, the remote enables access to network features, streaming services, and advanced audio settings. Utilize the remote to adjust speaker levels, customize sound preferences, and navigate connected devices. Familiarize yourself with the layout for seamless control. Yamaha prioritizes intuitive design, ensuring a positive user experience, mirroring the reliability found across their entire product line.

Basic Remote Control Operations (Power, Volume, Input)

Powering on/off the RX-V377 is achieved with the prominently placed power button on the remote. Volume control utilizes dedicated up and down buttons, offering precise adjustments. Input selection is equally simple, with dedicated input buttons allowing quick switching between connected sources – mirroring Yamaha’s focus on user-friendly design across their diverse product line, from motorcycles to marine equipment.

These core functions are fundamental to everyday operation. The input buttons correspond to HDMI, Optical, and other available connections. A central ‘Enter’ button confirms selections. Yamaha’s commitment to intuitive controls ensures even first-time users can quickly master these essential operations. Explore these features to unlock the full potential of your receiver.

Surround Sound Mode Selection

The RX-V377 offers a variety of surround sound modes to optimize audio for different content. These modes, accessible via the remote, include options like ‘Movie,’ ‘Music,’ and ‘TV.’ Each mode adjusts the audio processing to enhance the listening experience for that specific type of media, reflecting Yamaha’s dedication to performance across all their products – from ATVs to audio systems.

Experimenting with these modes is encouraged to find the best setting for your preferences. ‘Direct’ mode bypasses processing for a pure audio signal. Yamaha’s technology aims to deliver immersive sound, mirroring the advanced engineering found in their 2025 motorcycle lineup. Detailed descriptions of each mode are available in the full manual.

Network Connectivity and Streaming Features

The RX-V377 boasts robust network connectivity, enabling access to a world of streaming content. Connect via Wi-Fi or Ethernet to unlock services like Spotify and Pandora, mirroring Yamaha’s commitment to connectivity found in their broader product range, including motorcycles and power products.

Yamaha’s official website highlights their dedication to advanced technology. Streaming setup is managed through the receiver’s on-screen menu. Explore the Yamaha ecosystem for seamless integration. The receiver supports various network protocols for stable connections. Discover the latest updates and features through Yamaha’s online resources, similar to exploring their 2025 motorcycle lineup.

Connecting to Your Home Network (Wi-Fi/Ethernet)

Establishing a network connection on your RX-V377 unlocks streaming capabilities and firmware updates, mirroring Yamaha’s broader connectivity focus seen in their motorcycles and ATVs. You can connect via Wi-Fi for wireless convenience or utilize an Ethernet cable for a more stable, wired connection.

Access the receiver’s setup menu to locate the network settings. Select your Wi-Fi network and enter the password, or connect the Ethernet cable directly to your router. Yamaha’s official website emphasizes reliable connectivity. Ensure your network meets the receiver’s requirements for optimal performance. A stable connection is crucial for uninterrupted streaming, much like Yamaha’s commitment to performance in all their products.

Streaming Music Services (Spotify, Pandora, etc.)

The RX-V377 provides access to a world of audio entertainment through integrated streaming services, aligning with Yamaha’s diverse product range – from motorcycles to audio equipment. Popular options like Spotify and Pandora are readily available, offering millions of songs at your fingertips.

Navigate the receiver’s menu to select your preferred streaming service. You may need to link your account for seamless access. Yamaha prioritizes user experience, ensuring easy integration with these platforms. Enjoy high-quality audio streaming, enhancing your home theater experience. Explore the available services and discover new music, mirroring Yamaha’s innovative spirit found across their entire product line.

Troubleshooting Common Issues

Encountering problems with your RX-V377? Common issues include no sound output, HDMI connection difficulties, and network connectivity problems. First, verify speaker connections and volume levels. For HDMI issues, ensure proper cable seating and source device compatibility, reflecting Yamaha’s quality standards across products like their motorcycles and boats.

Network problems often stem from incorrect Wi-Fi passwords or router settings. Consult the receiver’s manual for detailed troubleshooting steps. Yamaha’s support resources offer further assistance. Remember to check for firmware updates, as these often resolve known bugs. A systematic approach, combined with Yamaha’s reliable design, will usually restore optimal performance.

No Sound Output

If your RX-V377 produces no sound, begin with basic checks. Confirm the receiver isn’t muted and the volume is appropriately set. Verify speaker wires are securely connected to both the receiver and speakers – a loose connection is a frequent cause. Ensure the correct input source is selected, mirroring Yamaha’s attention to detail in their diverse product line, from ATVs to watercraft.

Test with different audio sources to isolate the problem. If only one source is affected, the issue likely lies with that device or its connection. Check speaker impedance compatibility. Finally, consult the receiver’s manual for speaker configuration settings and troubleshooting guidance. Yamaha’s commitment to quality extends to comprehensive support resources.

HDMI Connection Problems

Experiencing HDMI issues with your RX-V377? First, ensure the HDMI cable is securely connected to both the receiver and the source device. Try a different HDMI cable to rule out a faulty cord – cable quality matters. Confirm the source device’s HDMI output is set to the correct resolution and format, mirroring Yamaha’s precision engineering in their motorcycle and boat lines.

Test different HDMI ports on the receiver. If using ARC/CEC, verify these features are enabled in both the receiver’s and TV’s settings. A firmware update for the RX-V377 might resolve compatibility issues. Consult the manual for specific HDMI version support and troubleshooting steps. Yamaha provides extensive resources for optimal performance.

Network Connectivity Issues

If your RX-V377 struggles connecting to your network, begin by verifying your Wi-Fi router is functioning correctly and broadcasting a signal. Double-check the receiver’s Wi-Fi password entry for accuracy. For a wired connection, ensure the Ethernet cable is securely plugged into both the receiver and router, mirroring the secure connections found in Yamaha’s motor products.

Restart both the receiver and your router. Access the receiver’s network settings menu and attempt to reconnect. A firmware update can often resolve connectivity problems. Explore Yamaha’s official website for support and troubleshooting guides. Consider temporarily disabling your firewall to see if it’s blocking the connection, but re-enable it afterward for security.

PDF

the ten commandments explained pdf

The Ten Commandments Explained: A Comprehensive Guide

Exploring the enduring moral code, this guide delves into the historical roots, theological interpretations, and modern relevance of the Ten Commandments, often found in PDF format.

Historical Origins and Dating

Determining the precise origins and dating of the Ten Commandments remains a complex scholarly endeavor. While traditionally attributed to Moses receiving them on Mount Sinai, the exact timeframe is debated, with estimates ranging widely from the 16th to the 13th century BCE, and even extending past 750 BCE.

Scholarly perspectives vary, some viewing the commandments as ancient precepts delivered to Moses, others as prophetic texts emerging later, and still others as a distillation of existing legal and priestly traditions. The absence of contemporaneous extra-biblical evidence complicates establishing a definitive date.

Numerous resources, including readily available PDF documents, explore these historical nuances. These materials often present comparative analyses of archaeological findings and textual interpretations, offering a deeper understanding of the commandments’ evolution and contextualization within ancient Near Eastern cultures. Understanding these origins is crucial for appreciating their lasting impact.

The Biblical Account of Moses and Mount Sinai

Central to the narrative surrounding the Ten Commandments is the biblical account in the books of Exodus and Deuteronomy. This recounts Moses ascending Mount Sinai to receive divine instruction from God. After a period of fasting and isolation, Moses received the commandments inscribed on two stone tablets.

The narrative details a dramatic theophany – a manifestation of God – accompanied by thunder, lightning, and the sound of a shofar. This awe-inspiring event underscored the sacredness and authority of the laws being delivered. Moses then descended the mountain to share these laws with the Israelites.

Detailed explanations and analyses of this pivotal biblical story are widely available, often compiled in accessible PDF guides. These resources explore the symbolism, theological implications, and literary structure of the account, providing context for understanding the commandments’ divine origin and their role in establishing the covenant between God and Israel.

Dating the Ten Commandments: Scholarly Perspectives (16th-13th Century BCE to 750 BCE)

Establishing a precise date for the Ten Commandments’ origin remains a complex scholarly endeavor. Estimates range widely, from the 16th to the 13th century BCE, correlating with the proposed timeframe of Moses and the Exodus event. However, some scholars suggest a later composition, even post-750 BCE, viewing the commandments as evolving legal and priestly traditions.

These varying perspectives stem from differing interpretations of the textual evidence and archaeological findings. Those advocating an earlier date often point to potential parallels with Near Eastern legal codes from the second millennium BCE. Conversely, those favoring a later date emphasize the commandments’ unique theological framework and literary style.

Comprehensive overviews of these scholarly debates, including detailed analyses of the evidence, are frequently found in academic publications and summarized in accessible PDF resources. These materials offer a nuanced understanding of the challenges and complexities involved in dating this foundational text.

The Text of the Ten Commandments

Originally inscribed on stone tablets, the Ten Commandments’ text has endured for millennia, influencing moral codes globally, and is readily available in detailed PDF studies.

Comparative Texts: Examining Variations in Different Traditions

Analyzing the Ten Commandments across traditions reveals fascinating variations. Jewish texts, foundational to the commandments’ origin, present a specific formulation, often detailed in scholarly PDF resources. The Samaritan version, preserved by a distinct religious community, exhibits notable differences in wording and emphasis, offering a unique perspective.

Christian interpretations, documented extensively in theological works and accessible as PDF downloads, generally align with the Hebrew Bible but sometimes incorporate nuanced understandings based on the New Testament. Muslim perspectives, while acknowledging the core principles, frame them within the broader context of Islamic law, as explored in comparative religious studies available in PDF format.

These textual comparisons, often presented in academic PDFs, highlight how each tradition understands and applies the commandments. Variations exist in numbering – some traditions combine commandments, resulting in different systems; Examining these differences provides a richer understanding of the commandments’ evolving interpretations and enduring significance across diverse faith communities, readily available for study in comprehensive PDF guides.

Division of the Commandments: Different Numbering Systems

The seemingly straightforward “Ten Commandments” are subject to varying divisions, creating different numbering systems across religious traditions. This complexity is often detailed in comprehensive guides available as PDF downloads. A primary divergence stems from how the first and tenth commandments are treated – some traditions combine the prohibition against other gods and idolatry into a single command.

Similarly, the prohibition against coveting is sometimes split into two separate commandments. Jewish tradition typically follows a division resulting in ten distinct commands, while some Christian denominations consolidate commands, leading to fewer than ten. These differing systems are thoroughly examined in comparative theological PDFs.

Understanding these variations is crucial for interpreting the commandments accurately. Scholarly PDF resources often present charts illustrating these different numbering schemes, clarifying the nuances of each tradition’s approach. The debate over the “correct” division highlights the interpretive nature of religious texts and the importance of contextual understanding, readily accessible through detailed PDF analyses.

Interpretations Across Religions

Diverse faiths view the Ten Commandments uniquely, with detailed analyses available in PDF guides. Examining Jewish, Samaritan, Christian, and Muslim perspectives reveals fascinating theological differences.

Jewish Understanding of the Ten Commandments

Central to Jewish faith, the Ten Commandments (Aseret ha-Dibrot) aren’t merely historical dictates but a living covenant between God and the Jewish people, continually reaffirmed. Foundational to Jewish law (Halakha) and ethics, they represent core principles of monotheism, morality, and righteous living. Detailed explanations, often available as a PDF resource, emphasize the commandments’ ongoing relevance.

Jewish tradition views the Ten Commandments as divinely revealed to Moses on Mount Sinai, forming the basis of the Torah. They are recited weekly during the Sabbath and holidays, reinforcing their importance. Interpretations delve into the nuances of each commandment, exploring their practical applications in daily life. Rabbinic commentaries, accessible in comprehensive PDF studies, offer layers of understanding.

Unlike some other faiths, Judaism doesn’t see the Ten Commandments as a complete legal code, but rather as a foundational framework upon which the rest of Jewish law is built. The 613 mitzvot (commandments) are seen as elaborations and applications of these ten core principles. Numerous PDF guides explore this intricate relationship, providing a deeper understanding of Jewish legal thought.

Samaritan Interpretation and Differences

Distinct from mainstream Jewish tradition, the Samaritan interpretation of the Ten Commandments presents notable variations, preserved within their unique religious practices. Samaritans believe their version represents the original text given to Moses, differing from the Masoretic Text used in Rabbinic Judaism. These differences, often detailed in scholarly PDF analyses, center on both textual content and theological emphasis.

A key divergence lies in the Samaritan version’s inclusion of an eleventh commandment, concerning the construction of an altar on Mount Gerizim, their holy site. This addition underscores their distinct theological focus and claim to be the true preservers of the original covenant. Comparative PDF documents highlight these textual discrepancies.

Furthermore, Samaritan interpretations emphasize the importance of direct, literal obedience to the commandments, with a strong focus on ritual purity and Sabbath observance. Their understanding of the commandments is deeply interwoven with their unique history and identity. Accessing detailed explanations, often available as a downloadable PDF, reveals the nuances of their ancient tradition and its enduring significance.

Christian Understandings of the Ten Commandments

Central to Christian ethics, the Ten Commandments are generally viewed as a reflection of God’s moral law, though interpretations vary across denominations. While acknowledging their divine origin, Christian theology often frames them within the context of the New Covenant established through Jesus Christ. Many Christians believe the commandments are fulfilled through faith and grace, rather than strict legal adherence, a topic often explored in detailed PDF studies.

Protestant perspectives, frequently outlined in accessible PDF guides, often emphasize the continuing relevance of the Ten Commandments as a guide for righteous living, while recognizing salvation is achieved through faith alone. Catholic tradition, detailed in official church documents available as PDF downloads, views the commandments as essential for moral development and preparation for receiving grace.

However, a common thread is the understanding that the spirit of the law—love for God and neighbor—is paramount. Numerous resources, including comprehensive PDF explanations, delve into the nuances of how Christians apply these ancient principles to contemporary life, navigating the complexities of faith and morality.

Muslim Perspectives on the Ten Commandments

Islam shares significant common ground with Judaism and Christianity regarding ethical principles, and the Ten Commandments, while not explicitly named as such in the Quran, are largely recognized through similar moral precepts. Muslims believe God (Allah) revealed laws to prophets throughout history, including Moses (Musa), and these laws resonate within Islamic teachings. Detailed explanations, often available as PDF resources, highlight these parallels.

Core tenets like monotheism (belief in one God), prohibiting idolatry, respecting parents, and forbidding murder and theft are fundamental to both Islamic faith and the Ten Commandments. Islamic jurisprudence, extensively documented in PDF format, expands upon these principles, providing detailed guidance on ethical conduct. The emphasis on justice, compassion, and accountability aligns closely with the spirit of the commandments.

However, Islamic law, derived from the Quran and the Sunnah (teachings and practices of Prophet Muhammad), offers a comprehensive legal and moral framework that extends beyond the Ten Commandments. Numerous scholarly analyses, accessible in PDF form, explore the intersections and distinctions between these traditions.

Detailed Examination of Each Commandment

This section provides in-depth analysis of each commandment, exploring its historical context, theological implications, and practical application, often detailed in PDF guides.

“You Shall Have No Other Gods Before Me” ‒ Understanding Monotheism

This foundational commandment, central to Judeo-Christian belief, establishes the principle of monotheism – the belief in one God. Historically, this was a radical departure from the polytheistic worldviews prevalent during the time the commandments originated, as detailed in numerous scholarly PDF resources.

The prohibition extends beyond simply acknowledging one God; it demands exclusive devotion. Ancient cultures often incorporated multiple deities into their worship, viewing them as aspects of a larger divine reality. This commandment rejects that notion, asserting God’s unique sovereignty and demanding unwavering loyalty.

Understanding this principle requires recognizing the context of ancient Israel’s covenant with God. The Israelites were to be a distinct people, set apart by their exclusive worship. Modern interpretations, often found in accessible PDF explanations, explore the implications for contemporary life, challenging individuals to identify and reject any competing allegiances – be they material possessions, personal ambitions, or ideologies – that might usurp God’s rightful place.

Furthermore, the commandment isn’t merely about avoiding outward acts of worship to other deities, but also about cultivating an inner disposition of complete trust and reliance on God, a concept thoroughly explored in theological PDF documents.

“You Shall Not Make for Yourself an Image” ⎻ The Prohibition of Idolatry

This commandment directly follows the call to monotheism, reinforcing the unique nature of God and prohibiting the creation of any physical representation for worship. Scholarly analyses, often available as detailed PDF guides, suggest this wasn’t simply against artistic expression, but against the inherent danger of reducing the infinite God to a finite, tangible form.

Idolatry, in its original context, involved creating idols – statues or images – believed to possess divine power. These objects became focal points of worship, diverting devotion from the true God. However, the prohibition extends beyond literal idols.

Contemporary interpretations, readily found in accessible PDF resources, broaden the definition to encompass anything that replaces God as the ultimate object of one’s affection or trust. This includes materialism, power, fame, or any other pursuit that becomes all-consuming.

The underlying principle is that God, being spirit, cannot be adequately captured or contained by a physical image. Creating such an image risks misrepresenting God and fostering a distorted relationship, a point frequently emphasized in theological PDF studies.

“You Shall Not Take the Name of the Lord Your God in Vain” ⎻ Respect for the Divine Name

This commandment, often misunderstood, extends beyond simply avoiding profanity. It encompasses a broader respect for God’s character and a commitment to honoring His name in all aspects of life. Detailed explanations, frequently available in comprehensive PDF guides, highlight the sacredness attached to the divine name in ancient Hebrew culture.

Taking God’s name “in vain” historically meant misusing it – swearing falsely, making vows one didn’t intend to keep, or invoking it lightly without reverence; Modern interpretations, explored in numerous theological PDF documents, expand this to include any action that brings dishonor to God’s reputation.

The commandment emphasizes the power inherent in God’s name. It’s not merely a label, but a representation of His very being and authority. Therefore, to misuse it is to demonstrate a lack of respect for God Himself.

Resources in PDF format often connect this commandment to the concept of bearing witness to God’s truth, urging believers to live in a manner that reflects His holiness and integrity, thereby upholding the honor of His name.

“Remember the Sabbath Day, to Keep it Holy” ⎻ The Significance of the Sabbath

This commandment, unique among the Ten, focuses on time – specifically, dedicating a portion of it to God. Extensive resources, often compiled into detailed PDF guides, explain the Sabbath’s origins in the creation narrative, where God rested on the seventh day and blessed it. It’s presented not as a burden, but as a gift – a time for spiritual renewal and rest.

Historically, the Sabbath served as a day of ceasing work, offering respite for both individuals and the land. Modern interpretations, thoroughly discussed in theological PDFs, vary widely regarding its observance. Some adhere to a strict Saturday observance, while others view it as a principle of regular rest and worship adaptable to contemporary life.

The core principle remains: intentionally setting aside time to connect with God, reflect on His blessings, and prioritize spiritual well-being.

Numerous PDF resources explore the Sabbath’s social implications, highlighting its role in fostering community and providing a counterbalance to the pressures of a work-centric culture, promoting a holistic approach to life.

Controversies and Modern Relevance

Examining modern debates surrounding the Ten Commandments, detailed PDF analyses reveal ongoing discussions about their application in contemporary society and legal interpretations.

The Sabbath Day Controversy: Observance and Interpretation

The fourth commandment, “Remember the Sabbath day, to keep it holy,” consistently sparks debate, extensively documented in numerous PDF resources. Historically, Jewish observance centered on a strict cessation of work from Friday evening to Saturday evening, a practice rooted in the creation narrative. However, interpretations diverge significantly.

Christian perspectives vary widely. Some denominations, like Seventh-day Adventists, maintain a Saturday Sabbath, aligning with traditional Jewish practice. Most Protestants observe Sunday as the Lord’s Day, viewing it as a commemoration of Jesus’ resurrection rather than a continuation of the seventh-day Sabbath. This shift is often justified through New Testament interpretations.

Contemporary controversies revolve around defining “work” in a modern context. What constitutes permissible activity on the Sabbath? Is recreational shopping work? What about digital labor or essential services? PDF guides often present diverse theological arguments and practical applications. The debate extends to legal accommodations for religious observance, balancing individual rights with societal needs, a complex issue explored in detail within these resources.

“You Shall Not Steal” ‒ Ethical Implications and Legal Systems

The eighth commandment, “You shall not steal,” extends far beyond simple physical theft, encompassing broader ethical considerations detailed in comprehensive PDF analyses. It fundamentally addresses respect for another’s property, rights, and livelihood, forming a cornerstone of societal order.

Legal systems worldwide demonstrably reflect this principle. Criminal codes universally prohibit theft, fraud, and embezzlement, with varying degrees of punishment. However, the commandment’s influence extends to civil law, governing contracts, intellectual property, and fair business practices. PDF resources often trace the historical development of these legal frameworks.

Ethical implications are nuanced. Does “stealing” include exploiting loopholes, unfair competition, or withholding just wages? Modern interpretations grapple with issues like digital piracy, data breaches, and the appropriation of cultural heritage. Many PDF guides explore these contemporary challenges, prompting reflection on personal responsibility and societal justice. The commandment’s enduring relevance lies in its call for honesty, integrity, and respect for the possessions of others.

Idolatry in the Modern World: Defining Contemporary Idols

The second commandment, prohibiting the creation and worship of idols, presents a unique challenge in the modern world, extensively explored in detailed PDF explanations. While literal idol worship is less prevalent, the concept of “idolatry” extends to anything that usurps the place of God – or ultimate values – in one’s life.

Contemporary “idols” can take many forms: materialism, ambition, power, fame, pleasure, or even political ideologies. These pursuits, when prioritized above ethical considerations and genuine human connection, can become all-consuming, dictating choices and shaping identities. PDF resources often analyze these modern manifestations.

Defining these contemporary idols requires critical self-reflection. Is one’s self-worth tied to possessions or achievements? Are decisions driven by a desire for external validation? The commandment challenges us to examine our priorities and identify what truly holds our allegiance. Many PDF guides offer frameworks for discerning genuine values from fleeting desires, promoting a life of purpose and authenticity, free from the subtle grip of modern idolatry.

Public Monuments and Controversy Regarding the Ten Commandments

The display of the Ten Commandments on public grounds, particularly in the United States, has sparked considerable legal and social debate, thoroughly documented in numerous PDF analyses. Proponents argue that the commandments represent a foundational moral code essential to Western civilization, justifying their public presence.

Conversely, opponents contend that such displays violate the Establishment Clause of the First Amendment, which prohibits government endorsement of religion. Legal challenges often center on whether the monuments serve a secular purpose or primarily promote a specific religious belief. Detailed PDF reports outline landmark court cases addressing these issues.

The controversy extends beyond legal arguments, encompassing concerns about religious pluralism and inclusivity. Critics argue that prioritizing one religious tradition over others marginalizes minority faiths. Examining these debates through comprehensive PDF resources reveals the complex interplay between religious freedom, public space, and the enduring legacy of the Ten Commandments in contemporary society, prompting ongoing discussions about their appropriate role in the public sphere.

The Ten Commandments in Modern Society

Despite evolving societal norms, the Ten Commandments continue to influence legal systems, cultural ethics, and personal morality, readily accessible through detailed PDF explanations.

Influence on Legal Systems Worldwide

The Ten Commandments, frequently detailed in accessible PDF guides, have profoundly shaped legal frameworks globally, extending far beyond their religious origins. Concepts like prohibitions against theft – “You Shall Not Steal” – directly correlate with modern laws safeguarding property rights and defining criminal offenses. Similarly, the commandment against bearing false witness (“You Shall Not Give False Testimony”) underpins principles of honesty and integrity within judicial proceedings.

Western legal traditions, particularly those rooted in Judeo-Christian ethics, demonstrate a clear lineage tracing back to these ancient precepts. Many foundational legal codes incorporate prohibitions against murder, adultery, and dishonesty, mirroring the core tenets of the Decalogue. Even in legal systems not directly influenced by these traditions, similar ethical principles often emerge as fundamental to societal order.

Furthermore, the emphasis on respecting life and property, central to the Ten Commandments, resonates within international human rights law. The Universal Declaration of Human Rights, for instance, reflects these values in its protections against arbitrary deprivation of life and the right to own property. Studying comprehensive PDF resources illuminates these connections, revealing the enduring legacy of these ancient laws.

Impact on Cultural Norms and Ethics

The Ten Commandments, readily explored in detailed PDF explanations, have indelibly shaped cultural norms and ethical frameworks across centuries and continents. Beyond legal codes, these precepts have permeated societal values, influencing perceptions of right and wrong, and fostering a shared moral compass.

Concepts like honoring parents (“Honor your father and your mother”) have reinforced familial bonds and respect for elders in numerous cultures. The prohibition against coveting (“You shall not covet”) encourages contentment and discourages envy, contributing to social harmony. These principles, often internalized through religious education and cultural transmission, guide individual behavior and shape collective morality.

Moreover, the emphasis on monotheism – “You Shall Have No Other Gods Before Me” – has fostered a sense of universal morality, promoting the idea of a single, overarching ethical standard. Examining comprehensive PDF analyses reveals how these commandments have influenced artistic expression, literature, and philosophical thought, solidifying their place as cornerstones of Western civilization and beyond, impacting ethical considerations globally.

Relevance to Personal Conduct and Morality

Delving into resources like a detailed “Ten Commandments Explained PDF” reveals their enduring relevance to individual lives and moral decision-making. These aren’t merely historical relics; they offer a framework for navigating complex ethical dilemmas in the modern world.

The commandments encourage personal responsibility – from honesty (“You shall not bear false witness”) to respecting boundaries (“You shall not commit adultery”). They promote self-control, integrity, and compassion, fostering a virtuous character. Understanding the nuances, as presented in comprehensive PDF guides, allows for thoughtful application to daily life.

Furthermore, the call to refrain from stealing (“You shall not steal”) extends beyond material possessions to encompass intellectual property and respect for others’ efforts. The Sabbath commandment (“Remember the Sabbath day”) encourages rest, reflection, and spiritual renewal. Ultimately, the Ten Commandments, when thoughtfully considered through resources like explanatory PDFs, provide a timeless guide for cultivating a meaningful and ethical existence, shaping personal morality and conduct.

PDF

pdf the curious incident dog nighttime

The Curious Incident of the Dog in the Night-Time: A Comprehensive Overview

Mark Haddon’s novel‚ available as a PDF‚ explores a unique narrative voice and perspective. Published in 2003 (ISBN 0-385-50945-6)‚ it’s a compelling story‚ often analyzed through a linguistic lens.

Publication Details and ISBNs

Mark Haddon’s The Curious Incident of the Dog in the Night-Time was first published in 2003 by David Fickling Books‚ an imprint of Random House Children’s Books. The novel quickly gained recognition and has since been released in numerous editions and formats‚ including a widely accessible PDF version. Key ISBNs associated with the book include 978-0385509458 (hardcover)‚ 978-1400032716 (paperback)‚ 9781474240598‚ 9781474240628‚ and 9781474240604.

These ISBNs differentiate various printings and editions. The book’s initial publication details reveal it was printed in the United States‚ with subsequent editions distributed globally. Online platforms often provide access to the novel through the “Look inside” feature‚ allowing potential readers to sample the text before purchasing or downloading a PDF copy. The book’s enduring popularity ensures its continued availability in diverse formats.

Initial Reception and Awards

Upon its 2003 release‚ The Curious Incident of the Dog in the Night-Time garnered significant critical acclaim and resonated deeply with readers. While readily available now as a PDF‚ initial reception focused on its innovative narrative structure and compelling portrayal of a neurodivergent protagonist. The novel swiftly climbed bestseller lists‚ captivating audiences with its unique perspective.

It received the Whitbread Book Award (now the Costa Book Award) in 2003‚ a prestigious honor recognizing outstanding literary merit. Furthermore‚ it was shortlisted for numerous other awards‚ solidifying its place as a significant work of contemporary fiction. The book’s success spurred widespread discussion about autism and neurodiversity‚ even as readers accessed it through various means‚ including PDF downloads‚ expanding its reach and impact.

The Novel’s Core Premise: A Mystery Unfolds

The narrative of The Curious Incident of the Dog in the Night-Time‚ often encountered as a readily accessible PDF‚ centers around a perplexing mystery: the brutal killing of Wellington‚ a neighbor’s dog. This event triggers a full-scale investigation led by Christopher Boone‚ a fifteen-year-old boy with autism spectrum disorder.

However‚ the investigation quickly transcends a simple whodunit‚ evolving into a deeply personal journey of self-discovery for Christopher. As he delves deeper into the circumstances surrounding Wellington’s death‚ he uncovers unsettling truths about his own family and his carefully constructed world. The PDF format allows readers to closely follow Christopher’s meticulous observations and logical deductions as the mystery unravels‚ revealing layers of deception and hidden emotions.

Christopher Boone: The Narrator and His Perspective

Christopher Boone’s unique voice‚ powerfully conveyed in the PDF version‚ shapes the entire narrative. His first-person perspective offers an intimate‚ unfiltered view of events.

Understanding Christopher’s Unique Voice

Christopher’s voice‚ meticulously crafted by Mark Haddon and readily apparent in the novel’s PDF format‚ is characterized by its literalness and precise detail. He struggles with metaphors and figurative language‚ preferring concrete descriptions. This stems from his neurodiversity‚ often identified as being on the autism spectrum‚ influencing how he processes information and communicates.

The PDF allows close examination of his sentence structure – often simple and declarative – and his avoidance of emotional language. He meticulously catalogs observations‚ prioritizing facts over feelings. This distinctive narrative style isn’t a stylistic choice‚ but a fundamental aspect of his character‚ offering readers a profound insight into his internal world. His distrust of stories‚ as Siobhan notes‚ highlights his preference for verifiable truth‚ a key element of his unique perspective.

The Significance of First-Person Narration

The choice of first-person narration in Mark Haddon’s novel‚ easily accessible as a PDF‚ is crucial to its impact. It immerses the reader directly into Christopher Boone’s subjective experience‚ fostering empathy and understanding. We perceive the world through his eyes‚ experiencing his anxieties‚ frustrations‚ and unique observations unfiltered.

This intimate perspective‚ evident when reading the novel’s PDF version‚ is vital for conveying the challenges and complexities of neurodiversity. The reader isn’t told about Christopher’s condition; they experience it through his language and thought processes. This narrative technique avoids clinical distance‚ instead promoting a deeply personal connection. The PDF format allows for focused analysis of this singular viewpoint‚ highlighting its narrative power.

Christopher’s Challenges and Abilities

Analyzing the PDF of Mark Haddon’s novel reveals a complex portrayal of Christopher Boone. He faces significant challenges in social interaction‚ interpreting emotions‚ and navigating everyday situations‚ often struggling with deception and “stories.” However‚ these are counterbalanced by remarkable abilities – exceptional memory‚ a talent for mathematics‚ and a hyper-observant attention to detail.

The PDF format facilitates close reading of Christopher’s internal monologue‚ showcasing his logical reasoning and pattern recognition skills‚ particularly his fascination with prime numbers; While he struggles with abstract concepts like irony‚ his literal interpretation of information is a strength. The novel‚ readily available as a PDF‚ doesn’t present Christopher as simply “disabled‚” but as an individual with a unique cognitive profile.

Key Themes Explored in the Novel

The PDF version highlights themes of truth‚ lies‚ and trust‚ central to Christopher’s journey. Social interactions and the perception of reality are also key.

Truth and Lies: Christopher’s Struggle with Deception

Christopher Boone’s unwavering need for factual accuracy‚ readily accessible within the PDF of the novel‚ forms a core conflict. He struggles immensely with deception‚ finding stories problematic because they aren’t “really real‚” as Siobhan explains (page 82). This aversion stems from his difficulty interpreting social cues and understanding nuanced communication.

The investigation into Wellington’s death forces Christopher to confront lies and hidden truths‚ challenging his worldview. The PDF allows close examination of his literal interpretations and the resulting misunderstandings. His father’s initial dishonesty is particularly devastating‚ shattering Christopher’s trust and prompting his arduous journey to London. The novel‚ in its complete PDF form‚ powerfully illustrates the emotional consequences of deception for someone who prioritizes absolute truth.

Trust and Relationships: Navigating Social Interactions

Examining the complete text in PDF format reveals Christopher Boone’s profound difficulties forming and maintaining relationships. His autism spectrum condition impacts his ability to understand social conventions and emotional reciprocity. He relies heavily on established routines and struggles with unpredictable interactions‚ a detail clearly presented within the novel’s PDF version.

Siobhan serves as a crucial support figure‚ patiently explaining social nuances to Christopher. However‚ even with her guidance‚ he experiences significant challenges. The PDF highlights his initial trust in his father‚ which is irrevocably broken by a discovered lie. This betrayal profoundly impacts his ability to trust others‚ forcing him to re-evaluate his understanding of relationships and navigate a complex social world‚ all meticulously detailed in the novel’s PDF.

The Power of Observation and Detail

The novel‚ readily available as a PDF‚ showcases Christopher Boone’s extraordinary capacity for detailed observation. He meticulously records his surroundings and experiences‚ often focusing on seemingly insignificant details that others overlook. This ability is central to his understanding of the world‚ and the PDF allows for close examination of these descriptive passages.

His narrative‚ presented in the PDF‚ isn’t driven by emotional interpretation but by factual reporting. He notices patterns‚ remembers precise times (like “7 minutes after midnight” as noted in the PDF excerpts)‚ and analyzes information logically. This intense focus on detail is both a strength and a challenge‚ shaping his perception of reality and influencing his interactions. The PDF format facilitates a deeper appreciation for Haddon’s skillful portrayal of this unique observational skill.

Linguistic Analysis of the Novel

PDF versions enable detailed study of Haddon’s unique prose‚ mirroring Christopher’s perspective. Linguistic approaches reveal how language constructs his perceived reality.

Representing Autism Through Language

The novel’s power lies in its authentic portrayal of a neurodivergent mind‚ achieved through meticulous linguistic choices. Accessing the text as a PDF facilitates close reading of these nuances. Haddon masterfully employs specific stylistic devices to represent Christopher Boone’s unique cognitive processes‚ including literal interpretations‚ difficulty with metaphors‚ and a preference for factual detail.

Scholarly analysis‚ often conducted using PDF copies for annotation‚ highlights how the narrative structure and vocabulary reflect Christopher’s sensory sensitivities and challenges with social communication. The absence of emotional description‚ coupled with precise observation‚ creates a compelling and believable character. The PDF format allows researchers to easily identify patterns in language use‚ furthering understanding of how Haddon effectively conveys the experience of autism.

Narrative Structure and its Impact

The novel’s first-person narrative‚ readily available in PDF format for detailed study‚ profoundly shapes the reader’s experience. Christopher Boone’s voice dominates‚ offering an intensely subjective and limited perspective. This structure compels readers to actively interpret events alongside him‚ navigating the world through his unique lens. The chronological unfolding of the mystery‚ easily traceable within a PDF version‚ mirrors Christopher’s logical‚ step-by-step thinking.

The use of chapters with prime number lengths – a detail easily confirmed when examining the PDF – reinforces Christopher’s fascination with patterns and order. This unconventional structure isn’t merely stylistic; it’s integral to understanding his cognitive framework. Analyzing the PDF reveals how the narrative’s form mirrors its content‚ enhancing the novel’s thematic resonance.

The Use of Prime Numbers and Patterns

A striking feature of Mark Haddon’s novel‚ readily observable within the PDF version‚ is the deliberate incorporation of prime numbers. Chapters are numbered sequentially‚ but their lengths correspond to prime numbers – 2‚ 3‚ 5‚ 7‚ and so on. This isn’t arbitrary; it reflects Christopher Boone’s deep-seated need for order and his comfort in mathematical logic. Examining the PDF allows for easy verification of this pattern.

Beyond chapter lengths‚ patterns permeate Christopher’s observations and thought processes. He seeks predictability in a chaotic world‚ finding solace in routines and quantifiable data. The PDF format facilitates close reading‚ revealing how these patterns are woven into the narrative fabric‚ mirroring Christopher’s internal world and enhancing the novel’s thematic depth.

Adaptations: From Novel to Stage Play

PDF versions of the novel highlight the internal monologue‚ a key challenge for stage adaptation; the play creatively visualizes Christopher’s unique perspective.

Differences Between the Novel and Play Openings

Analyzing the novel’s opening‚ readily available in PDF format‚ alongside the play’s reveals striking contrasts. Haddon’s novel begins with a precise‚ detailed observation – “It was 7 minutes after midnight.” This immediately establishes Christopher Boone’s analytical and literal mindset.

Conversely‚ the play’s opening often employs a more visually arresting and fragmented approach‚ aiming to directly immerse the audience in Christopher’s sensory experience. The novel relies on prose to convey his internal state‚ while the play utilizes staging‚ lighting‚ and sound to achieve a similar effect.

Reading a novel allows for a slower‚ more introspective pace‚ while experiencing a play is a communal‚ immediate event. The PDF allows revisiting key passages‚ aiding detailed analysis absent in a live performance. The play’s opening‚ therefore‚ prioritizes experiential impact over textual detail.

The Challenges of Adapting an Internal Monologue

Adapting Mark Haddon’s novel‚ accessible as a PDF‚ presents unique hurdles‚ primarily concerning Christopher Boone’s intensely internal narrative. The novel thrives on conveying his thought processes directly to the reader‚ a feat difficult to replicate onstage. Translating this unbroken stream of consciousness into a visually engaging theatrical experience requires innovative solutions.

The play must externalize Christopher’s inner world‚ utilizing staging‚ movement‚ and sound design to represent his perceptions. Simply narrating his thoughts would prove static and ineffective. Finding a balance between fidelity to the source material – the PDF’s textual nuances – and theatrical dynamism is crucial.

Successfully conveying Christopher’s unique perspective without resorting to caricature or sentimentality demands careful consideration. The adaptation must honor the novel’s complexity while remaining accessible to a live audience.

Theatrical Representation of Christopher’s World

The stage adaptation of “The Curious Incident of the Dog in the Night-Time”‚ stemming from Haddon’s novel (available as a PDF)‚ ingeniously visualizes Christopher Boone’s sensory experience. The production employs a minimalist set‚ often utilizing a grid system‚ to reflect his need for order and structure. Projections and dynamic lighting effectively convey his heightened sensitivity to stimuli.

Movement is highly stylized‚ mirroring Christopher’s precise and deliberate actions. The ensemble cast frequently embodies objects and environments‚ creating a fluid and immersive world. This approach allows the audience to perceive reality as Christopher does – fragmented‚ overwhelming‚ yet intensely detailed.

The play’s success lies in its ability to externalize his internal landscape‚ offering a powerful and empathetic portrayal of autism.

Critical Perspectives and Interpretations

Readers often interpret the PDF novel through the lens of autism‚ prompting discussions about representation and societal perceptions of neurodiversity and “reality”.

Reader Response and the Perception of Autism

The Curious Incident of the Dog in the Night-Time‚ widely available as a PDF‚ consistently elicits strong reader responses centered around its portrayal of autism. Many readers grapple with understanding Christopher Boone’s unique perspective‚ often leading to increased awareness and empathy regarding autism spectrum disorders.

However‚ interpretations vary; some readers focus on the novel’s literary merits – its narrative structure and linguistic style – while others prioritize its representation of neurodiversity. Critical discussions frequently address whether Haddon’s depiction is authentic and respectful‚ or if it relies on stereotypes. The novel’s success has sparked broader conversations about how autism is perceived and understood within society‚ influencing public discourse and challenging preconceived notions. Accessing the novel in PDF format facilitates wider engagement with these important themes.

The Novel’s Social Commentary

Mark Haddon’s novel‚ readily accessible as a PDF‚ offers a subtle yet potent social commentary on contemporary society. Through Christopher Boone’s experiences‚ the narrative critiques societal norms regarding neurodiversity‚ challenging assumptions about “normal” behavior and communication. The story exposes the difficulties faced by individuals who deviate from established social expectations‚ highlighting issues of prejudice and misunderstanding.

Furthermore‚ the novel subtly examines family dynamics‚ trust‚ and the complexities of human relationships. Christopher’s journey reveals the fragility of truth and the prevalence of deception within seemingly ordinary lives. The PDF version allows for close reading and analysis of these themes‚ prompting readers to reflect on their own biases and perceptions of the world around them‚ ultimately fostering a more inclusive perspective.

Exploring the Concept of “Reality” in the Narrative

The PDF version of Mark Haddon’s novel powerfully deconstructs the notion of objective “reality” through Christopher Boone’s unique perspective. His literal interpretation of events and difficulty with abstract concepts force readers to question their own assumptions about truth and perception. The narrative challenges the idea of a singular‚ universally accepted reality‚ suggesting instead that it is subjective and constructed.

Christopher’s distrust of stories‚ as Siobhan notes (“some things which are kind of true in things which are made up”)‚ underscores this theme. The novel explores how individuals create meaning and navigate the world based on their own internal frameworks. Accessing the text as a PDF facilitates detailed analysis of Haddon’s stylistic choices‚ revealing how language itself shapes our understanding of reality.

The Novel’s Structure and Plot Points

The PDF reveals a meticulously crafted plot‚ beginning with Wellington’s death and Christopher’s investigation. This launches his journey‚ detailed within the novel’s structure.

The Initial Investigation: Wellington’s Death

The novel‚ readily accessible as a PDF‚ immediately plunges the reader into a mystery: the brutal killing of Wellington‚ Mrs. Shears’ dog. This event‚ described in precise detail from Christopher Boone’s perspective‚ serves as the catalyst for the entire narrative. The PDF format allows for close examination of Haddon’s opening lines – “It was 7 minutes after midnight” – establishing Christopher’s methodical and literal mindset.

Christopher’s decision to investigate‚ despite his anxieties and sensory sensitivities‚ demonstrates his commitment to truth and logic. He meticulously documents his findings‚ creating a detailed record of the scene and interviewing neighbors. The PDF version facilitates easy referencing of these crucial early chapters‚ highlighting the significance of observation and deduction in Christopher’s approach. This initial investigation sets the stage for the larger exploration of trust‚ deception‚ and the complexities of human relationships.

Christopher’s Journey to London

Accessible as a PDF‚ the novel’s pivotal mid-section details Christopher Boone’s extraordinary journey to London. Driven by the revelation of a significant family secret‚ he embarks on this challenging quest independently‚ navigating unfamiliar environments and overwhelming sensory input. The PDF format allows readers to trace Christopher’s route and analyze his reactions to the city’s complexities.

This journey represents a significant step in his personal growth‚ forcing him to confront his fears and develop coping mechanisms. The PDF’s searchable text enables focused study of passages detailing his anxieties regarding travel and social interaction. His experiences on the train and within London’s bustling streets are vividly portrayed‚ showcasing his unique perspective and resilience. The journey ultimately leads to a confrontation with his mother‚ and a path towards a new family dynamic.

The Resolution and its Implications

The novel‚ readily available as a PDF‚ concludes with a complex resolution‚ offering neither simple answers nor complete closure. Christopher achieves a degree of independence‚ moving into a new home and continuing his studies‚ demonstrating significant personal growth. Accessing the text via PDF allows for detailed examination of the final chapters and their nuanced portrayal of change.

The PDF format facilitates revisiting key scenes‚ like the return of his father‚ and analyzing their impact on Christopher’s development. While he passes his A-levels‚ the narrative acknowledges ongoing challenges. The implications extend to broader themes of neurodiversity and societal acceptance. The ending‚ as presented in the PDF‚ is realistically hopeful‚ emphasizing resilience and the possibility of a fulfilling life‚ despite ongoing difficulties.

PDF

simile and metaphor worksheet pdf

Simile and Metaphor Worksheet PDF: A Comprehensive Guide

Worksheets focusing on simile and metaphor offer invaluable practice, aiding students in recognizing and utilizing figurative language for enhanced comprehension and creative writing skills.

Understanding Figurative Language

Figurative language, encompassing similes and metaphors, transcends literal meanings, enriching communication with layers of symbolism and imagery. These tools are prevalent in everyday speech, literature, and media, demanding skillful identification and interpretation.

A simile and metaphor worksheet PDF serves as a crucial resource for mastering these concepts. It provides structured exercises, guiding learners to distinguish between direct comparisons using “like” or “as” (similes) and implied comparisons stating one thing is another (metaphors).

Understanding these nuances boosts reading comprehension, analytical skills, and the ability to craft compelling, descriptive prose. Recognizing these figures of speech unlocks deeper meaning within texts and empowers effective self-expression.

What is a Simile?

A simile explicitly compares two unlike things using “like” or “as,” creating a vivid image and enhancing understanding, as practiced in worksheets.

Definition of Simile

A simile is a figure of speech that directly compares two different things, explicitly stating a resemblance between them. This comparison is always made using the words “like” or “as.” Unlike a direct statement of equality, a simile acknowledges the differences while highlighting a shared quality.

Worksheets dedicated to similes help students grasp this concept by providing examples and exercises. They learn to identify the two things being compared and the common characteristic that links them. Understanding similes is crucial for interpreting literature and enriching one’s own writing. Recognizing these comparisons enhances reading comprehension and fosters a deeper appreciation for the nuances of language.

Essentially, a simile paints a picture in the reader’s mind by drawing a connection between the familiar and the unfamiliar.

Key Indicators: “Like” and “As”

When identifying similes within text, the words “like” and “as” serve as crucial indicators. These words signal a direct comparison between two dissimilar things, forming the core of a simile’s structure. Worksheet exercises often emphasize spotting these keywords to quickly pinpoint potential similes.

However, it’s important to note that simply finding “like” or “as” doesn’t automatically confirm a simile; the phrase must demonstrate a comparison. Students learn to differentiate between comparative statements and instances where these words function differently.

PDF resources frequently bold these indicator words in example sentences to aid visual recognition. Mastering this skill is fundamental for analyzing figurative language effectively.

Simile Examples in Literature

Simile examples abound in literature, enriching texts with vivid imagery and deeper meaning. Worksheet activities often present excerpts from famous works, challenging students to identify these figures of speech. For instance, Robert Burns’ “A Red, Red Rose” utilizes the simile “O my Luve is like a red, red rose,” comparing love to the beauty and fragility of a flower.

Analyzing such examples helps students understand how authors employ similes to evoke emotions and create memorable descriptions. PDF resources frequently include passages from poetry and prose, providing ample practice.

Recognizing these literary devices enhances comprehension and appreciation of the author’s craft.

What is a Metaphor?

Metaphors create comparisons without using “like” or “as,” stating one thing is another, offering a powerful, implied connection for descriptive effect.

Definition of Metaphor

A metaphor is a figure of speech where a word or phrase is applied to an object or action to which it is not literally applicable. Unlike a simile, which explicitly states a comparison using “like” or “as,” a metaphor implies a resemblance. It asserts that something is something else, not just similar to it.

For instance, stating “He is a lion in battle” doesn’t mean he’s literally a feline; it conveys his bravery and ferocity. Worksheet exercises often focus on deciphering these implied meanings. Understanding metaphors requires recognizing the shared qualities between the two seemingly disparate things being connected. This skill enhances reading comprehension and allows for richer interpretation of texts.

Metaphors add depth and color to language, moving beyond literal descriptions to evoke emotions and create vivid imagery.

Direct Comparison vs. Implied Comparison

The core difference between direct and implied comparison lies at the heart of understanding similes and metaphors. A direct comparison, as seen in similes, explicitly draws a connection using words like “like” or “as.” For example, “brave as a lion” directly states the similarity.

Conversely, a metaphor employs an implied comparison, stating that one thing is another. “He is a lion” doesn’t use connecting words; it equates him to a lion, suggesting shared qualities of courage and strength. Worksheet practice often involves transforming similes into metaphors to grasp this nuance.

Identifying whether a comparison is direct or implied is crucial for analyzing figurative language and appreciating its impact on meaning.

Metaphor Examples in Everyday Speech

Metaphors permeate our daily conversations, often without conscious recognition. Phrases like “time is money” or “life is a journey” aren’t literal truths, but powerfully convey concepts through implied comparison. We say someone is “a rock” to indicate stability, or describe a difficult situation as “a storm.”

Worksheet exercises frequently ask students to identify these everyday metaphors, demonstrating how ingrained they are in our language. Recognizing these instances builds a foundation for understanding more complex figurative language in literature.

Analyzing common metaphors reveals how they shape our perceptions and add depth to communication, enriching our understanding beyond the literal.

Simile vs. Metaphor: Key Differences

Worksheets highlight that similes use “like” or “as” for comparison, while metaphors directly equate two unlike things, creating a stronger, implied connection.

Coleridge’s Distinction: Imagination vs. Fancy

Worksheets often reference Samuel Taylor Coleridge’s insightful distinction between imagination and fancy when exploring simile and metaphor. Coleridge viewed metaphor as stemming from the imagination – a more profound, creative faculty that dissolves and re-creates. He considered similes products of fancy, a more passive, associative power.

This means metaphors, in Coleridge’s view, are more original and transformative, forging new connections. Similes, while still figurative, rely on explicit comparison, making them less inherently imaginative. Worksheet exercises can encourage students to analyze how this distinction impacts the power and effect of each figure of speech, prompting deeper critical thinking.

Identifying Similes and Metaphors in Sentences

Worksheet exercises frequently present students with sentences and ask them to pinpoint whether each contains a simile or a metaphor. These exercises emphasize recognizing key indicators: the words “like” or “as” typically signal a simile, while direct statements of equivalence suggest a metaphor.

Effective worksheets don’t stop at simple identification. They often require students to explain what is being compared to what, reinforcing comprehension of the figurative meaning. Some worksheets include sentences containing both, or even personification, adding complexity. Analyzing these sentences builds crucial analytical skills for literary interpretation.

Simile and Metaphor Worksheet Exercises

Worksheet activities include basic identification of figures of speech, and transforming similes into metaphors, strengthening understanding and application skills.

Basic Identification Practice

Fundamental exercises involve reading sentences and discerning whether they contain a simile or a metaphor. Students are prompted to pinpoint the two distinct elements being compared within each phrase.

For instance, analyzing “Our class is a buzzing beehive today” requires identifying the comparison between the class and a beehive. Worksheets often bold key words like “like” or “as” to highlight similes.

Questions accompanying each example ask students to explicitly state whether the sentence presents a simile or a metaphor, reinforcing their ability to differentiate between the two. This foundational practice builds confidence and prepares learners for more complex analyses.

Transforming Similes into Metaphors

Worksheet activities challenge students to convert similes into metaphors, deepening their understanding of the nuances between these figures of speech. An example provided is: “She danced like she was floating on air.”

The task requires students to rephrase this sentence as a direct comparison, eliminating “like” or “as”. A possible metaphor would be: “She was a feather, effortlessly gliding across the floor.”

This exercise emphasizes that metaphors assert equivalence, while similes suggest resemblance. Practicing this transformation solidifies comprehension and encourages creative expression, fostering a more intuitive grasp of figurative language.

Advanced Worksheet Challenges

Advanced exercises involve analyzing complex metaphors and identifying personification alongside similes and metaphors, testing a deeper understanding of figurative language.

Analyzing Complex Metaphors

Worksheets dedicated to complex metaphors move beyond simple comparisons, requiring students to dissect layered meanings and understand the underlying conceptual connections. These exercises often present extended metaphors found in poetry or prose, demanding careful consideration of the author’s intent.

Students are challenged to identify the tenor (the subject being described) and the vehicle (the image used to describe it), then articulate how the vehicle illuminates the tenor. For instance, a metaphor like “His ears were cauliflowers left in the reduced section at Sainsburys” requires unpacking the implied commentary on appearance and value.

Effective worksheets will prompt students to explain the emotional impact of the metaphor and how it contributes to the overall theme or message of the text. This analytical approach fosters critical thinking and a nuanced appreciation for figurative language.

Identifying Personification Alongside Similes and Metaphors

Advanced simile and metaphor worksheets frequently integrate personification exercises, encouraging students to distinguish between these related figures of speech. Recognizing personification – attributing human qualities to inanimate objects or abstract concepts – sharpens analytical skills.

Worksheet activities might present sentences containing all three devices, requiring students to label each instance correctly. For example, “The wind whispered secrets through the trees” demonstrates personification, while “Her smile was as bright as the sun” is a simile.

These exercises emphasize that while similes and metaphors focus on comparison, personification creates a sense of life and agency where none exists literally, enriching descriptive language and imagery.

Using Similes and Metaphors in Writing

Similes and metaphors elevate writing by fostering vivid imagery and descriptive language, enabling authors to convey complex ideas with impactful clarity and nuance.

Enhancing Descriptive Language

Similes and metaphors are powerful tools for enriching descriptive writing, moving beyond literal statements to create a more engaging and memorable experience for the reader. Instead of simply stating a fact, these figures of speech allow writers to show, not tell, bringing scenes and characters to life.

For instance, describing a character as “brave” is adequate, but comparing them to “a lion in battle” (a metaphor) or stating they were “as courageous as a lion” (a simile) adds depth and impact. Worksheets help students practice crafting these comparisons, learning to select imagery that effectively conveys specific qualities and emotions. This practice cultivates a more nuanced and evocative writing style, transforming ordinary prose into something truly captivating.

Creating Vivid Imagery

Similes and metaphors excel at constructing vivid imagery, appealing to the reader’s senses and fostering a deeper connection with the text. By drawing comparisons between dissimilar things, these figures of speech unlock new perspectives and create striking mental pictures.

A simile, like “the moon was like a silver coin,” instantly evokes a visual, while a metaphor, such as “the city was a concrete jungle,” paints a more abstract yet equally powerful image. Worksheet exercises focused on these techniques encourage students to think creatively about sensory details and translate abstract concepts into concrete representations. This skill is crucial for developing a strong, imaginative voice and captivating readers with descriptive language.

Finding Similes and Metaphors in Literature

Worksheets guide students to identify similes and metaphors within poems and prose, enhancing analytical skills and appreciation for authors’ stylistic choices.

Analyzing Poetry for Figurative Language

Poetry frequently employs similes and metaphors to create vivid imagery and deeper meaning. Worksheets designed for poetic analysis prompt students to closely examine verses, pinpointing instances where comparisons are made using “like” or “as” – hallmarks of similes.

Furthermore, these exercises encourage the identification of metaphors, where direct comparisons are implied, enriching understanding of the poet’s intent. Students learn to dissect how these figures of speech contribute to the poem’s overall theme, tone, and emotional impact.

By actively searching for and interpreting these literary devices, students develop a more nuanced appreciation for the artistry and complexity inherent in poetic expression, fostering critical thinking skills.

Exploring Similes and Metaphors in Prose

Prose, unlike poetry, often subtly integrates similes and metaphors to enhance descriptive passages and character development. Worksheets focusing on prose analysis guide students to identify these figures of speech within narrative texts, moving beyond explicit comparisons.

Exercises emphasize recognizing implied metaphors that enrich the writing, prompting students to consider how these devices contribute to the story’s atmosphere and thematic depth. Students learn to analyze how authors use figurative language to reveal character traits or symbolize abstract concepts.

This practice cultivates a deeper understanding of how skilled writers employ language to create immersive and meaningful reading experiences.

Resources for Simile and Metaphor Worksheets (PDF)

Online generators and downloadable PDFs provide diverse simile and metaphor worksheets, catering to various skill levels and educational needs for effective practice.

Online Worksheet Generators

Several websites offer dynamic simile and metaphor worksheet generators, allowing educators to customize exercises based on specific learning objectives and student needs. These tools often provide options to adjust difficulty levels, incorporate different question types – such as identification, completion, or sentence transformation – and generate answer keys automatically.

Examples include platforms that create randomized exercises, ensuring students encounter fresh content with each attempt. Some generators even allow teachers to input specific vocabulary or literary passages for analysis, fostering a deeper understanding of figurative language within context. Utilizing these resources saves valuable preparation time and provides targeted practice opportunities for students mastering these essential literary devices.

Downloadable PDF Worksheets

Numerous websites provide readily downloadable PDF worksheets dedicated to simile and metaphor practice. These resources offer a convenient, offline option for reinforcing concepts in the classroom or assigning homework. Many PDFs include a variety of exercise types, ranging from basic identification tasks – distinguishing between similes and metaphors – to more challenging activities like transforming similes into metaphors and analyzing figurative language within literary excerpts.

These printable materials often feature answer keys for easy assessment, and some are designed to align with specific grade levels or curriculum standards, ensuring targeted and effective learning.

Allegory and its Relation to Simile and Metaphor

Similes and metaphors are foundational to allegorical narratives, enriching symbolic meaning and contributing to a deeper understanding of the story’s underlying message.

Understanding Allegorical Narratives

Allegory, originating from the Greek term for “speaking otherwise,” presents a complete narrative with a dual meaning – a surface story and a hidden, symbolic interpretation. These narratives often convey moral, political, or spiritual lessons through characters and events representing abstract concepts.

Unlike simple similes or metaphors, which function within a sentence or phrase, allegory operates on a larger scale, structuring an entire story around sustained symbolic representation. Recognizing allegory requires identifying these underlying meanings, often through careful analysis of recurring motifs and character archetypes.

Effective worksheets can guide students to decipher allegorical layers, prompting them to explore what characters or events might symbolize beyond their literal depiction, fostering critical thinking skills.

How Similes and Metaphors Contribute to Allegory

Similes and metaphors are foundational building blocks within allegorical narratives, serving as crucial tools for establishing symbolic connections. While allegory utilizes extended symbolism throughout an entire story, individual similes and metaphors act as concentrated doses of figurative meaning, enriching the allegorical texture.

These figures of speech don’t merely decorate the text; they actively construct the allegorical framework, hinting at deeper, hidden layers of interpretation. Worksheet exercises focusing on identifying these devices within allegorical passages can help students unlock the narrative’s symbolic core.

Analyzing how specific similes and metaphors function within the broader allegorical context reveals the author’s intended message and enhances comprehension.

breville bread machine manual

Breville Bread Machine Manual: A Comprehensive Guide

This guide simplifies baking with your Breville machine! Discover how to create fresh, flavorful bread, knowing exactly what ingredients are used, with ease and confidence.

Our comprehensive resource explores all features, from basic loaves to advanced techniques, ensuring delightful results every time.

Enjoy the aroma of homemade bread – this manual unlocks the potential of your Breville bread maker for bakers of all skill levels.

Understanding Your Breville Bread Machine

Your Breville bread machine is a versatile kitchen appliance designed to simplify the art of homemade bread baking. It automates much of the process, from kneading and proofing to baking, delivering fresh, delicious bread with minimal effort. Understanding its capabilities is key to unlocking its full potential.

This machine isn’t just for white bread! It caters to diverse baking needs, offering cycles for whole wheat, gluten-free recipes, dough-only preparations, and even jams and compotes. The convenience of a bread machine lies in its ability to consistently produce quality results, regardless of your baking experience.

Homemade bread offers advantages like freshness, superior flavor, and complete control over ingredients. However, achieving consistent results requires understanding the machine’s settings and how they impact the final product. This section will guide you through the core functionalities, preparing you for successful baking adventures. It’s about more than just pushing a button; it’s about understanding the process.

Explore the possibilities!

Key Components and Their Functions

The Breville bread machine boasts several key components working in harmony to create perfect loaves. The baking pan is where the magic happens – ensure it’s securely locked in place. The kneading paddle, crucial for dough development, automatically mixes ingredients. Understanding its function prevents issues like uneven mixing.

The control panel is your command center, featuring cycle selections, crust color options, and timer settings. Familiarize yourself with each button for precise control. Ingredient dispensers (fruit & nut, yeast) automatically add ingredients at optimal times, enhancing convenience.

The viewing window allows you to monitor progress without interrupting the baking cycle. Heating elements provide consistent, even heat for optimal baking. Finally, the power cord ensures a stable connection. Knowing each component’s role is vital for troubleshooting and maximizing your machine’s performance. Proper care extends the lifespan of these essential parts.

Mastering these components unlocks baking success!

Initial Setup and First Use

Before your first loaf, unpack your Breville bread machine and remove all packaging materials. Wipe down the interior with a damp cloth. Thoroughly inspect the baking pan and kneading paddle, ensuring they are clean and free of debris. Proper initial setup is crucial for optimal performance and longevity.

Plug in the machine and perform a test run – select the ‘Basic’ cycle without any ingredients. This burns off any manufacturing residue. You might notice a slight odor; this is normal and will dissipate. Familiarize yourself with the control panel and cycle options.

For your first loaf, we recommend a simple white bread recipe. Accurately measure ingredients and add them to the pan in the order specified in the manual. Securely lock the baking pan into the machine. Select your desired crust color and press start. Enjoy the aroma of freshly baked bread!

A successful start sets the stage for baking enjoyment!

Bread Machine Cycles Explained

Your Breville bread machine offers a variety of pre-programmed cycles designed for different bread types and baking needs. The ‘Basic’ cycle is ideal for standard white bread, providing a balanced rise and bake time. The ‘Whole Wheat’ cycle adjusts kneading and rising times for denser whole wheat flour.

For gluten-free baking, utilize the dedicated ‘Gluten-Free’ cycle, which optimizes the process for gluten-free flour blends. The ‘Dough’ cycle allows you to create dough for baking in a conventional oven. ‘Sweet’ cycle is perfect for enriched breads like brioche or challah.

‘Rapid’ cycle delivers a loaf in under four hours, while ‘French’ cycle creates crusty artisan-style bread. Explore the manual for detailed cycle timings and recommended ingredient types. Understanding each cycle ensures consistently perfect results!

Experiment with cycles to discover your baking preferences.

Basic White Bread Recipe

This classic recipe is perfect for beginners! You’ll need 3 cups (360g) of bread flour, 1 ¼ cups (300ml) of warm water, 2 tablespoons (30ml) of vegetable oil, 1 ½ teaspoons of salt, and 2 ¼ teaspoons (7g) of active dry yeast.

First, add the water and oil to the bread machine pan. Next, add the flour, salt, and yeast on top – ensuring the yeast doesn’t directly contact the liquid. Select the ‘Basic’ cycle and press start.

The machine will handle kneading, rising, and baking automatically. Once the cycle is complete, carefully remove the loaf and let it cool on a wire rack before slicing. Enjoy the fresh, homemade taste! Adjust ingredients slightly for desired texture.

This recipe yields a standard 1.5lb loaf.

Whole Wheat Bread Recipe

Embrace the nutty flavor of whole wheat! For this recipe, you’ll require 2 cups (240g) of whole wheat flour, 1 cup (120g) of bread flour, 1 ¼ cups (300ml) of warm water, 2 tablespoons (30ml) of honey, 1 ½ teaspoons of salt, and 2 ¼ teaspoons (7g) of active dry yeast.

Begin by adding the water and honey to the bread machine pan. Then, layer the whole wheat flour, bread flour, salt, and yeast on top, keeping the yeast separate from the liquid. Select the ‘Whole Wheat’ cycle and initiate the baking process.

The bread machine will expertly knead, rise, and bake the loaf. Upon completion, remove the loaf and allow it to cool completely on a wire rack before slicing. Adjust honey for sweetness.

This recipe provides a hearty and nutritious 1.5lb loaf.

Gluten-Free Baking with Your Breville

Enjoy bread without gluten! Gluten-free baking requires a specialized blend. Use 2 ¼ cups (280g) gluten-free bread flour mix (containing xanthan gum), 1 ½ cups (360ml) warm water, 2 tablespoons (30ml) olive oil, 1 tablespoon sugar, 1 teaspoon salt, and 2 ¼ teaspoons (7g) active dry yeast.

Add ingredients to the pan in the order recommended by your Breville manual – typically liquid first, then dry. Crucially, select the ‘Gluten-Free’ cycle on your machine. This cycle adjusts kneading and rising times for optimal results with gluten-free flours.

Gluten-free doughs are often wetter; don’t add extra flour. The machine will handle the consistency. Once baked, cool completely before slicing. Experiment with different gluten-free flour blends to find your preference.

This yields a delicious 1.5lb gluten-free loaf.

Customizing Recipes: Adjusting Ingredients

Personalize your loaves! Adjusting ingredients allows for unique flavors and textures. For a softer crust, add 1-2 tablespoons of softened butter or oil to the dough; To increase sweetness, add 1-2 tablespoons of sugar or honey.

Experiment with flours: Replace up to 25% of the bread flour with whole wheat flour for a nuttier flavor. For a denser loaf, reduce the liquid by 1-2 tablespoons. Remember, small changes make a big difference.

Spice it up! Add herbs, seeds, or dried fruits to the dispenser for timed additions. Always maintain the total flour weight within the recipe’s range. Carefully monitor the dough consistency during mixing and adjust liquids accordingly.

Keep notes on your adjustments to refine your perfect recipe!

Using the Delay Timer Function

Wake up to fresh bread! The delay timer allows you to schedule baking up to 13 hours in advance. First, add all ingredients to the bread pan, ensuring yeast doesn’t come into direct contact with liquids initially. Select the desired cycle and crust color.

Press the “Timer” button and set the desired end time. Consider that longer delays may require reducing yeast slightly (approximately 1/4 teaspoon) to prevent over-proofing. Avoid using perishable ingredients like milk or eggs for extended delays.

The machine will automatically begin kneading and baking at the appropriate time. Ensure the power supply remains uninterrupted during the delay. For best results, test the delay timer with a simple recipe before attempting complex ones. Enjoy the convenience of freshly baked bread when you need it!

Troubleshooting Common Issues

Is your loaf falling? Often, this indicates too much liquid or insufficient flour. Check ingredient measurements carefully. A dense loaf suggests too little yeast or expired yeast – always verify its freshness. Uneven baking can stem from improper ingredient layering or an unevenly distributed heating element (contact support if persistent).

If the dough isn’t rising, ensure the yeast is active and the machine’s heating element is functioning. A stuck kneading paddle might require a gentle nudge during the kneading cycle (unplug the machine first!). Burning smells usually indicate excess sugar or a cycle that’s too long.

Always double-check the ingredient list and cycle selection. Refer to the error code section for specific issues. Regular cleaning prevents build-up that can affect performance. If problems persist, consult the Breville support website for further assistance.

Error Codes and Their Meanings

“Err 1” typically signals a power interruption during the baking cycle, or a faulty temperature sensor. “Err 2” often indicates a problem with the kneading motor – check for obstructions. “Err 3” suggests an issue with the heating element; discontinue use and contact Breville support. “Err 4” usually means the lid wasn’t securely closed during operation.

If you encounter “Err 5”, it points to a potential issue with the machine’s internal memory. “Err 6” can signify an overheating problem, requiring the machine to cool down before restarting. “Err 7” often relates to a faulty lid sensor. “Err 8” indicates a problem with the dispenser mechanism.

Always unplug the machine before addressing error codes. Consult the full Breville manual for detailed troubleshooting steps. If an error persists after attempting solutions, contact Breville customer service for professional assistance. Ignoring error codes can lead to further damage.

Cleaning and Maintenance

Regular cleaning extends your Breville bread machine’s lifespan. Always unplug the machine and allow it to cool completely before cleaning. The baking pan and kneading paddle are non-stick and can be hand-washed with warm, soapy water, or placed in the dishwasher (top rack recommended).

Wipe the machine’s exterior with a damp cloth. Avoid abrasive cleaners, which can damage the finish. Inspect the heating element periodically for crumbs; gently brush them away. The lid can be wiped down with a damp cloth, ensuring no water enters the control panel.

For stubborn residue in the baking pan, soak it in warm, soapy water. Ensure all parts are thoroughly dry before reassembling. Regular maintenance prevents buildup and ensures optimal performance. Refer to the full manual for detailed cleaning instructions and diagrams.

Understanding the Dispenser Functions

Your Breville bread machine features automatic dispensers for added convenience. The fruit and nut dispenser releases ingredients at the optimal time during the baking cycle, ensuring even distribution without impacting the dough’s rise. The yeast dispenser, a crucial component, keeps yeast separate from wet ingredients until needed, preventing premature activation.

Proper use of these dispensers guarantees consistent results. Always check the dispenser capacity and avoid overfilling. For the fruit and nut dispenser, use dried fruits and chopped nuts. The yeast dispenser requires dry, active yeast; avoid instant yeast unless the recipe specifically allows it.

Refer to your recipe for specific dispenser instructions. Experimenting with different ingredients can enhance your bread, but always follow recommended quantities. Regularly inspect the dispensers for any blockages or residue.

Fruit and Nut Dispenser Usage

The Breville bread machine’s fruit and nut dispenser adds delightful textures and flavors to your loaves. Ensure ingredients are dry; excess moisture can affect dough consistency. Chopped nuts should be roughly ¼ inch in size, while dried fruits like raisins or cranberries work exceptionally well. Avoid sticky fruits like dates, as they may clump.

Do not overfill the dispenser – adhere to the maximum fill line indicated. Overloading can cause the dispenser to jam, interrupting the baking process. For best results, add ingredients that won’t melt or dissolve during baking. Consider coating nuts in a little flour to prevent them from sinking.

Experiment with combinations like cranberries and walnuts, or apricots and almonds. Always refer to your recipe for suggested quantities and timing; Regular cleaning of the dispenser is essential to prevent residue buildup.

Yeast Dispenser: Best Practices

Utilizing the yeast dispenser on your Breville bread machine ensures optimal yeast activation and consistent results. Always use instant or bread machine yeast; active dry yeast requires pre-activation and isn’t suitable for the dispenser. Ensure the dispenser is clean and dry before each use to prevent clumping. Do not compress the yeast when filling the dispenser – a gentle pour is sufficient.

Follow the recipe’s yeast quantity precisely; over or under-filling can impact the loaf’s rise and texture. The dispenser automatically releases the yeast at the appropriate stage of the cycle. Avoid using expired yeast, as its potency diminishes over time.

For optimal performance, store your yeast in an airtight container in a cool, dry place. Regularly inspect the dispenser for any blockages or residue. Proper yeast handling is crucial for successful bread making with your Breville machine.

Advanced Baking Techniques

Beyond basic loaves, your Breville bread machine unlocks a world of advanced baking possibilities. Experiment with different flour blends – rye, spelt, or sourdough – to create unique flavors and textures. Adjust hydration levels (water content) for denser or lighter breads. Utilize the “Dough” cycle for artisan-style loaves, shaping and baking them in a conventional oven for a crustier finish.

Explore European-style breads with longer fermentation times for enhanced flavor complexity. Incorporate pre-ferments like poolish or biga for improved texture and rise. Master the art of scoring dough before baking to control expansion and create beautiful patterns.

Don’t be afraid to experiment with additions like olives, sun-dried tomatoes, or cheeses. Precise measurements and understanding ingredient interactions are key to success in advanced baking with your Breville machine.

Making Dough Only

The “Dough” cycle on your Breville bread machine is incredibly versatile, allowing you to create dough for a variety of baked goods beyond standard loaves. Utilize this function for pizza dough, bagels, pretzels, or even cinnamon rolls – the possibilities are endless! Simply add your ingredients, select the “Dough” cycle, and let the machine do the kneading.

After the cycle completes, remove the dough and proceed with your desired recipe. For pizza dough, stretch and top before baking in a conventional oven. For bagels, shape, boil, and then bake. Remember to adjust ingredient quantities based on your recipe’s requirements.

This cycle provides perfectly kneaded dough, saving you time and effort. Experiment with different flours and hydration levels to achieve the ideal texture for your creations.

Jam and Compote Recipes

Beyond bread, your Breville machine excels at crafting delicious homemade jams and compotes! The “Jam” cycle simplifies preserving seasonal fruits, offering a delightful alternative to store-bought options. Utilize fresh or frozen fruit, combined with sugar and a touch of lemon juice, for vibrant flavors.

Follow tested recipes carefully, ensuring proper sugar-to-fruit ratios for optimal setting. The machine handles the stirring, preventing scorching and ensuring even cooking. Experiment with different fruit combinations – strawberry-rhubarb, peach, or mixed berry are excellent choices.

Once the cycle completes, carefully transfer the hot jam or compote into sterilized jars. Proper sealing is crucial for long-term storage. Enjoy your homemade creations on toast, scones, or as a filling for pastries!

apc smart-ups 2200 manual

This manual details the APC Smart-UPS 2200 series, offering guidance on installation, operation, and troubleshooting․ It covers battery management and advanced configuration options․

Key resources, like the PowerChute software, and specifications for models such as SUA2200RMI2U are included, alongside safety precautions for optimal use․

Documentation is available online at APC’s website (www․apc․com) and on the included CD, providing comprehensive support for your uninterruptible power supply․

Understanding the Smart-UPS 2200 Series

The APC Smart-UPS 2200 series represents a robust line of Uninterruptible Power Supplies (UPS) designed for critical infrastructure protection․ These devices, including models like the SUA2200RMI2U, provide reliable power backup and surge protection for servers, networking equipment, and other sensitive electronics․

This series utilizes line-interactive technology, offering efficient power conditioning and automatic voltage regulation․ The 2U rackmount form factor (as seen in the SMT2200RMI2U) allows for convenient installation in standard server racks․

Understanding the core functionality – battery runtime, load capacity, and monitoring capabilities – is crucial for maximizing the UPS’s effectiveness․ Referencing the user manual and APC’s website (www․apc․com) provides detailed insights into the specific features and benefits of each model within the 2200 series․

Key Features and Benefits

The APC Smart-UPS 2200 series delivers several key advantages, starting with dependable battery backup during power outages, safeguarding equipment from data loss and downtime․ Surge protection shields against damaging voltage spikes and fluctuations, extending the lifespan of connected devices․

PowerChute software integration enables automated shutdown procedures, ensuring orderly system closure during extended outages․ The LCD panel provides real-time status updates on power conditions and UPS performance․

Rackmount compatibility (2U form factor) optimizes space utilization in data centers and server rooms․ Remote monitoring capabilities, via optional network management cards, allow for proactive management and alerts․ These features combine to offer a comprehensive power protection solution, detailed in the user manual and on APC’s website (www․apc․com)․

Package Contents and Initial Inspection

Upon receiving your APC Smart-UPS 2200, carefully inspect the package for any signs of damage during shipping․ The standard package includes the Smart-UPS unit itself, a power cord, documentation (including the user manual – available online and on CD), and potentially mounting hardware․

Verify that all listed components are present․ Check the UPS for any visible physical damage, such as dents or cracks․ Review the included documentation for important safety information and setup instructions․

Retain the packaging materials for potential future transport or warranty claims․ Refer to the manual (and APC’s website: www․apc․com) for a complete list of included items and detailed inspection guidelines before proceeding with installation․

Installation and Setup

Proper installation ensures reliable power protection․ This section guides you through unpacking, placement, and connecting the Smart-UPS 2200 to both power sources and your critical devices․

Follow the manual’s instructions carefully, prioritizing safety and correct wiring for optimal performance and longevity of your UPS system․

Unpacking and Placement

Carefully unpack the Smart-UPS 2200, verifying all components are present according to the package contents list․ Inspect for any shipping damage immediately, and report issues to the carrier and APC support․

Choose a location that is cool, dry, and well-ventilated, avoiding direct sunlight and excessive humidity․ Ensure sufficient space around the unit for airflow – at least 2U of vertical clearance is recommended for the 2U rackmount models like the SUA2200RMI2U․

The UPS should be placed on a stable, level surface or securely mounted in a compatible rack․ Avoid obstructing the ventilation openings, as this can lead to overheating and reduced battery performance․ Consider proximity to the devices it will protect and the power source for convenient cabling․

Do not place near flammable materials or liquids․

Connecting the Smart-UPS to Power

Before connecting, ensure the Smart-UPS input voltage matches your facility’s power supply (100/120V or 230V)․ Incorrect voltage can cause damage․ Connect the provided power cord to the UPS’s input socket and then to a grounded wall outlet․

Avoid using extension cords or power strips, as they can limit the UPS’s ability to protect connected equipment․ For optimal performance, a dedicated circuit is recommended․ Verify the outlet is not overloaded with other devices․

The UPS will perform a self-test upon power-up․ Allow this to complete before connecting any loads․ Confirm the LCD panel indicates normal operation before proceeding․ Refer to the manual for interpreting indicator lights and error codes․

Do not connect to ungrounded outlets․

Connecting Devices to the Smart-UPS

Plug your critical devices into the battery-backed outlets on the rear panel of the Smart-UPS 2200․ These outlets provide power during outages․ Avoid connecting non-essential devices to these outlets to maximize runtime for critical equipment․

The UPS features multiple outlet types, including IEC C13 receptacles․ Ensure you use appropriate power cords for each device․ Do not exceed the UPS’s total load capacity (refer to specifications)․ Overloading can cause the UPS to shut down․

Prioritize connecting servers, networking equipment, and computers․ Less critical devices can be connected to the surge-protected-only outlets, if available․ Regularly check connections for security․

Verify all devices are functioning correctly after connection․

Operation and Monitoring

The Smart-UPS 2200 performs a self-test upon startup․ Monitor its status via the LCD panel, indicators, and PowerChute software for optimal performance․

Regular monitoring ensures reliable power protection and allows for proactive maintenance, extending the life of your UPS and connected equipment․

Power On and Initial Self-Test

Upon connecting the Smart-UPS 2200 to a power source, the unit automatically initiates a comprehensive self-test sequence․ This diagnostic process verifies the functionality of critical components, including the battery, inverter, and internal circuitry․

The initial self-test typically takes several minutes to complete, during which the LCD panel will display the progress․ Observe the indicators for any error messages or alerts․ A successful self-test confirms the UPS is operating within acceptable parameters and ready to provide power protection;

If the self-test fails, consult the troubleshooting section of this manual or contact APC support for assistance․ Do not connect sensitive equipment until the UPS has successfully completed its self-test and is functioning correctly․ Regular self-tests are recommended to ensure continued reliability․

LCD Panel and Indicators

The Smart-UPS 2200 features a comprehensive LCD panel providing real-time status information․ This includes input voltage, output voltage, battery charge level, load percentage, and estimated runtime․ Various indicators, such as LEDs, visually represent the UPS’s operational mode – online, battery, or bypass․

Different LED colors signify specific conditions; green typically indicates normal operation, yellow suggests a warning or potential issue, and red signals a critical fault․ The LCD panel also displays error codes, which are detailed in the troubleshooting section of this manual․

Understanding these indicators is crucial for proactive monitoring and quick identification of potential problems․ Regularly check the LCD panel and indicators to ensure the UPS is functioning optimally and providing reliable power protection for connected equipment․

Monitoring Software: PowerChute

PowerChute software enhances the capabilities of your Smart-UPS 2200, offering advanced monitoring and control features․ It provides detailed information about power quality, battery status, and UPS performance directly on your computer․

Key functionalities include automated shutdown capabilities, protecting your valuable data during extended power outages․ PowerChute allows for customizable settings, enabling you to tailor the shutdown process to your specific needs and connected devices․

The software also provides event logging and notification features, alerting you to potential issues before they escalate․ Download the latest version of PowerChute from the APC website (www․apc․com) to ensure compatibility and access to the newest features․

Battery Management

Proper battery maintenance maximizes UPS lifespan․ This section details runtime expectations, replacement procedures, and testing guidelines for the Smart-UPS 2200 series․

Refer to APC’s website (www․apc․com) for specific battery runtime values based on connected load and operating conditions․

Battery Runtime and Load Capacity

Understanding battery runtime is crucial for effective UPS operation․ The APC Smart-UPS 2200’s runtime varies significantly based on the connected load․ Higher wattage demands will naturally reduce the duration the UPS can provide power during an outage․

APC provides detailed runtime charts on their website (www․apc․com), allowing users to estimate backup time for specific configurations․ These charts consider different load levels, expressed in Watts or VA․ It’s essential to accurately assess the power requirements of all connected devices․

Load capacity refers to the maximum power the UPS can deliver safely․ Exceeding this capacity can lead to overload, potentially damaging the UPS and connected equipment․ Regularly review and adjust connected devices to stay within the specified limits, ensuring reliable backup power when needed․

Remember that battery age and condition also impact runtime․ Older batteries will have reduced capacity, resulting in shorter backup times․

Battery Replacement Procedures

Replacing batteries in the APC Smart-UPS 2200 requires careful attention to safety․ Always disconnect the UPS from the mains power before commencing any battery work․ It’s recommended to use insulated tools to prevent accidental short circuits․

Refer to the user manual for detailed, step-by-step instructions․ Typically, this involves removing the front panel, accessing the battery compartment, and disconnecting the old batteries․ Note the polarity before removal․

Install new batteries of the correct type and specification, ensuring proper connections․ Incorrect battery installation can damage the UPS․ Dispose of old batteries responsibly, following local regulations for battery recycling․

After replacement, allow the UPS to recharge fully before restoring power to connected equipment․ A self-test is recommended to verify proper operation․

Battery Maintenance and Testing

Regular battery maintenance extends the life of your APC Smart-UPS 2200․ Keep the UPS in a cool, dry, and well-ventilated environment, avoiding extreme temperatures․ Dust accumulation should be minimized to prevent overheating;

Periodic self-tests, initiated through the LCD panel or PowerChute software, are crucial for assessing battery health․ These tests simulate a power outage, verifying the battery’s ability to provide backup power․

Monitor battery runtime during self-tests; a significant decrease indicates potential battery degradation․ Consider a battery replacement if runtime falls below acceptable levels․ Consult the manual for expected runtime values․

Annual battery testing is recommended, and records should be kept to track performance over time․ Proper maintenance ensures reliable power protection for your critical equipment․

Troubleshooting

This section addresses common issues with the APC Smart-UPS 2200, including error codes and solutions․ Contact APC support for unresolved problems․

Refer to the manual for detailed error code explanations and troubleshooting steps to quickly restore UPS functionality and protect your equipment․

Common Issues and Solutions

UPS not turning on: Verify the input power cord is securely connected to a working outlet․ Check the rear panel power switch is in the ‘ON’ position․ If still failing, the battery may require replacement․

Battery runtime shorter than expected: Excessive load or aging batteries are common causes․ Reduce connected devices or replace the battery cartridge․ Ensure the UPS isn’t operating in temperature extremes․

LCD panel displaying errors: Consult the ‘Error Codes and Their Meanings’ section for specific troubleshooting steps․ Note the error code before contacting APC support․

Communication issues with PowerChute: Confirm the USB or serial cable is properly connected․ Reinstall the PowerChute software and ensure compatibility with your operating system․ Check device manager for driver conflicts․

Audible alarms: Alarms indicate various conditions, from low battery to overload․ Refer to the manual for alarm code definitions and appropriate actions․

Error Codes and Their Meanings

Code 1: Input Voltage Out of Range: Indicates the incoming voltage is too high or too low for safe operation․ Check the power source and consider a voltage regulator․

Code 2: Overload: The connected load exceeds the UPS capacity․ Disconnect non-essential devices to reduce the load․

Code 3: Battery Failure: The battery is nearing the end of its life or has failed․ Battery replacement is required․

Code 4: Internal Temperature High: The UPS is overheating․ Ensure adequate ventilation and avoid direct sunlight․

Code 5: Fan Failure: The cooling fan has malfunctioned․ Contact APC support for assistance․ Code 6: Communication Failure: Issue with the communication link to PowerChute software․ Verify cable connections and software installation․

Refer to the full manual or APC’s website (www․apc․com) for a complete list of error codes and detailed troubleshooting guidance․

Contacting APC Support

For immediate assistance with your Smart-UPS 2200, APC offers multiple support channels․ Visit the APC website at www․apc․com for a comprehensive knowledge base, FAQs, and downloadable resources․

You can also access their online support portal to submit a support ticket or initiate a live chat session with a technical expert․

Phone support is available during business hours; specific numbers vary by region and are listed on the APC website․

When contacting support, have your UPS model number (SUA2200RMI2U), serial number, and a detailed description of the issue readily available to expedite the process․

APC also provides access to community forums where users can share solutions and best practices․

Advanced Configuration

Explore network management card (NMC) setup for remote monitoring and control of your Smart-UPS 2200․ Firmware updates enhance performance and security․

Configuration details are found in the NMC user manual, available on the APC website, enabling tailored power protection for critical systems․

Network Management Card (NMC) Setup

The Network Management Card (NMC) extends Smart-UPS 2200 capabilities, enabling remote monitoring, control, and automated management of your UPS․ Initial setup involves connecting the NMC to the UPS and your network via Ethernet cable․

Access the NMC’s web interface using a web browser by entering its IP address․ The default credentials are often found in the NMC’s documentation or on the APC website․ Configure the IP address, gateway, and DNS settings to match your network environment․

Once connected, you can monitor battery status, load levels, and environmental conditions remotely․ Configure alerts to notify you of power events, and schedule automated shutdowns to protect your equipment during extended outages․ Refer to the NMC user manual for detailed instructions and advanced configuration options․

Ensure the NMC firmware is up-to-date for optimal performance and security․

Remote Monitoring and Control

With the Network Management Card (NMC) installed, the Smart-UPS 2200 offers robust remote monitoring and control features․ Access the UPS’s status, including battery runtime, load percentage, and input/output voltage, from any web browser․

Configure email notifications to receive alerts regarding power outages, low battery conditions, or temperature thresholds․ Utilize the NMC’s web interface to remotely reboot or gracefully shut down connected equipment, preventing data loss during extended power failures․

Integration with SNMP allows for centralized monitoring within existing network management systems․ The NMC enables proactive power management, ensuring business continuity and minimizing downtime․ Detailed logs and reporting features provide valuable insights into power events․

Secure access to the NMC is crucial; change default credentials immediately․

Firmware Updates

Maintaining up-to-date firmware on your Smart-UPS 2200, particularly the Network Management Card (NMC), is vital for optimal performance and security․ Firmware updates address potential vulnerabilities, enhance compatibility, and introduce new features․

Download the latest firmware from the APC website (www․apc․com) and follow the instructions provided in the accompanying release notes․ The update process is typically performed through the NMC’s web interface․

Ensure a stable network connection during the update to prevent interruptions․ Avoid power outages during the firmware upgrade, as this could potentially damage the NMC․ Regularly check for updates to benefit from the latest improvements․

Refer to the user manual for detailed guidance on the firmware update procedure․

Safety Precautions

Always adhere to general and electrical safety guidelines when installing and operating the Smart-UPS 2200․ Proper grounding and avoiding wet locations are crucial․

Disconnect power before servicing, and never bypass safety features․ Consult the manual for detailed precautions to prevent hazards․

General Safety Guidelines

Prior to installation and operation, carefully review all safety instructions provided within this manual and on the Smart-UPS 2200 unit itself․ This equipment is designed for indoor use only, and must be protected from direct sunlight, excessive heat, moisture, and dust․

Ensure adequate ventilation around the UPS to prevent overheating․ Do not obstruct the ventilation openings․ Avoid operating the unit in potentially explosive atmospheres․ Regularly inspect the power cords for damage and replace them immediately if any defects are found․

Do not attempt to disassemble or modify the UPS internally, as this could result in electrical shock or damage to the equipment․ Servicing should only be performed by qualified personnel․ Always disconnect the UPS from the mains power before performing any maintenance or battery replacement procedures․

Electrical Safety

This APC Smart-UPS 2200 contains hazardous voltages․ Only qualified personnel should perform any electrical maintenance or troubleshooting․ Always disconnect the unit from the mains power supply before accessing any internal components or replacing batteries․ Never work on the UPS while it is energized․

Ensure the UPS is properly grounded to prevent electrical shock․ Do not use extension cords or adapters, as they may not be adequately rated for the UPS’s power requirements․ Avoid overloading the UPS by connecting devices that exceed its capacity․

Inspect power cords regularly for damage and replace them immediately if found․ Do not operate the UPS with a damaged power cord․ Be cautious of potential arc flash hazards during battery replacement or maintenance procedures․

Specifications

The SUA2200RMI2U offers 2200VA/1980W output, with 16A input current․ It’s a 2U rack-mountable, line-interactive UPS designed for 230V environments․

Technical Specifications of SUA2200RMI2U

Model Number: SUA2200RMI2U․ Output Power Capacity: 2200VA / 1980 Watts․ Nominal Output Voltage: 230V․ Output Voltage Regulation: Step-regulated․ Output Frequency: 50/60 Hz +/- 1%․ Output Connections: 8 IEC C13 outlets․ Input Voltage: 230V․

Input Current: 16A․ Input Frequency: 50/60 Hz․ Battery Voltage: 12V․ Battery Runtime: Varies depending on load (see APC․com for details)․ Communication Ports: USB․ Audible Alarm: Yes․ Dimensions (H x W x D): 8․66 x 17․8 x 13․4 inches (220 x 452 x 340 mm)․ Net Weight: 50․7 lbs (23 kg)․

Environmental Specifications

Operating Temperature: 32°F to 104°F (0°C to 40°C)․ Storage Temperature: 32°F to 113°F (0°C to 45°C)․ Relative Humidity: 0 to 95% non-condensing․ Altitude: Up to 10,000 feet (3048 meters)․ Audible Noise: Less than 55 dBA․

Harmonic Distortion: Less than 5% Total Harmonic Distortion (THD)․ Emissions Compliance: FCC Part 15 Class A, CE․ Safety Compliance: UL 1778, CSA․ RoHS Compliance: Compliant․ WEEE Compliance: Compliant․ Mean Time Between Failures (MTBF): >200,000 hours․ Proper ventilation is crucial for optimal performance and longevity of the UPS unit․

Physical Dimensions and Weight

Dimensions (H x W x D): 3․3 inches x 17․6 inches x 28․9 inches (8․4 cm x 44․7 cm x 73․4 cm)․ Rack Mounting Height: 2U․ Net Weight: Approximately 48․5 pounds (22 kg)․ Shipping Weight: Approximately 55 pounds (25 kg)․ Front Panel Height: Standard 19-inch rack mountable․

Chassis Material: Steel․ Color: Black․ Shipping Dimensions: Refer to the packaging label for precise measurements․ Ensure sufficient space around the unit for adequate ventilation․ Proper handling is required during installation to avoid damage․ These dimensions are approximate and may vary slightly․

nha study guide pdf

NHA CCMA Study Guide PDF: A Comprehensive Plan (Updated 12/13/2025)

Comprehensive NHA CCMA study guides, including PDFs with 652+ practice questions, are available on Amazon, alongside resources for exam preparation and baseline assessments.

The NHA Certified Clinical Medical Assistant (CCMA) certification validates competency in both administrative and clinical medical assisting roles.
Preparation materials, like comprehensive study guides available in PDF format, are designed to instill the knowledge and standards necessary for excelling in this field.
These guides aim to provide directed preparation for the CCMA exam, incorporating training hours, implementation tips, and detailed content coverage.
Success hinges on understanding the exam’s scope and utilizing effective study resources, including practice tests and online tools.

II. Understanding the CCMA Exam Format

The NHA CCMA exam is a computer-based, multiple-choice assessment designed to evaluate a candidate’s knowledge and skills. Study guides, often available as PDFs, emphasize the exam’s structure to aid preparation. These resources help familiarize test-takers with the question types and time constraints. Effective study involves utilizing practice tests – with over 652+ and 400+ questions available – to simulate the exam environment and identify areas needing further focus. Understanding the format is crucial for maximizing performance.

III. Core Content Areas of the NHA CCMA Exam

NHA CCMA exam preparation, utilizing study guide PDFs, centers around four key domains: Medical Office Administration, Clinical Procedures, Pharmacology, and Anatomy & Physiology. Comprehensive guides detail each area, ensuring candidates possess foundational knowledge. Resources emphasize mastering vital signs, phlebotomy, insurance billing, and common medications. Success requires a thorough understanding of body systems and medical terminology. Practice questions, exceeding 652+ and 400+, reinforce learning across these core content areas, boosting exam confidence.

A. Medical Office Administration

NHA CCMA study guides prioritize Medical Office Administration, covering patient scheduling, records management, and insurance billing. PDF resources detail coding practices and administrative workflows. Mastering these skills is crucial for exam success. Preparation materials emphasize efficient office operations and regulatory compliance. Practice questions focus on real-world scenarios, enhancing practical application. Effective study involves understanding HIPAA guidelines and ethical considerations within a medical office setting, ensuring comprehensive readiness.

B. Clinical Procedures

NHA CCMA study guide PDFs heavily emphasize essential Clinical Procedures, including vital signs measurement and phlebotomy techniques. Resources detail specimen collection protocols and proper handling procedures. Mastering these skills is vital for exam competency. Practice questions simulate real-world clinical scenarios, building confidence. Preparation materials cover infection control and patient safety protocols. A strong foundation in these procedures ensures readiness for practical application in a medical assisting role.

C. Pharmacology

NHA CCMA study guide PDFs dedicate significant sections to Pharmacology, focusing on common medications, their uses, and potential side effects. Resources cover medication administration techniques, dosage calculations, and drug interactions. Prior experience as a scribe can be beneficial here. Practice questions assess understanding of pharmaceutical principles and terminology. Mastering this area is crucial for safe and effective patient care, ensuring exam success and clinical competence.

D. Anatomy and Physiology

NHA CCMA study guide PDFs emphasize a strong foundation in Anatomy and Physiology, covering all major body systems. Resources detail anatomical structures, physiological processes, and common medical terminology. A&P knowledge is essential for understanding disease states and clinical procedures. Prior university coursework proves advantageous. Practice questions focus on applying anatomical and physiological concepts to real-world medical scenarios, ensuring comprehensive preparation for the certification exam.

IV. Utilizing NHA CCMA Study Guides

Effective use of NHA CCMA study guide PDFs is crucial for success. Official NHA resources provide directed preparation, instilling necessary knowledge and standards. Unofficial options, like those found on Amazon, offer supplemental practice with 652+ questions. Materials often include baseline practice tests to assess initial understanding. Seamless implementation requires dedicated study hours and utilizing all provided tools for optimal exam readiness.

A. Official NHA Study Guide Resources

NHA’s official study guides, often available in PDF format, are designed to provide directed preparation for the CCMA certification exam. These resources focus on instilling the knowledge and professional standards essential for excelling in medical assisting. They incorporate detailed content outlines, helping candidates understand required training hours and offering tips for seamless implementation. Utilizing these guides builds a strong foundational understanding for exam success.

B. Unofficial Study Guide Options (e.g., Amazon Resources)

Numerous unofficial NHA CCMA study guides, frequently available as PDF downloads on platforms like Amazon, offer supplementary exam preparation. These resources, such as the “All in One” guides, often include a substantial number of practice questions – exceeding 400 and even reaching 652+. They can provide diverse perspectives and additional practice, complementing official NHA materials. Consider these options to enhance your study plan and maximize your chances of success.

V. Self-Study Strategies for the NHA CCMA Exam

Effective self-study requires a structured approach, utilizing available PDF study guides and online resources. Creating a realistic study schedule is crucial, alongside implementing effective note-taking techniques. Leverage platforms like Reddit’s r/MedicalAssistant for shared experiences and advice from fellow test-takers. Consistent practice with numerous questions, found in supplemental guides, builds confidence and reinforces knowledge. Prior experience, like scribing, can also significantly aid in comprehension and exam success.

A. Creating a Study Schedule

A successful study schedule for the NHA CCMA exam necessitates dedicating sufficient hours, informed by PDF study guide content outlines. Allocate time for each core area – administration, clinical procedures, pharmacology, and anatomy. Incorporate regular practice questions from resources like those available on Amazon, aiming for consistent review. Schedule baseline practice tests to assess initial knowledge and track progress. Prioritize flexibility, allowing for adjustments based on individual learning pace and comprehension of the PDF materials.

B. Effective Note-Taking Techniques

When utilizing NHA CCMA PDF study guides, employ active recall techniques during note-taking. Summarize key concepts in your own words, rather than copying directly. Utilize visual aids like mind maps or flowcharts to connect related information. Focus on areas where your baseline practice tests reveal weaknesses. Regularly review and revise your notes, integrating practice questions from PDF resources to reinforce learning. Concise, organized notes derived from the PDF will prove invaluable during final exam preparation.

C. Leveraging Online Resources (Reddit r/MedicalAssistant)

The Reddit community r/MedicalAssistant offers valuable insights from individuals who’ve recently passed the NHA CCMA exam. Many users share self-study experiences and recommend specific PDF study guide resources. Search the subreddit for discussions on effective strategies and challenging exam topics. PDF study materials are often discussed, with users sharing their experiences. Supplement your PDF study with advice from peers, focusing on areas where you need additional support and clarification, enhancing your overall preparation.

VI. Practice Questions and Mock Exams

Utilizing practice questions is crucial for NHA CCMA success; resources like Amazon offer guides with 652+ and 400+ practice questions in PDF format. These questions mirror the exam’s format and content, identifying knowledge gaps. Mock exams simulate the testing environment, building confidence and time-management skills. Thoroughly analyze your results from PDF practice tests, focusing on weak areas. Consistent practice with PDF materials significantly improves your chances of passing the certification exam.

A. Importance of Practice Testing

Practice testing, especially utilizing PDF study guides, is paramount for NHA CCMA exam preparation. Resources offering 652+ and 400+ questions, available in PDF format, allow candidates to assess their readiness. These tests pinpoint areas needing improvement, reinforcing knowledge and building confidence. PDF practice questions mimic the exam’s structure, reducing test anxiety. Consistent practice with PDF materials enhances recall and application of learned concepts, ultimately maximizing your potential for a successful exam outcome.

B. Analyzing Practice Test Results

Thorough analysis of PDF practice test results is crucial. Don’t just check scores; identify specific knowledge gaps revealed by incorrect answers. PDF study guides often include explanations – utilize them! Categorize errors by content area (administration, clinical, pharmacology). Revisit relevant sections within your PDF study materials. Track progress across multiple practice tests to monitor improvement. This iterative process, fueled by PDF resources, ensures focused study and maximizes your understanding before the NHA CCMA exam.

C. Number of Practice Questions Available (652+ & 400+)

Extensive practice is key, and numerous PDF resources deliver! Amazon offers study guides boasting over 652 NHA CCMA practice questions, while others provide a focused set of 400. These PDF question banks simulate the exam environment, building confidence and identifying weak areas. Supplement official NHA materials with these additional PDF resources for comprehensive preparation. Utilizing both quantities ensures thorough content review and maximizes your chances of success on the NHA CCMA certification exam.

VII; Key Topics within Medical Office Administration

NHA CCMA PDF study guides heavily emphasize medical office administration. Core areas include efficient patient scheduling, meticulous records management, and navigating insurance billing and coding procedures. Mastering these topics is crucial for exam success. PDF resources often provide detailed explanations and practice scenarios. Focus on understanding the workflow, legal considerations, and ethical practices within a medical office setting, as these are frequently tested on the NHA CCMA exam.

A. Patient Scheduling and Records Management

NHA CCMA PDF study materials dedicate significant attention to patient scheduling and records management; These resources cover appointment types, prioritization, and effective communication techniques. PDF guides detail electronic health record (EHR) systems, legal aspects of record keeping (HIPAA), and proper documentation procedures. Understanding how to maintain accurate and confidential patient information is vital. Practice scenarios within PDFs help solidify skills in scheduling, filing, and retrieving medical records efficiently.

B. Insurance Billing and Coding

NHA CCMA PDF study guides thoroughly address insurance billing and coding procedures. These resources explain CPT, ICD-10, and HCPCS coding systems, alongside claim submission processes. PDF materials cover insurance verification, authorization requirements, and common billing errors. Understanding medical terminology related to billing is emphasized. Practice exercises within the PDFs help master coding accuracy and ensure compliant claim submissions, crucial for maximizing reimbursement and avoiding denials.

VIII. Essential Clinical Procedures to Master

NHA CCMA PDF study guides prioritize mastering essential clinical procedures. These PDF resources detail vital signs measurement, accurate documentation, and infection control protocols. Phlebotomy and specimen collection techniques are extensively covered, including proper handling and labeling. PDF materials also address EKG performance, medication administration, and wound care. Practice scenarios within the PDFs reinforce procedural competency, preparing candidates for practical application and ensuring patient safety during clinical tasks.

A. Vital Signs Measurement

NHA CCMA PDF study guides emphasize accurate vital signs measurement as a core skill. These PDF resources detail proper techniques for measuring temperature, pulse, respiration, and blood pressure. Understanding normal ranges and identifying abnormalities is crucial, as highlighted in the PDF materials. PDFs also cover documentation procedures and troubleshooting common errors. Practice questions within the PDFs reinforce competency, preparing candidates for practical application and ensuring accurate patient assessment during clinical encounters.

B. Phlebotomy and Specimen Collection

NHA CCMA PDF study guides dedicate significant attention to phlebotomy and specimen collection techniques. These PDF resources cover venipuncture procedures, proper tube order of draw, and accurate labeling protocols. Understanding safety precautions, infection control, and potential complications is emphasized within the PDF materials. PDFs also detail specimen handling, storage, and transportation requirements. Practice questions within the PDFs solidify understanding, preparing candidates for competency and ensuring accurate results for diagnostic testing.

IX. Pharmacology Review Focus Areas

NHA CCMA PDF study guides prioritize pharmacology review, focusing on common medications and their uses. These PDF resources detail drug classifications, routes of administration, and potential side effects. Understanding medication interactions, dosage calculations, and legal considerations is crucial, as highlighted in the PDF materials. PDFs also emphasize medication administration techniques and patient education. Practice questions within the PDFs reinforce knowledge, preparing candidates to confidently handle medication-related tasks in a clinical setting.

A. Common Medications and Their Uses

NHA CCMA PDF study guides extensively cover common medications, categorizing them by therapeutic use. These PDF resources detail frequently prescribed drugs for conditions like hypertension, diabetes, and infections. Understanding brand and generic names, drug classifications, and mechanisms of action is emphasized within the PDFs. PDF materials also focus on recognizing potential adverse reactions and contraindications. Practice questions in the PDFs assess knowledge of appropriate medication usage and patient monitoring, ensuring exam readiness.

B. Medication Administration Techniques

NHA CCMA PDF study guides thoroughly explain safe medication administration techniques. These PDF resources detail proper routes – oral, intramuscular, subcutaneous, and topical – with visual aids. Emphasis is placed on the “five rights” of medication administration, dosage calculations, and documentation procedures within the PDFs. PDF materials also cover handling and storage protocols. Practice questions in the PDFs assess competency in preparing and administering medications accurately, ensuring patient safety and exam success.

X. Anatomy and Physiology: Foundational Knowledge

NHA CCMA PDF study guides prioritize a strong anatomy and physiology foundation. These PDF resources systematically cover body systems – skeletal, muscular, nervous, cardiovascular, and more – with detailed diagrams. The PDFs emphasize understanding organ functions and their interrelationships, crucial for clinical procedures. PDF materials also include common medical terminology, prefixes, suffixes, and root words. Practice questions within the PDFs reinforce comprehension of anatomical structures and physiological processes, vital for passing the CCMA exam.

A. Body Systems Overview

NHA CCMA PDF study guides deliver a comprehensive body systems overview. These PDF resources detail the skeletal, muscular, nervous, cardiovascular, respiratory, digestive, urinary, endocrine, lymphatic, and reproductive systems. The PDFs explain each system’s organs, functions, and common pathologies. Diagrams and illustrations within the PDFs enhance understanding. PDF practice questions assess knowledge of system interactions and their clinical relevance. Mastering this overview, as presented in the PDF, is foundational for success on the CCMA exam.

B. Common Medical Terminology

NHA CCMA PDF study guides emphasize mastering common medical terminology. These PDF resources break down prefixes, suffixes, and root words, enabling accurate interpretation of medical records. The PDFs cover terms related to anatomy, physiology, diseases, and procedures. Flashcards within the PDFs aid memorization. PDF practice questions test the application of terminology in clinical scenarios. A strong grasp of medical terminology, as reinforced by the PDF, is crucial for effective communication and exam performance.

XI. Time Management for Exam Preparation

Effective time management is vital when utilizing an NHA CCMA PDF study guide. Create a realistic study schedule, allocating specific time slots for each content area. The PDF resources should be integrated into this schedule. Prioritize weaker areas identified through baseline practice tests. Break down study sessions into manageable chunks to avoid burnout. PDF practice questions should be timed to simulate exam conditions. Consistent, focused study, guided by the PDF, maximizes retention and minimizes last-minute stress.

XII. Resources for Additional Support

Supplementing your NHA CCMA PDF study guide is crucial for success. The Reddit community r/MedicalAssistant offers valuable insights and peer support. Utilize the PDF’s content alongside online forums for clarification. Amazon provides numerous PDF-based resources and practice questions. Consider joining study groups for collaborative learning. Don’t hesitate to seek guidance from experienced medical assistants. Leverage the PDF as a foundation, but broaden your support network for a comprehensive understanding of the exam material.

XIII. Understanding Baseline Practice Tests

Baseline practice tests, often included with NHA CCMA PDF study guides, are vital diagnostic tools. These initial assessments reveal your strengths and weaknesses before intensive studying. Analyze your results carefully to pinpoint areas needing focused attention. The PDF resources often incorporate these tests for self-evaluation. Don’t view the score as definitive, but as a roadmap for your study plan. Use the PDF’s content to address identified gaps and track your progress with subsequent practice tests.

XIV. Digital Tools and Online Tests

Many NHA CCMA PDF study guides now integrate digital tools and access to online tests. These resources, often exceeding 3250 questions, provide a dynamic learning experience. Utilize these platforms for realistic exam simulations and immediate feedback. PDF materials frequently include links or codes for online access. Leverage these digital components to reinforce concepts and identify areas for improvement. Online tests mimic the exam environment, building confidence and refining time-management skills, crucial for success.

XV. Exam Day Strategies

Review your PDF study guide’s key concepts one last time, but avoid cramming new information. Prioritize a good night’s sleep and a healthy breakfast. Arrive early at the testing center to minimize stress. During the exam, carefully read each question and manage your time effectively. Utilize the process of elimination when unsure of an answer. PDF practice tests build stamina; apply that experience. Stay calm, focused, and trust in your preparation—your NHA CCMA PDF study guide has prepared you!

XVI. Common Mistakes to Avoid

Don’t underestimate the importance of thoroughly reviewing your PDF study materials. A frequent error is rushing through questions without careful reading. Avoid changing answers unless you’re absolutely certain of a mistake. Neglecting to practice with timed PDF mock exams is another pitfall. Don’t skip questions – attempt every one, even if it’s a guess. Relying solely on memorization, instead of understanding concepts from your NHA CCMA PDF guide, hinders success. Prioritize consistent study and avoid last-minute cramming!

XVII. Post-Exam Analysis and Feedback

After completing the NHA CCMA exam, carefully review your performance report. Identify areas of weakness highlighted by the results, referencing your PDF study guide for clarification. Seek feedback from peers or instructors regarding challenging topics. Analyze incorrect answers to understand the reasoning behind them. Utilize the explanations provided with practice questions in your PDF resources. This self-assessment, guided by your NHA CCMA PDF, is crucial for continuous improvement and solidifying your medical assisting knowledge.

XVIII. Maintaining Certification

NHA CCMA certification requires ongoing professional development. Regularly revisit your PDF study guide to refresh foundational knowledge, especially regarding evolving medical practices. Participate in continuing education courses to earn credits for renewal. Stay updated on changes in pharmacology, procedures, and regulations – resources often referenced within comprehensive NHA CCMA PDF guides. Utilize online platforms and professional organizations for current information. Consistent review, aided by your PDF, ensures continued competence and adherence to industry standards.

XIX. The Role of Prior Experience (e.g., Scribing)

Prior medical experience, like scribing, significantly aids CCMA exam preparation. Familiarity with pathology and medications, gained through scribing, complements your NHA CCMA PDF study guide. Focus your PDF review on areas where experience is limited, such as insurance billing or specific clinical procedures. Leverage your practical knowledge to contextualize concepts within the PDF. Scribing provides a foundation, allowing for more efficient and targeted study using the NHA CCMA PDF, enhancing comprehension and retention.

XX. Updates for 2024-2025 & 2025-2026 Exams

Ensure your NHA CCMA PDF study guide is current for the 2024-2025 and 2025-2026 exam cycles. Updates reflect evolving medical practices and exam content. Look for PDF resources specifically labeled for these years to avoid outdated information. Amazon offers updated PDF prep materials with practice questions. Verify the PDF’s publication date and cross-reference with official NHA announcements. Utilizing a recent NHA CCMA PDF maximizes your chances of success by aligning your preparation with the latest exam standards.

XXI. Conclusion: Achieving CCMA Success

Utilizing a well-chosen NHA CCMA PDF study guide is pivotal for exam success. Combine PDF resources with consistent self-study, practice questions (652+ available), and online tools like Reddit’s r/MedicalAssistant. A current PDF ensures content alignment with the 2025 exam. Prior experience, like scribing, complements PDF study. Remember, thorough preparation, leveraging a comprehensive NHA CCMA PDF, and effective test-taking strategies are key to becoming a certified Clinical Medical Assistant.