Patiowell 10×10 Shed Instructions PDF: A Comprehensive Guide
Navigating the assembly can be tricky; finding the Patiowell 10×10 shed instructions PDF online is crucial for a smooth‚ successful build experience.
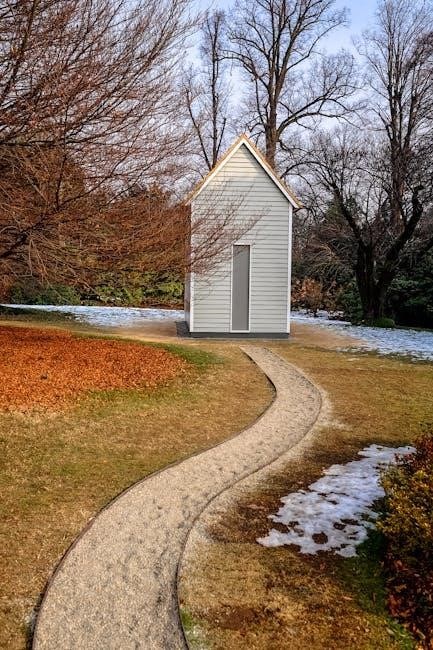
Understanding the Patiowell 10×10 Shed Kit
The Patiowell 10×10 shed kit typically arrives as a collection of pre-cut wooden components‚ hardware‚ and detailed (hopefully!) instructions. Familiarizing yourself with the kit’s contents before starting assembly is paramount. Expect wall panels‚ roof rafters‚ sheathing‚ siding‚ a door kit‚ and potentially window components.
Understanding the labeling system used for parts – often alphanumeric – will save considerable frustration. The included PDF instructions‚ though sometimes challenging to decipher‚ are your primary guide. Knowing what to expect within the box minimizes delays and ensures a more efficient building process‚ ultimately leading to a sturdy and functional shed.
Locating the Patiowell 10×10 Shed Instructions PDF
Finding the official Patiowell 10×10 shed instructions PDF can sometimes prove unexpectedly difficult. Start by checking the box the kit arrived in – a printed QR code often links directly to the digital manual. If absent‚ a thorough search on Patiowell’s official website is essential.
Alternatively‚ utilize search engines with specific keywords like “Patiowell 10×10 shed assembly instructions PDF.” Be cautious of unofficial sources; prioritize downloads from Patiowell directly to ensure accuracy and avoid potentially outdated or incorrect guides. Having the correct PDF is vital for proper assembly.

Pre-Assembly Preparation
Before commencing construction‚ meticulous pre-assembly preparation is paramount for a stress-free Patiowell 10×10 shed build. This begins with a comprehensive inventory of all parts‚ cross-referencing against the parts list in the instructions PDF. Simultaneously‚ gather the necessary tools – drills‚ screwdrivers‚ levels‚ and safety gear.
Crucially‚ prepare the build site‚ ensuring a level foundation. Proper preparation minimizes errors and ensures structural integrity‚ ultimately saving time and frustration during the assembly process.
Inventory of Parts
A thorough inventory is the first step; carefully unpack and compare all components against the detailed parts list within the Patiowell 10×10 shed instructions PDF. Verify quantities of wall panels‚ roof rafters‚ siding‚ hardware (screws‚ nails‚ brackets)‚ and the door kit.
Note any discrepancies immediately – missing or damaged parts should be reported to Patiowell customer support before proceeding. Accurate inventory prevents mid-build delays and ensures a complete‚ structurally sound shed.
Tools Required for Assembly
Preparation is key for efficient construction; the Patiowell 10×10 shed instructions PDF outlines essential tools. You’ll need a drill/driver with various bits‚ a level (spirit or laser)‚ a measuring tape‚ a hammer‚ and a circular saw or hand saw for minor adjustments.
Safety glasses and work gloves are crucial. A square ensures accurate angles‚ while a wrench set assists with hardware tightening. Having these tools ready streamlines the assembly process significantly.
Site Preparation & Foundation
A solid base ensures shed longevity; the Patiowell 10×10 shed instructions PDF emphasizes proper site preparation. Choose a level location‚ clear of debris and vegetation. Accurate measurements are vital for a square foundation.
Consider drainage to prevent water damage. The foundation must support the shed’s weight. Options include gravel‚ concrete‚ or wooden skids – each detailed within the PDF. Proper preparation prevents future structural issues and ensures stability;
Foundation Options for the 10×10 Shed
The Patiowell 10×10 shed instructions PDF details several foundation choices. A gravel foundation offers good drainage and is cost-effective‚ requiring a compacted base. Concrete slab foundations provide maximum stability but are more labor-intensive.
Wooden skid foundations are suitable for temporary structures or uneven ground. The PDF outlines material lists and step-by-step guides for each option‚ emphasizing the importance of a level and stable base for long-term shed integrity.
Gravel Foundation
The Patiowell 10×10 shed instructions PDF recommends a minimum of four inches of compacted gravel for a stable base. Begin by excavating the area‚ then lay down landscape fabric to prevent weed growth. Add gravel in layers‚ compacting each layer thoroughly with a plate compactor.
Ensure the gravel bed is level before proceeding with frame assembly. This foundation type offers excellent drainage and is relatively inexpensive‚ making it a popular choice for shed construction.
Concrete Slab Foundation
According to the Patiowell 10×10 shed instructions PDF‚ a concrete slab provides the most durable and level foundation. Pour a slab at least four inches thick‚ reinforced with rebar for added strength. Proper preparation is key – ensure the ground is compacted and level before pouring.
Allow the concrete to cure completely before beginning shed assembly. This method requires more effort and expense but offers superior long-term stability and resistance to settling.
Wooden Skid Foundation
The Patiowell 10×10 shed instructions PDF details a wooden skid foundation as a cost-effective and relatively simple option. Construct a frame using pressure-treated lumber‚ ensuring it’s level and square. This allows for easier relocation of the shed if needed.
Place gravel underneath the skids for drainage and stability. Regularly inspect the wood for rot or damage‚ as this foundation type is more susceptible to moisture-related issues than concrete.
Shed Frame Assembly
The Patiowell 10×10 shed instructions PDF emphasizes careful frame assembly as the foundation for structural integrity. Begin with the base frame‚ ensuring square corners and secure connections using provided hardware. Next‚ construct the wall frames‚ following the diagrams precisely.
Pay close attention to door and window openings. The PDF will guide you through rafter installation‚ crucial for roof support. Accurate measurements and proper alignment are vital throughout this stage.
Wall Frame Construction
The Patiowell 10×10 shed instructions PDF details wall frame construction‚ starting with assembling the side and end wall frames individually. Use the provided lumber and connectors‚ ensuring precise measurements as indicated in the diagrams.
Pay close attention to stud spacing and top/bottom plate alignment. The PDF stresses the importance of pre-drilling holes to prevent splitting the wood. Once assembled‚ temporarily brace the frames for stability before proceeding to the next step.
Roof Rafter Installation
The Patiowell 10×10 shed instructions PDF guides you through roof rafter installation‚ emphasizing accurate spacing and secure attachment to the wall frames. Begin by identifying the rafter angle and cutting the ends accordingly.
The PDF highlights using appropriate fasteners and ensuring rafters are plumb and level. Temporary bracing is crucial for stability during installation. Pay attention to the ridge board connection‚ as it’s vital for roof integrity. Following the diagram closely is essential for a structurally sound roof.

Door Frame Installation
The Patiowell 10×10 shed instructions PDF details door frame installation‚ stressing the importance of a square and plumb setup. Begin by assembling the door frame on a flat surface‚ ensuring accurate dimensions. The PDF emphasizes using shims to achieve perfect alignment within the wall opening.
Secure the frame with screws‚ referencing the diagram for correct placement; Proper installation prevents door binding and ensures smooth operation. Double-check measurements before permanently fixing the frame to the shed’s structure.
Wall Panel Installation
The Patiowell 10×10 shed instructions PDF guides users through wall panel installation‚ highlighting the need for a helper due to panel size and weight; Begin by carefully lifting each panel into position‚ aligning it with the assembled frame. The PDF stresses using screws to securely attach the panels‚ following the specified pattern.
Maintaining squareness is critical; utilize temporary bracing to ensure walls remain plumb during attachment. Consistent screw placement guarantees structural integrity and a professional finish.
Attaching Wall Panels to the Frame
According to the Patiowell 10×10 shed instructions PDF‚ attaching wall panels requires precision. Start by positioning the panel against the frame‚ ensuring a flush fit. The manual details specific screw types and placement – typically spaced every 6-8 inches along studs and top/bottom plates.
Pre-drilling pilot holes is recommended to prevent splitting the wood. The PDF emphasizes using a level to confirm vertical alignment before fully securing each panel‚ contributing to overall shed stability.
Ensuring Squareness and Alignment
The Patiowell 10×10 shed instructions PDF stresses the importance of a square structure. Utilize the 3-4-5 triangle method – measuring diagonally from corner to corner – to verify squareness before fully securing wall panels. Any discrepancy indicates a need for adjustment.
Consistent alignment is achieved by frequently checking with a level and plumb bob during panel attachment. The PDF highlights that a slightly out-of-square shed can cause roofing and door installation issues later on.
Roofing Installation

The Patiowell 10×10 shed instructions PDF details a two-stage roofing process. First‚ install the roof sheathing‚ ensuring proper overlap and secure fastening to the rafters‚ as illustrated in the diagrams.
Next‚ apply your chosen roofing material – shingles or metal – following the PDF’s specific guidance for overlap‚ nailing patterns‚ and sealing. Proper installation prevents leaks and ensures long-term weather protection. The manual emphasizes careful measurement and cutting for a neat finish.
Installing Roof Sheathing
The Patiowell 10×10 shed instructions PDF clearly outlines sheathing installation. Begin by laying plywood sheets perpendicularly to the rafters‚ ensuring a slight overhang on all sides for drip edge attachment.
Secure each sheet with nails or screws‚ spaced according to the manual’s specifications – typically 6 inches along the edges and 12 inches in the field. Stagger the seams for added strength and stability. Precise alignment is crucial for a level roofing surface.
Applying Roofing Material (Shingles/Metal)

The Patiowell 10×10 shed instructions PDF details roofing material application. Start at the bottom edge‚ overlapping each row according to the material’s guidelines – typically exposing 3-5 inches. Secure shingles with roofing nails‚ driven straight and flush.

For metal roofing‚ follow the manufacturer’s instructions for panel overlap and fastener placement. Proper sealing around vents and chimneys is vital to prevent leaks. Careful adherence to the PDF’s diagrams ensures a weatherproof roof.
Door Installation
The Patiowell 10×10 shed instructions PDF guides door installation‚ beginning with hanging the door within the prepared frame. Ensure proper alignment and smooth swing before securing hinges. Adjustments may be needed for a flush fit.
Next‚ install door hardware – latch‚ handle‚ and potentially a lock. The PDF provides specific placement details for these components. A properly installed door is crucial for security and weather protection‚ so follow the instructions closely for optimal results.
Hanging the Shed Door

Referring to the Patiowell 10×10 shed instructions PDF‚ carefully position the door within the door frame. Align the hinges with the pre-drilled holes‚ ensuring a snug fit. Secure the hinges using the provided screws‚ starting with the top hinge for initial support.
Test the door’s swing‚ making adjustments as needed to achieve smooth operation. The PDF emphasizes checking for squareness and levelness before fully tightening all screws. A properly hung door prevents drafts and ensures secure closure.

Installing Door Hardware (Latch‚ Handle)
The Patiowell 10×10 shed instructions PDF details hardware installation. Begin by marking the latch and handle positions on the door‚ referencing the provided diagrams. Drill pilot holes before attaching the hardware with screws‚ preventing wood splitting;
Ensure the latch aligns correctly with the strike plate on the door frame for secure closure. Test the handle and latch functionality repeatedly. Tighten all screws firmly‚ but avoid over-tightening‚ which could damage the wood or strip the screw holes.
Window Installation (If Applicable)
The Patiowell 10×10 shed instructions PDF guides window installation‚ if your kit includes them. Carefully prepare the window openings in the wall panels‚ ensuring accurate dimensions. Apply a bead of sealant around the window frame before inserting it into the opening.
Secure the window with screws‚ checking for squareness and plumb. Insulate around the window frame with expanding foam to prevent drafts and moisture intrusion. Finally‚ test the window’s operation and apply any finishing trim.
Preparing Window Openings
Referring to the Patiowell 10×10 shed instructions PDF is vital when preparing window openings. Accurately mark the designated areas on the wall panels‚ using a level to ensure straight lines. Carefully cut out the openings with a saw‚ following the PDF’s specified dimensions.
Reinforce the edges of the openings with additional framing lumber for structural support. Ensure the openings are sized correctly to accommodate the windows‚ allowing for a snug fit and proper sealing.
Securing Windows in Place
The Patiowell 10×10 shed instructions PDF details window installation. Carefully position the windows within the prepared openings‚ ensuring they are square and level. Utilize shims to achieve a perfect fit and support the window frame.
Secure the windows using screws or nails‚ as indicated in the PDF‚ driving them into the framing lumber. Apply a weatherproof sealant around the window perimeter to prevent water infiltration and drafts‚ guaranteeing a durable‚ airtight seal.
Siding Installation
The Patiowell 10×10 shed instructions PDF guides siding attachment. Begin at the bottom‚ aligning the first siding panel carefully. Overlap each subsequent panel according to the PDF’s specifications‚ ensuring a weather-resistant barrier.
Secure the siding using nails or screws‚ maintaining consistent spacing. Pay close attention to corner and edge treatments‚ following the diagram in the PDF. Proper installation prevents moisture damage and enhances the shed’s aesthetic appeal‚ creating a finished look.
Attaching Siding Panels
Referring to the Patiowell 10×10 shed instructions PDF is vital for correct siding attachment. Start at the base‚ ensuring panels are level and square before securing. The PDF details nail or screw placement – typically spaced every 12-16 inches along studs.
Maintain consistent overlap as shown in the diagrams. Pre-drilling can prevent splitting‚ especially with harder wood siding. Careful attachment ensures a weatherproof and structurally sound exterior‚ protecting your shed’s contents from the elements.
Overlapping and Securing Siding
The Patiowell 10×10 shed instructions PDF emphasizes proper overlapping for weather resistance. Typically‚ siding panels overlap by at least one inch‚ creating a shingle-like effect to shed water effectively. Secure each panel using the specified fasteners – nails or screws – detailed in the manual.
Ensure fasteners penetrate the siding and stud framing. Consistent overlap and secure attachment prevent gaps and potential water damage‚ maintaining the shed’s structural integrity and protecting stored items.
Troubleshooting Common Assembly Issues
The Patiowell 10×10 shed instructions PDF often addresses common hurdles. Misaligned parts are frequent; double-check connections and loosen bolts for adjustments. Roofing leaks can occur if sheathing isn’t properly sealed – apply roofing cement as needed.
Payment issues or account discrepancies with Audible can disrupt focus; resolve those separately. Refer to the PDF’s diagrams and re-examine steps if encountering difficulties. Patience and careful review are key to overcoming assembly challenges.
Dealing with Misaligned Parts
The Patiowell 10×10 shed instructions PDF highlights that slight misalignments are common during assembly. Don’t force connections! Loosen previously tightened bolts on adjacent sections to allow for adjustment. Gently nudge parts into place‚ ensuring they fit flush before re-tightening.
If significant misalignment persists‚ double-check the orientation of each piece against the diagrams. A stable foundation is crucial; uneven ground exacerbates alignment issues. Remember to pause Audible subscriptions if shed building consumes your time!
Addressing Roofing Leaks
The Patiowell 10×10 shed instructions PDF emphasizes careful roofing installation to prevent leaks. Ensure proper overlap of shingles or metal panels‚ following the specified guidelines. Inspect all seams and nail/screw placements for secure fastening. Apply roofing sealant around vents‚ chimneys‚ or any penetrations.
If leaks occur‚ immediately locate the source and re-seal. Consider pausing your Audible subscription for focused repairs; a quiet workspace aids concentration. Check for damaged roofing materials needing replacement.
Post-Assembly Maintenance
The Patiowell 10×10 shed instructions PDF recommends regular inspections to maintain structural integrity. Check for loose screws‚ damaged siding‚ and roof issues annually. Apply wood treatment to protect against rot and insects‚ extending the shed’s lifespan.
While maintaining your shed‚ consider an Audible subscription for enjoyable work companionship! Listen to DIY audiobooks during upkeep. Address any concerns promptly to avoid costly repairs‚ and ensure continued protection of your stored items.
Regular Inspections
Following the Patiowell 10×10 shed instructions PDF‚ conduct inspections at least twice yearly – spring and fall. Examine the roof for leaks‚ siding for damage‚ and the door for proper alignment. Check all screws and bolts‚ tightening as needed.
During these checks‚ an Audible audiobook can make the task more pleasant! Look for potential issues early to prevent larger problems. Consistent upkeep‚ paired with engaging audio content‚ ensures a long-lasting‚ secure shed.
Wood Treatment and Protection
As detailed in the Patiowell 10×10 shed instructions PDF‚ protect the wood with a quality sealant or stain annually. This shields against moisture‚ UV damage‚ and insect infestation. Consider a wood preservative for enhanced longevity‚ especially for the base.
While applying treatment‚ listen to an Audible audiobook for motivation! Proper wood care‚ combined with enjoyable audio‚ extends the shed’s life and maintains its structural integrity‚ saving future repair costs.
Audible Subscription Issues Related to Shed Building (Time Management)
Building a Patiowell 10×10 shed demands significant time. An Audible subscription can provide engaging company during repetitive tasks‚ but construction delays might disrupt listening schedules. Pausing or cancelling subscriptions‚ as many users explore‚ can alleviate financial strain when unexpected shed expenses arise.
Prioritize shed completion; consider pausing Audible to focus‚ then resume enjoying audiobooks post-build. Efficient time management is key!
Audible Account Access During Shed Construction (Mobile App Issues)
Shed building often occurs outdoors‚ potentially impacting mobile data connectivity. Users report difficulties accessing their Audible accounts or downloading audiobooks via the mobile app due to unstable networks. Accessing Audible through a web browser on a stable Wi-Fi connection is recommended when app access fails.
Ensure the Audible app is updated; outdated versions can exacerbate connectivity problems. Verify login credentials if account access is denied.
Cancelling Audible Subscriptions for Financial Flexibility (Shed Costs)
Shed construction can be a significant expense‚ prompting some builders to reassess discretionary spending. Cancelling an Audible subscription frees up funds for materials like lumber‚ roofing‚ and hardware. Users seeking cancellation guidance often find it easier to manage their Audible account through the Amazon website‚ rather than the mobile app.
Cancellation doesn’t affect the primary Amazon account.
Audible Credit Usage & Shed Building Resources (Audiobooks on DIY)
While assembling a Patiowell shed‚ consider utilizing Audible credits for DIY-focused audiobooks. Many resources cover carpentry‚ construction techniques‚ and project management – skills directly applicable to shed building. Despite credit availability issues reported by some users‚ exploring relevant audiobooks can enhance the building process.
Credits can provide valuable knowledge during construction.
Audible Payment Issues & Shed Material Purchases (Credit Card Verification)
Unexpected Audible payment problems can disrupt audiobook access while funding Patiowell shed materials. Users sometimes encounter credit card verification delays or interruptions‚ potentially impacting resource availability during construction. Ensure your Audible payment method is current and verified to avoid issues.
A new card may trigger extra verification steps‚ delaying access to helpful DIY audiobooks.
Audible App Updates & Shed Instruction PDF Access (Connectivity)
A stable internet connection is vital for both Audible app functionality and downloading the Patiowell 10×10 shed instructions PDF. Outdated apps can cause connectivity issues‚ hindering access to audiobooks offering building guidance. Confirm the Audible app on your device is updated to the latest version.
Poor network connections can also impede PDF downloads‚ delaying shed construction progress.
Audible Refund Requests & Unexpected Shed Expenses (Charge Disputes)
Unexpected costs during shed building can strain finances‚ potentially leading to Audible subscription charge disputes. If facing financial hardship due to unforeseen shed expenses‚ explore Audible’s refund policies carefully.
Document all shed-related costs and Audible charges for potential dispute resolution. Remember‚ accessing the Patiowell 10×10 shed instructions PDF is free‚ but materials aren’t!